The lastest addition to the AT is a set of protective stickers to prevent the zippers on my riding jacket and pants from scratching the paint on the fuel tank.
Some people have complained on the Spanish AT forum that the lacquer on the sides of their tanks has started to show some minor damage very quickly, so before mine does too, I ordered this set on Ebay.
They come from Italy, and first impressions on the quality of the product and the service from the vendor were good. They were delivered within a week of ordering and are thick and well-finished.
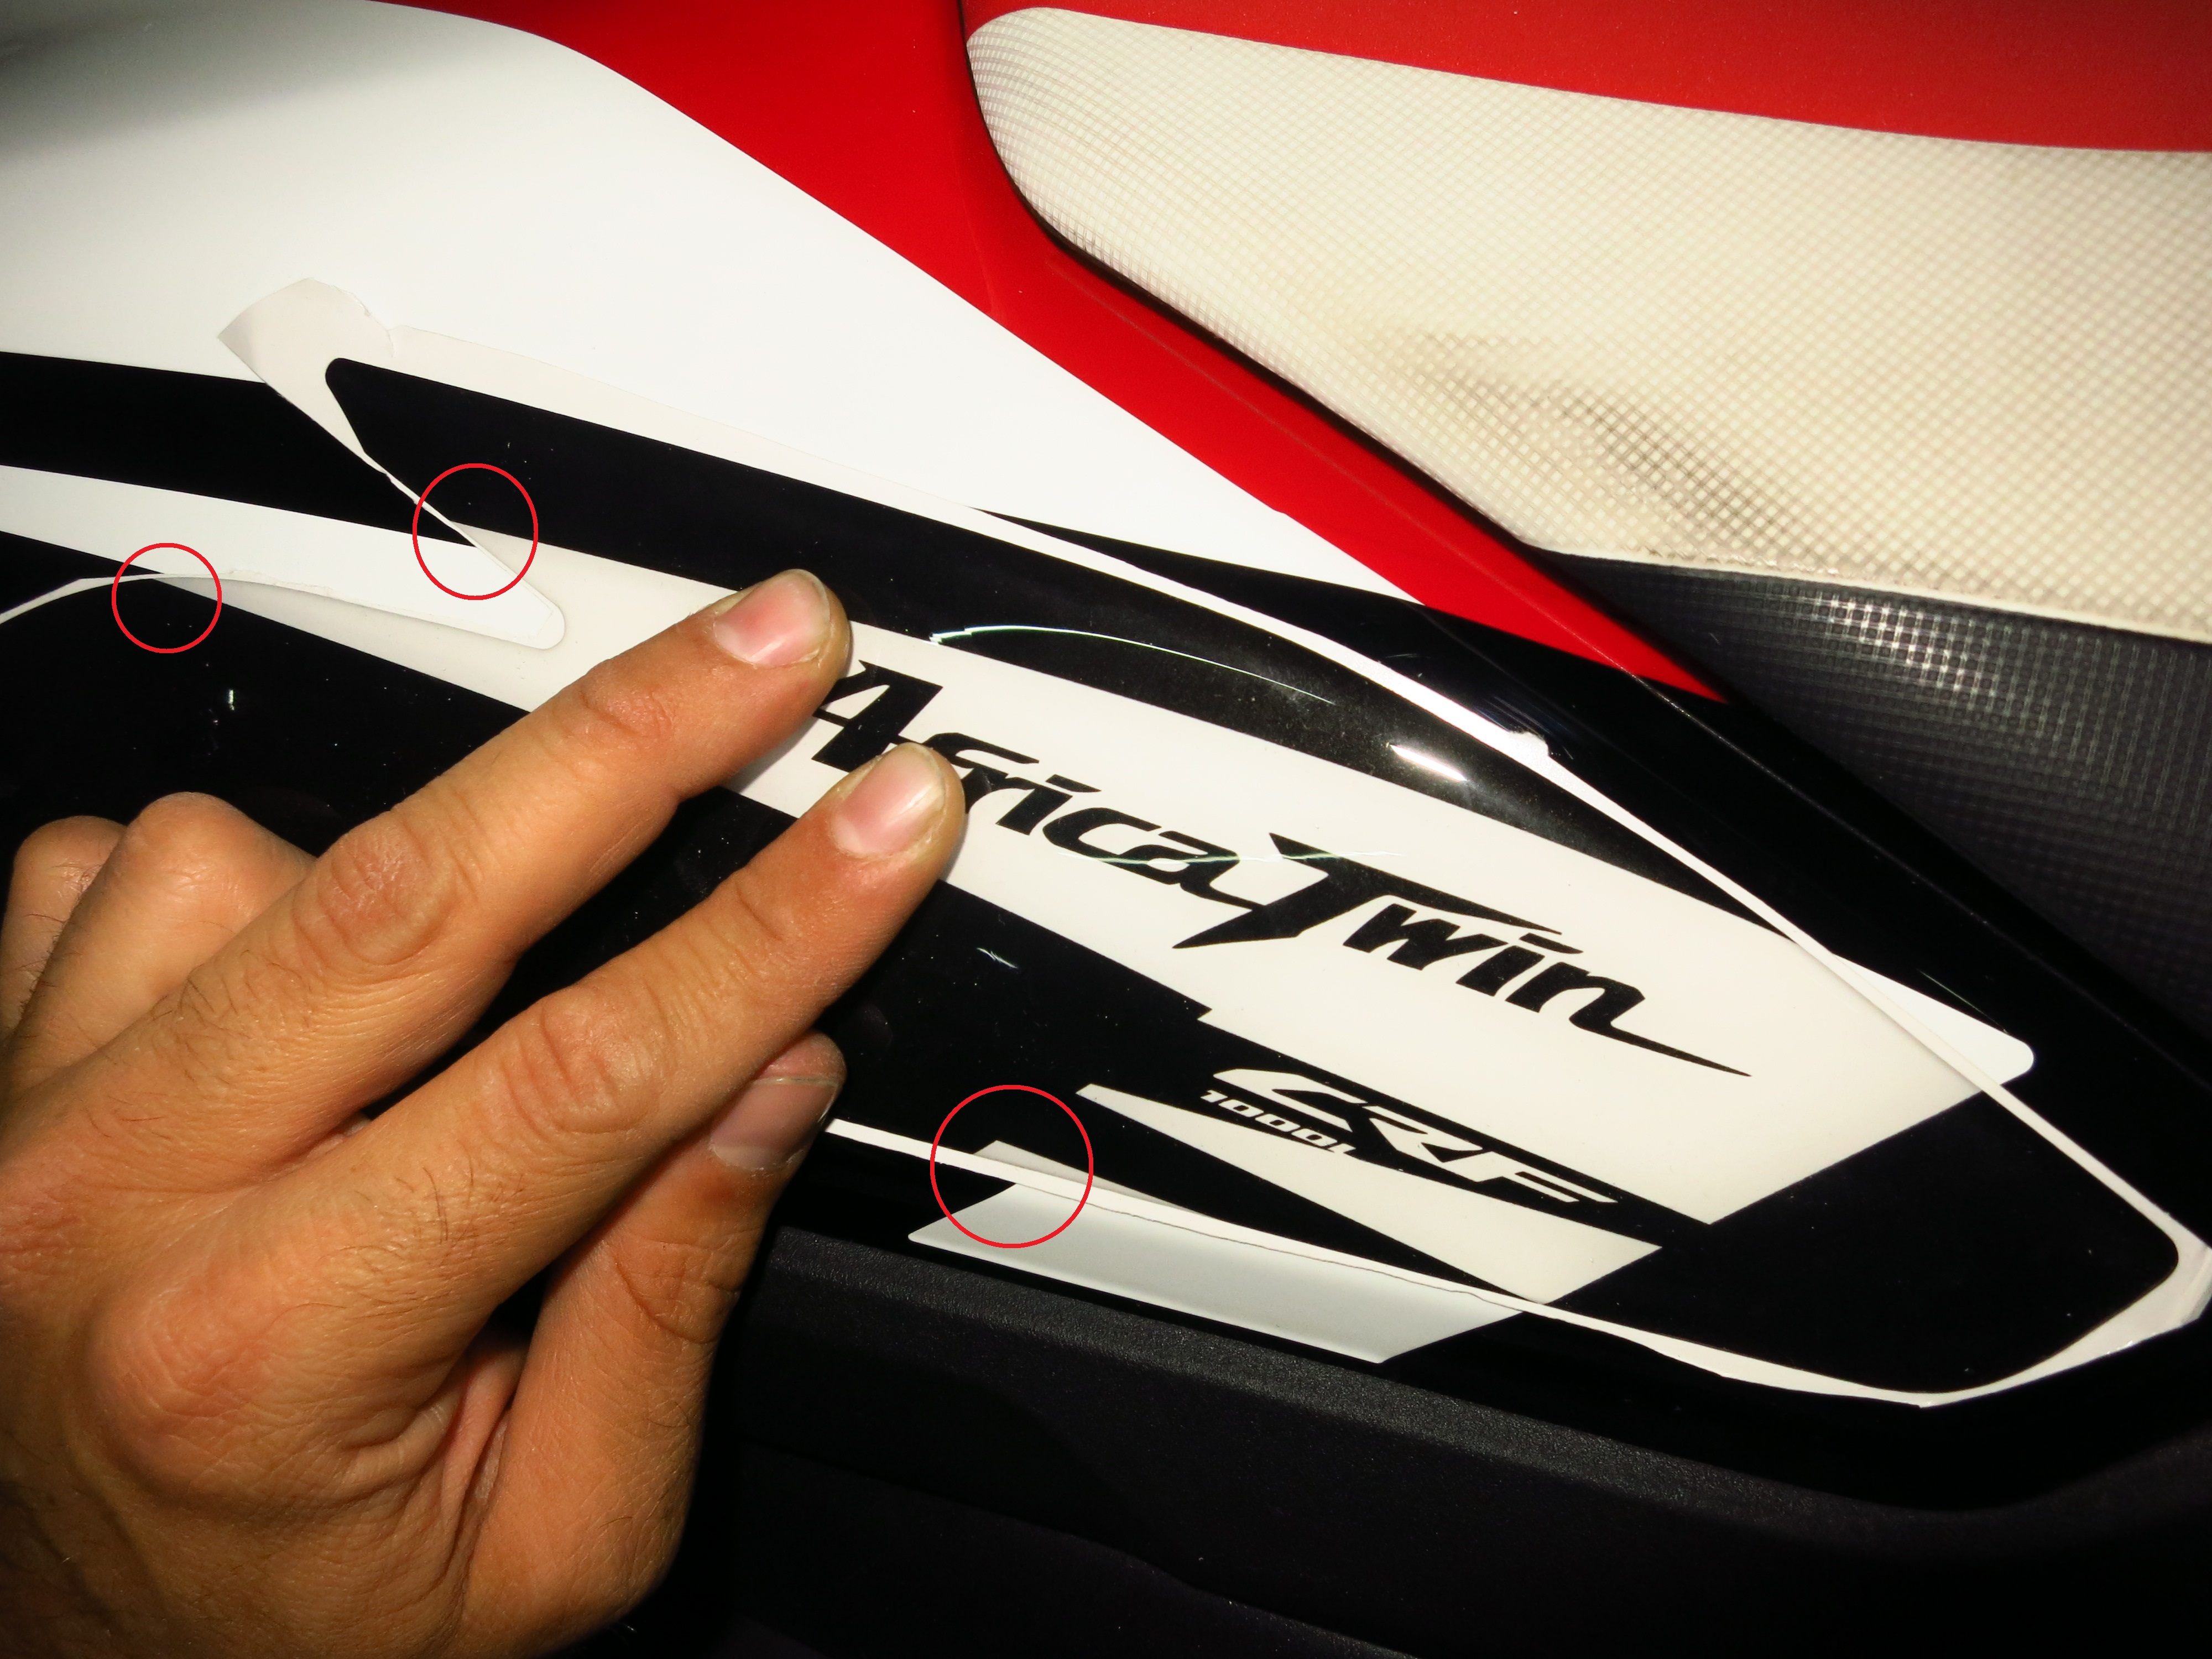
Things did not look so good when it came to putting them on the tank, however. These stickers are designed specifically for the Rally red paint scheme on the AT, the side stickers following the white stripe. When I lined them up against it, I saw that the white stripe on the sticker did not match the one on the bike at several points.
I sent a complaint to the vendor with these pictures attached, and got a reply in less than 24 hours: nothing wrong with the stickers, the white stripe is actually transparent to allow for differences in the paint in different bikes. What I saw white was actually the protective film behind the sticker. Well, that was embarrassing…
Back to the garage to get them on, then.
The tank protector that the previous owner had put on my old V-Strom was about 2cm off to the left, which drove me crazy for the five years I rode the bike, and that was black on black. Determined to do a proper job this time, I watched some tutorials online and followed the recommended method:
Step one: clean the surface with alcohol and let it dry.
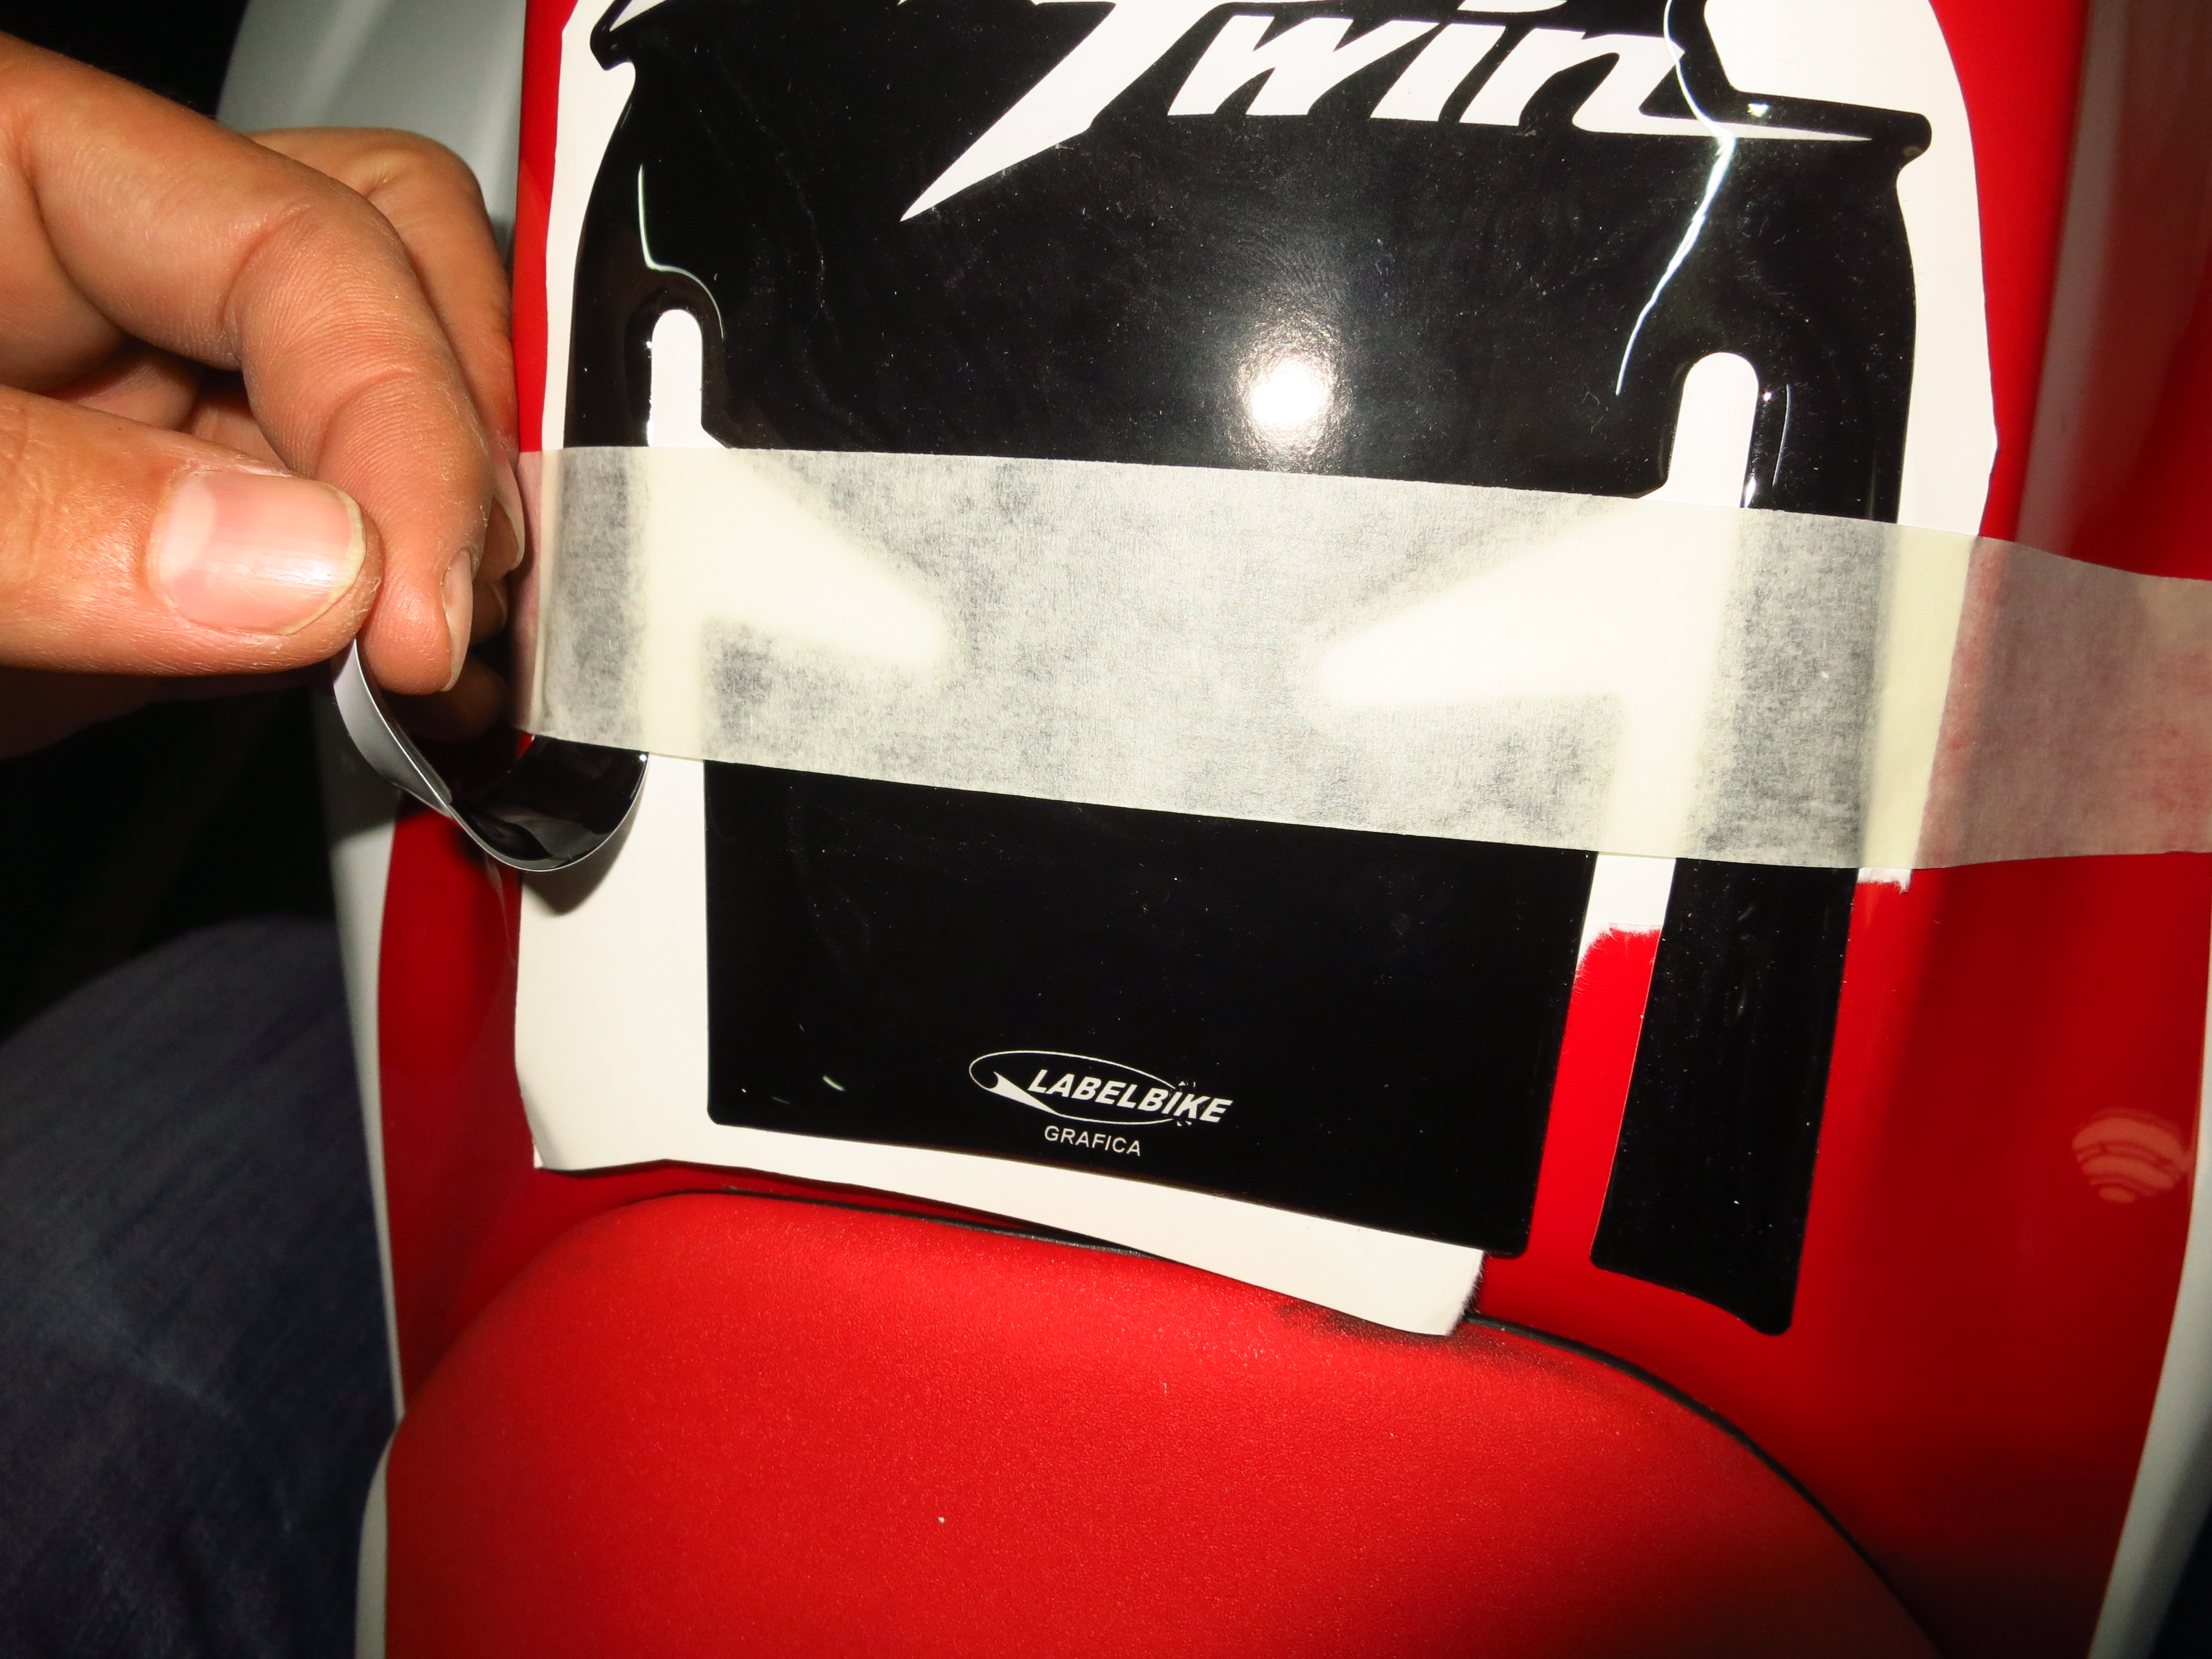
Step two: without removing the white paper at the back of the stickers, put them in the desired position, make sure everything lines up correctly and fix them in place with masking tape.
Step three: lift the sticker on either side of the masking tape, separate it from the white paper and cut the paper away. (Important tip here – you can tear the paper, but if there are transparent areas in the sticker, small shreds of paper might remain stuck to it and be visible, so it is better to cut it clean with a pair of scissors).
Press the sticker against the tank surface from the masking tape outwards, making sure there are no wrinkles or air bubbles. A plastic ice scratcher is a good tool to do that.
Step four: one third of the sticker securely in place, remove the masking tape, lift the other two thirds and repeat the process.
The result looks great:
The white lines you can see are reflections from the fluorescent tubes on the ceiling.
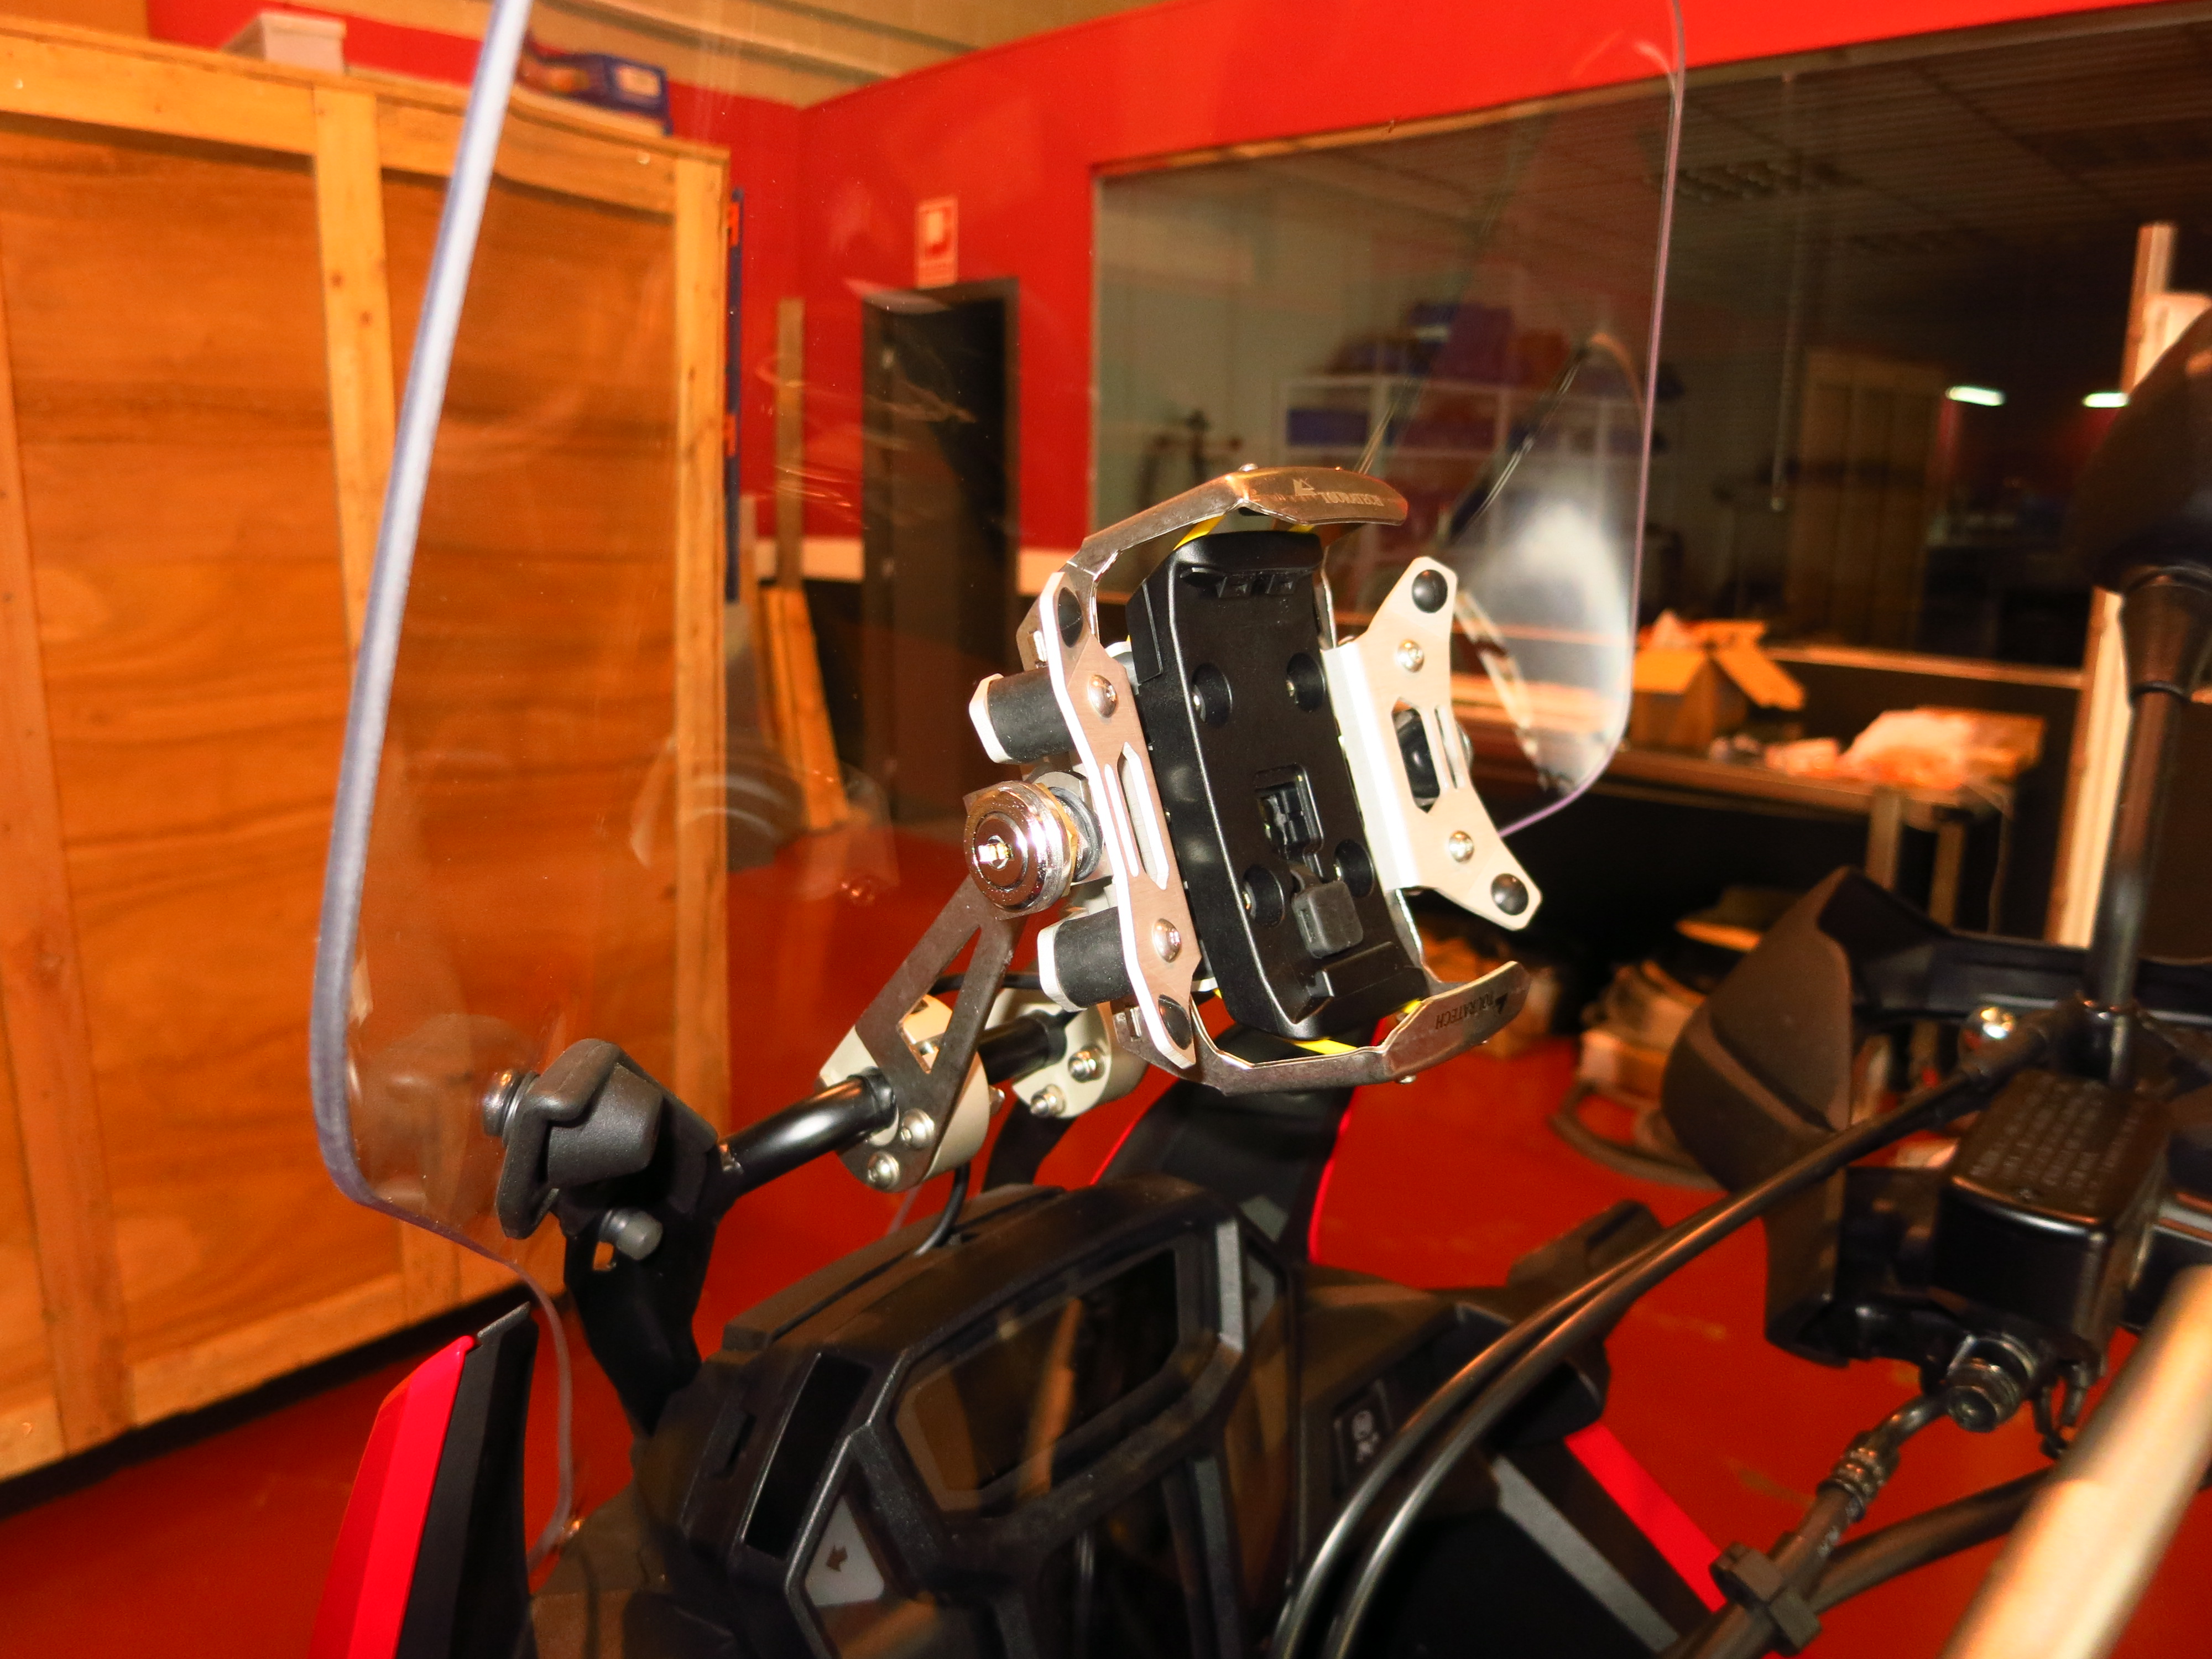
Next weekend some friends and I are taking part in the Rider1000, so it was imperative that I found some time to fit the Touratech GPS cradle for my Garmin, since I still do not have a 12V socket to plug the unit in. If you ride alone often and use a GPS, one of these lockable cradles is a good investment, it allows you to pop into a shop or pay for gas and leave the motorbike unattended for a few minutes without having to remove the unit which could otherwise get stolen very easily. Mind you, if someone really wants to steal it, they will still find a way fairly quickly…
On my old V-Strom I wired the cradle directly to the battery, but this time I wanted to do a more professional job and connect it to a switched power source. That, the fact that compared to the V space is at a premium here and my intention to fit more accessories that require wiring in the future (12V socket, heated grips, fog lamps…) made me decide to fit a fuse box to simplify wiring and keep relays to a minimum.
The first one I considered was the Rowe Electronics PDM60. It offers lots of interesting features – very tough design, no fuses (it’s electronic), highly customizable (you can set contact delay times, select power, and choose switched or constant power for each of the six circuits), and can deal with a total of 60A.
There were a few drawbacks, however – it is very expensive, if it fails you are left with no fuse protection, and availability (at the moment of buying, it was not in stock anywhere). So I bought a fuse box from Fuzeblocks. It cost half the price, was available immediately and is a simple yet practical design – it consists of a connection box with six fused circuits and a relay that powers the whole box. Depending on the position of each fuse, its circuit is constant or switched power, and the relay it uses is a simple automotive relay that can be easily found in case it fails. It can handle up to 30A, which is enough for my needs.
A friend who works at an engineering company offered to go to his job on Saturday, where we would have access to tools, connectors, soldering equipment, etc. Having the proper tools for the job makes things much easier, but it still took us three hours and a half to get it done.
First of all, removing the seat, fairings, windscreen and battery. I have always complained that the V-Strom had too much plastic to remove, that the tank had to be completely taken off the bike to access the air filter… Well, the AT is even worse. Removing both front fairings, the plastic fascia around the headlights and the windscreen takes a good while. And that is before I fit crash bars… we will see what happens then. I am not going to post instructions here, as other people have already done a very good job of it, if you want to see how to remove the fairings, here is an excellent video:
Even after removing all this plastic you do not get full access to all the wiring in the front part of the bike, but in our case it was enough for what we wanted to do.
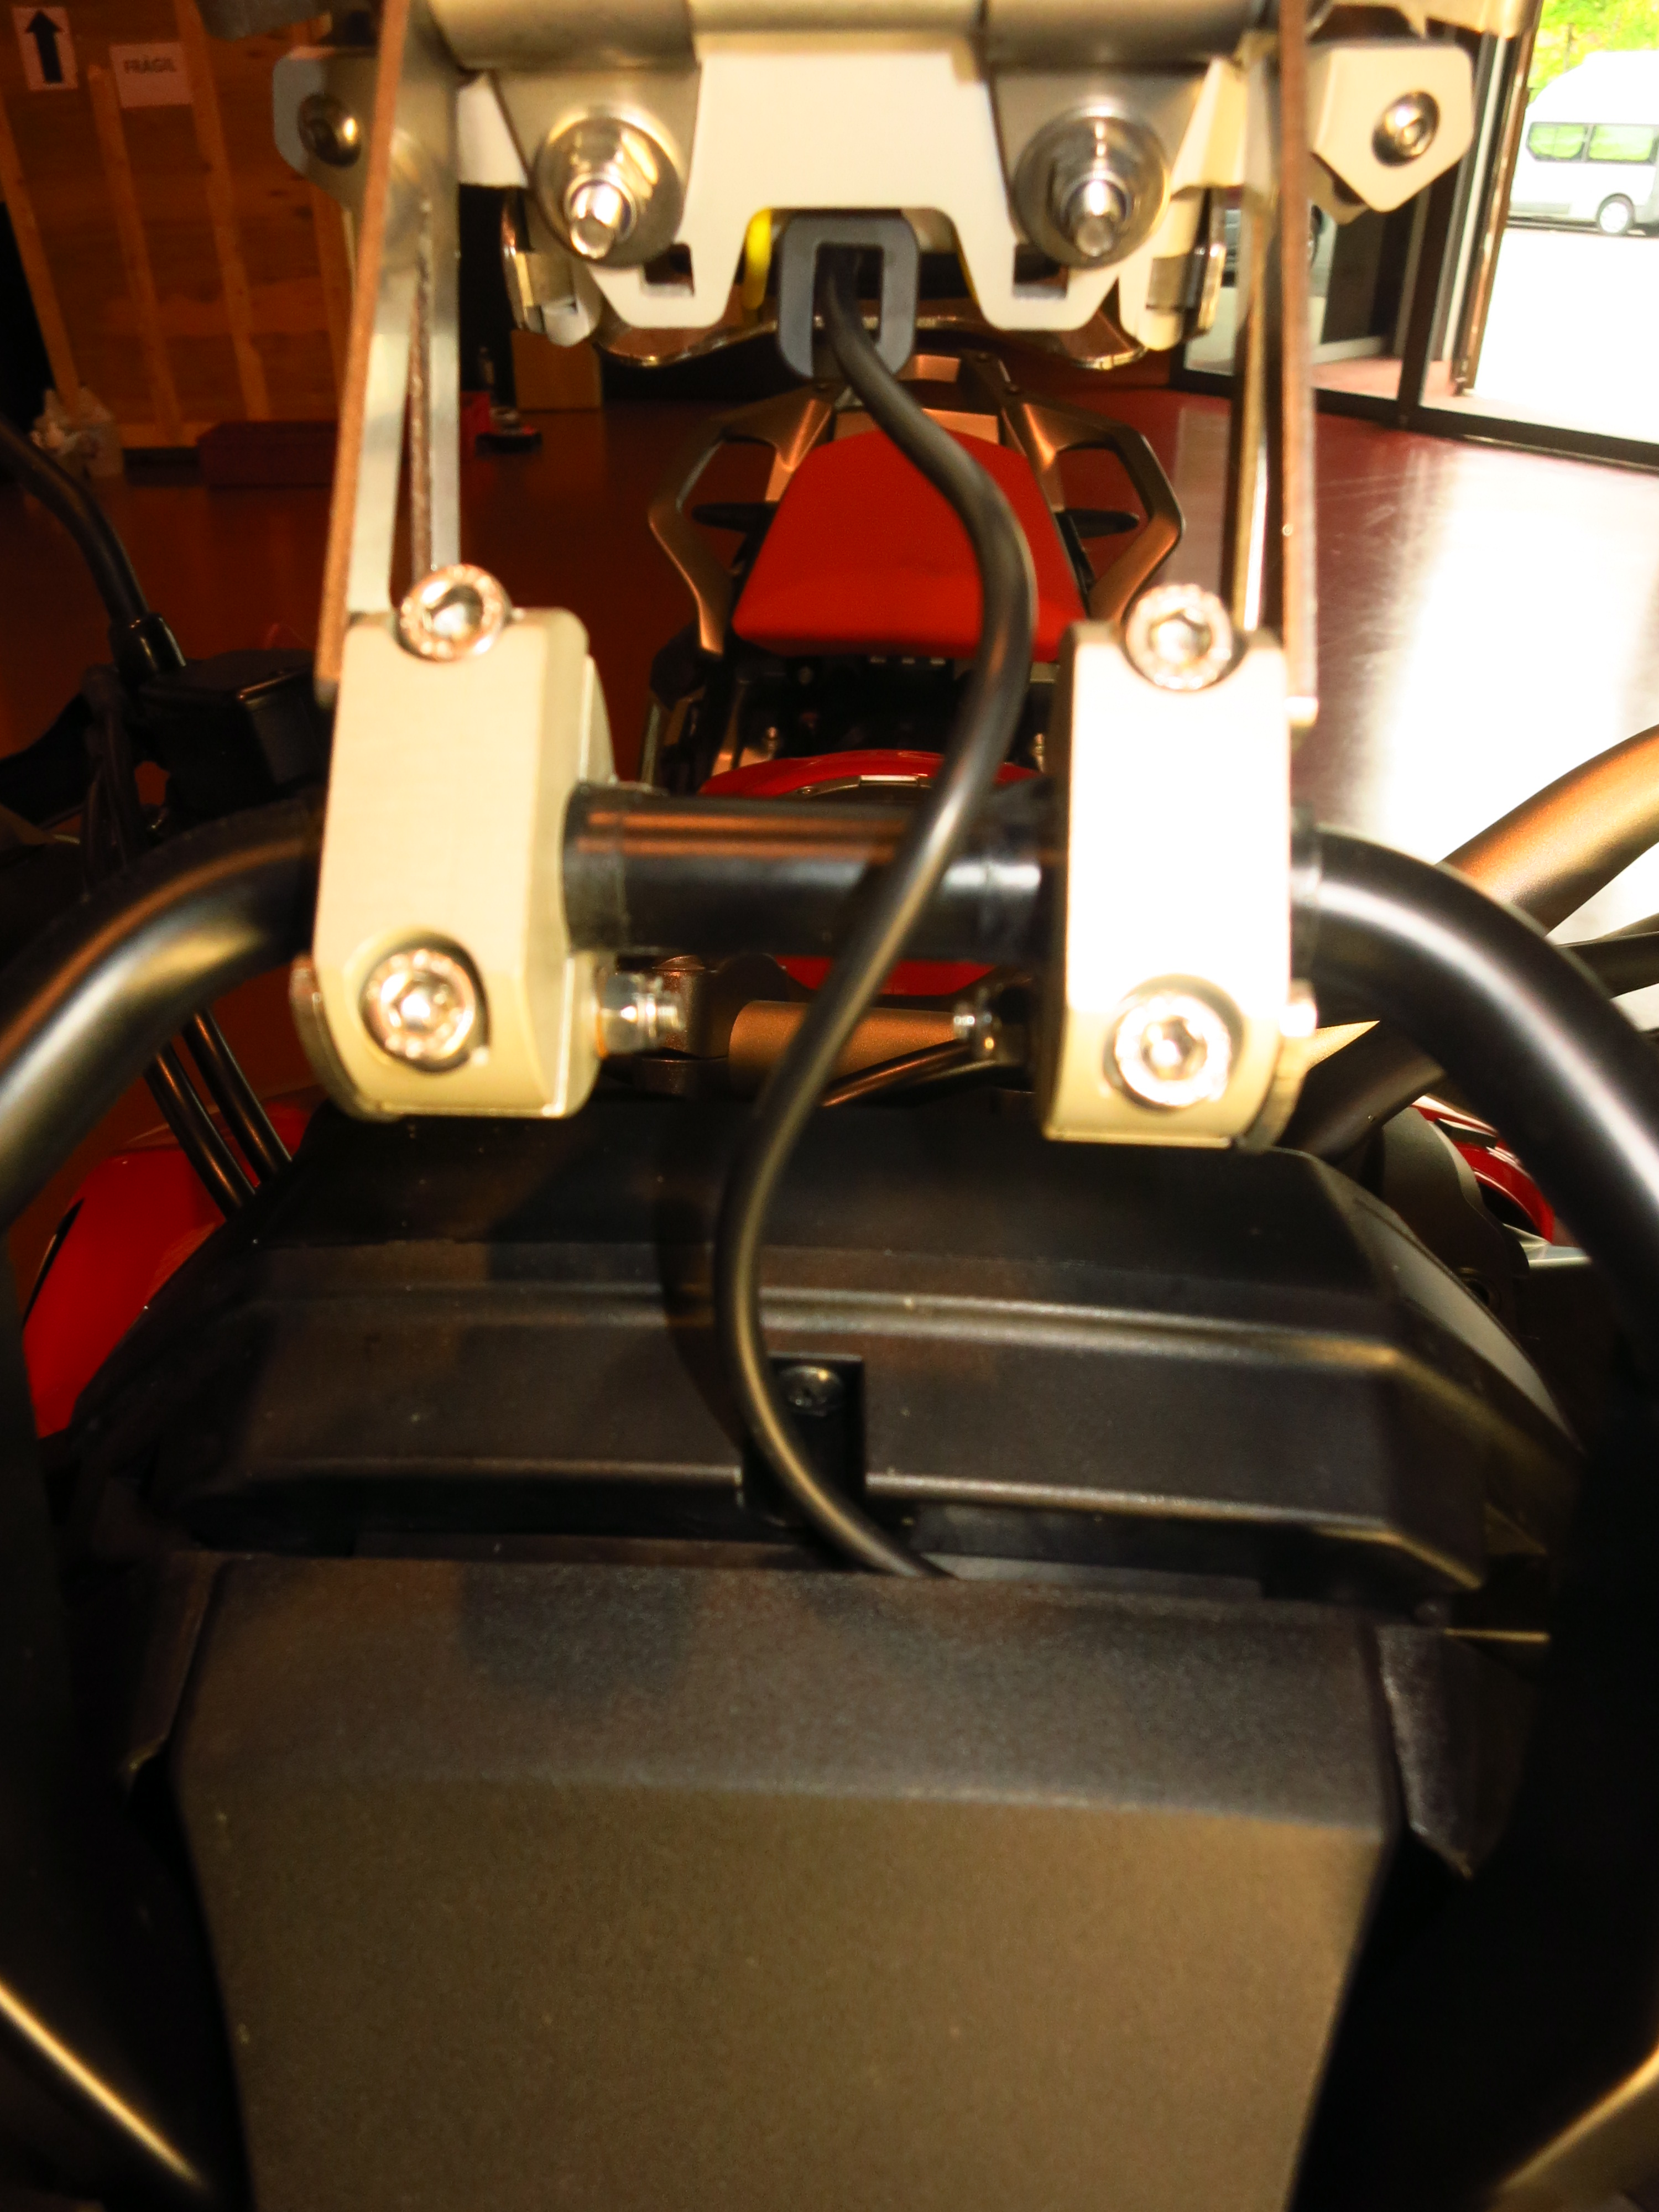
The Fuzeblock box was going to be installed in the only place there is space for it, under the seat. There is a very nice flat surface that seems to have been specially designed for it. It needs three wires – positive and ground directly from the battery and a switched positive to activate the relay.
The first step was to find a switched power source, which was an easy task thanks to the author of the video above. There is a six-pin connector under the passenger seat for the OEM alarm system. The bottom left corner wire (facing the connector) only receives tension with the contact on, which was what we were looking for. It is the most accessible point, and the closer one to the Fuzeblock.
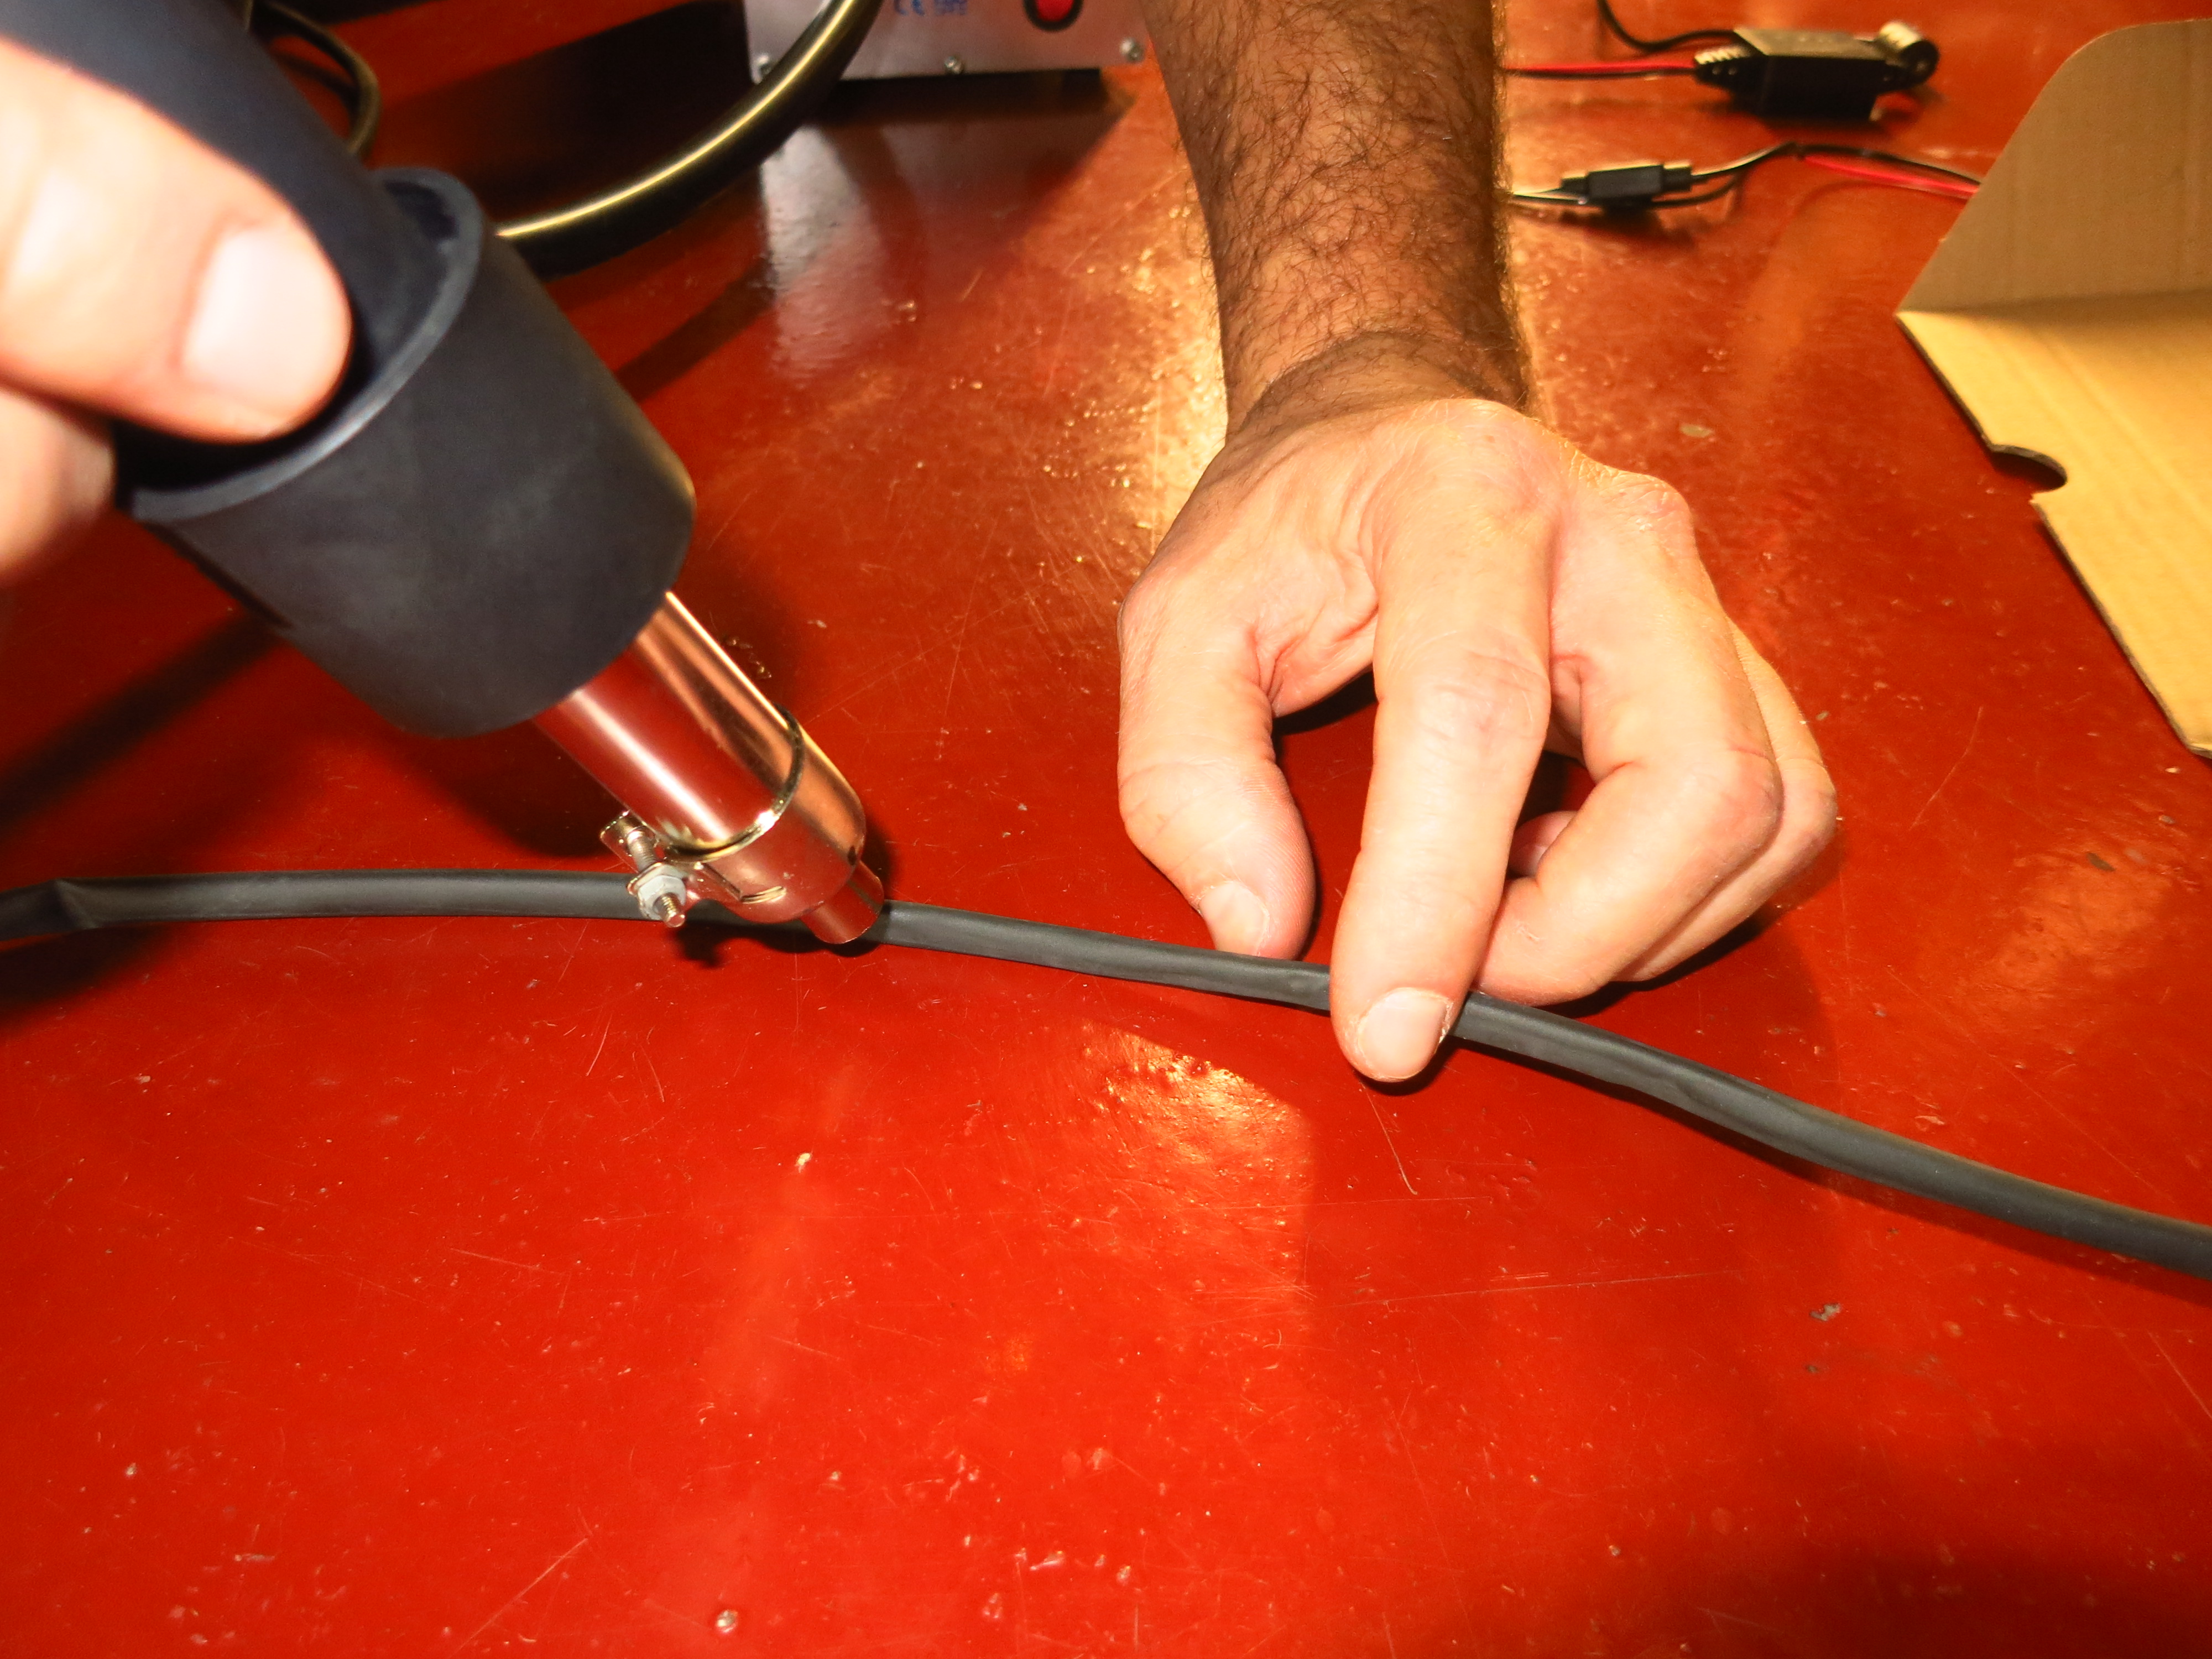
Next step was to route two wires to the battery. I had not been able to find instructions on how to remove the fuel tank, nor did we have time to try, but we found that we could route the wires to the battery on the left side of the tank, behind the frame and we protected them with heat-shrink tubing.
With the Fuzeblock installed and wired, it was time to route the wire from there to the GPS cradle, which proved to be more complicated than we thought. The end of the wire that mounts in the cradle has a square connector that was too big to go through some gaps, and the other end has a control box that was simply impossible to fit through anything. To make matters worse, the wire was not long enough to reach the Fuzeblock.
Well, always look on the bright side of life, they say, so since we had to cut the wire to extend it, we were able to route following the main wiring inside the fascia, down over the radiator, above the battery, through the very narrow gap between the frame and the petrol tank and into the space under the seat.
We then soldered the extension and covered it with more heat-shrink tubing. Last step was find some space for the control box (no more space left under the seat now) and tidy all the wiring a bit.
Putting the fairing back on was also harder than anticipated. Most instructions just say ‘put them back on’, or ‘follow the reverse process’, but it seems that everybody forgets to mention how many small plastic tabs and lips there are, and everything has to line up perfectly at the same time before you can start putting the clips back on.
Fortunately, with 12,000km service intervals I will not need to remove the fairings too often, but there is the matter of all the other accessories that I still want to install. Some things I already have, some things are ordered, some others I am saving for, but I am going to wait until I have everything ready and install everything over one single weekend. Wish me luck!
Thanks very much to my friend Jorge for his help and the equipment he provided.
I got a Honda Plus Card when I bought the AT, meaning that on top of an extended warranty and a 20% discount on accessories, I also have free use of a replacement motorbike each time I took mine to the garage.
When I took the AT for her first service, predictably, the replacement “motorbike” was a scooter. At least it was a 300cc one, so I could still ride to work without much trouble.
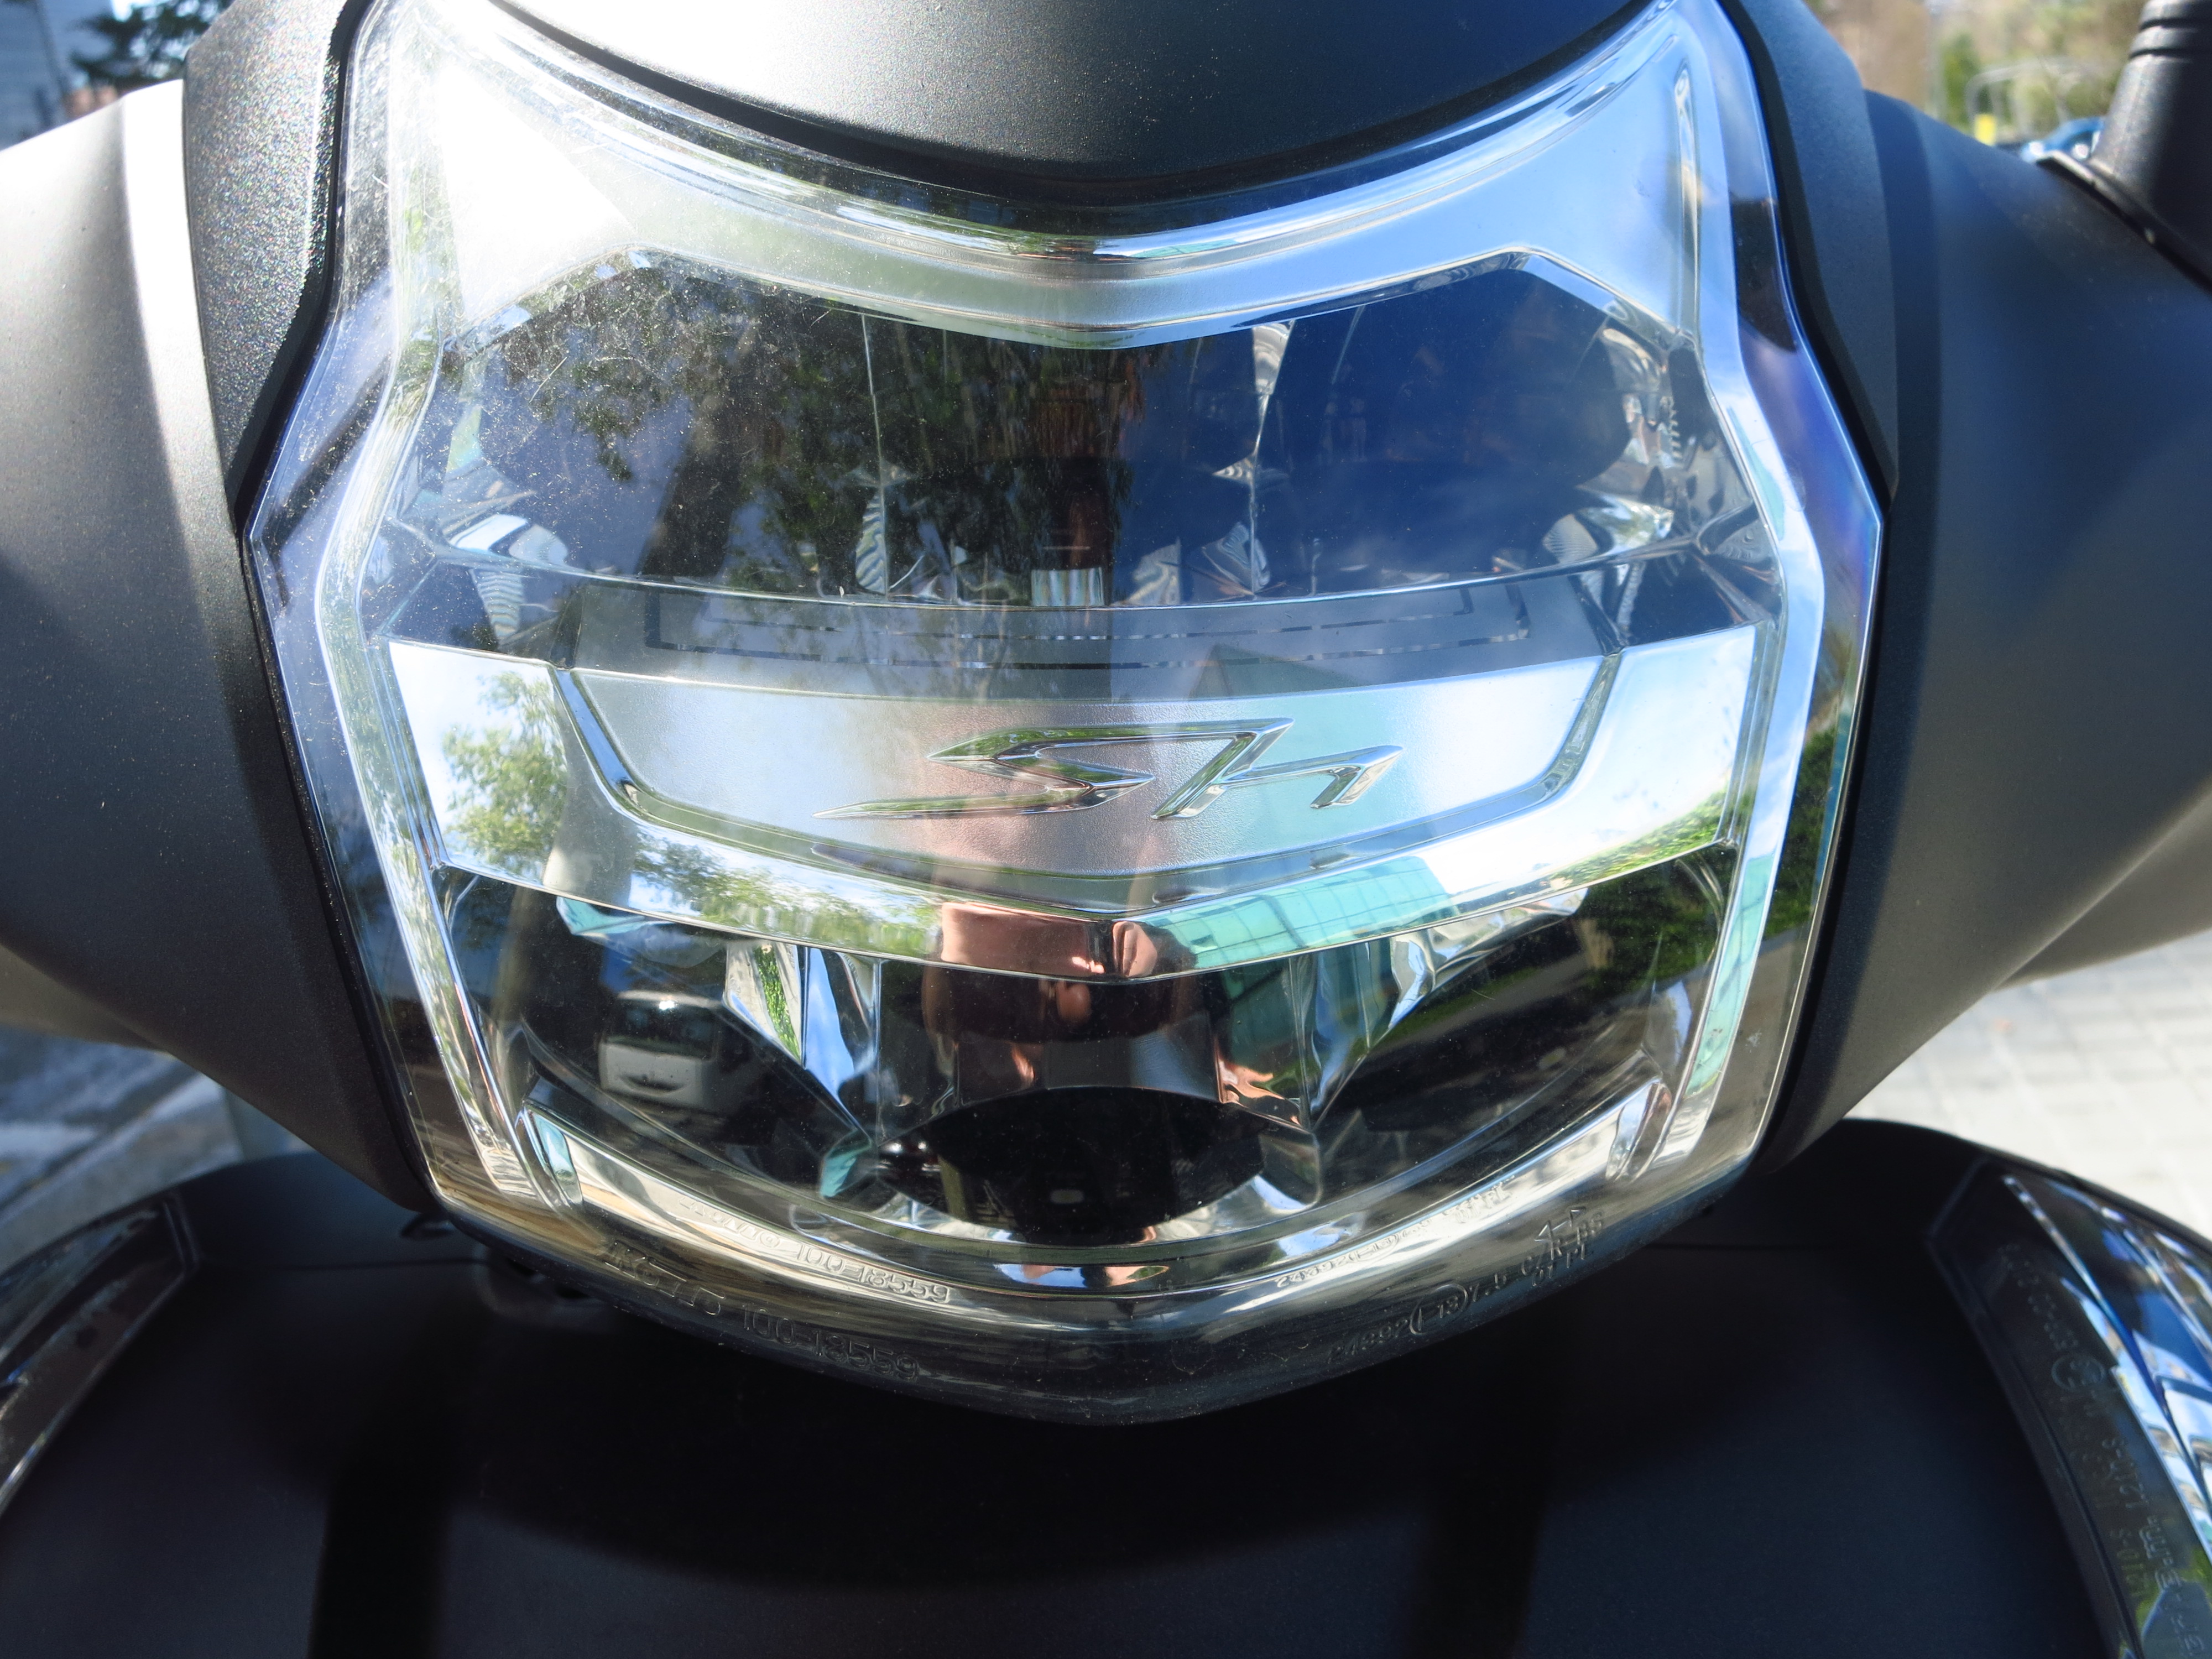
Even though I have no love for such contraptions, the scooter in question was not one to snigger at. The Honda Scoopy SH, both the 125 and the 300cc version, is one of the all-time best sellers in Barcelona, ranking high in the sales lists year after year and swarming the streets of the city in the thousands. As a consequence, it also holds the more dubious honour of being the most stolen vehicle, but that is a different story. With such credentials, I must admit that I was curious to see what was all about.
Finished in matte dark grey, the SH300 looks understated but undeniably classy, and sports a gadget that I found very practical: keyless start. As long as you have the keys on you, you simple walk to the scooter, press a knob located where the key hole normally is and when it lights up in blue, turn it to unlock and then start the bike. There is a position before that to unlock the button next to it to lift the seat.
Fit and finish is up to the standards one would expect from a brand like Honda, and other nice touches include a full LED headlight that proved to be surprisingly effective at night.
The only let downs were the lack of illumination under the seat, the absence of a 12V or USB socket and the usual gripe with lack of space for my helmet.
The engine is very smooth and there is no lack of acceleration to get away from the rest of traffic at the lights, it feels more nimble and eager to gain speed in the city than the other 300cc scooter I have tried, the Kawasaki J300. On the motorway, however, the Kawa maintained speed with more ease. The suspension is rather comfortable, but short travel means it still crashes over the bigger potholes and irregularities and a good turning radius and very low centre of gravity make it a doodle to move both in traffic and when stopped.
On the whole, I was surprised at how competent this scooter is. It is does what it says on the tin effectively, with absolutely no fuss and using very little fuel in the process (I averaged 78mpg on my usual commute). Being a Honda, I can assume that maintenance is low and reliability excellent, so I can hardly think of a better tool for getting round in the city.
I would not use a scooter to get anywhere that required riding at more than 80 km/h. Wind protection is poor and the sitting-on-the-toilet riding position gets very tiring fast with wind hitting the chest hard. The handlebars are too close to the body for my liking and the general position feels too cramped after 20 minutes on it. That said, if I had the money and I did not have to ride outside Barcelona I might consider one. The problem is that they are expensive to replace each time they get stolen…
Making yourself heard in traffic is essential, but the horn that comes as standard in most motorbikes sounds little better than the puny one in a scooter, which means that at speed or in heavy inner city traffic cagers might not hear you when you most need to make them aware of your presence.
Replacing the horn in the V-Strom was something that was on my to-do list forever but I never got round to do it even though it was one of the easiest bikes in which to install one of everyone’s favourite horns – the Stebel Nautilus, as it has plenty of room.
Then I got the Super Ténéré and the horn was even more ridiculous, which turned out to be not because it was complete rubbish as I thought but because it was on its way out. It died about a month after I bought the bike. Time to finally fit a proper horn, then.
Space in the Super was a lot more restricted than in the V, and after some thorough research on several forums I choose the PIAA Powersports Slim Line horn. It was a straight replacement for the standard horn, a simple matter of unscrewing and unplugging the OEM one and bolting in the PIAA in the same place and connecting it to the same wires. Current draw is not high, so there was no need to wire in a relay. It made a world of difference, maybe not in volume, but tone was a lot more car-like, so cagers do pay more attention when you sound it.
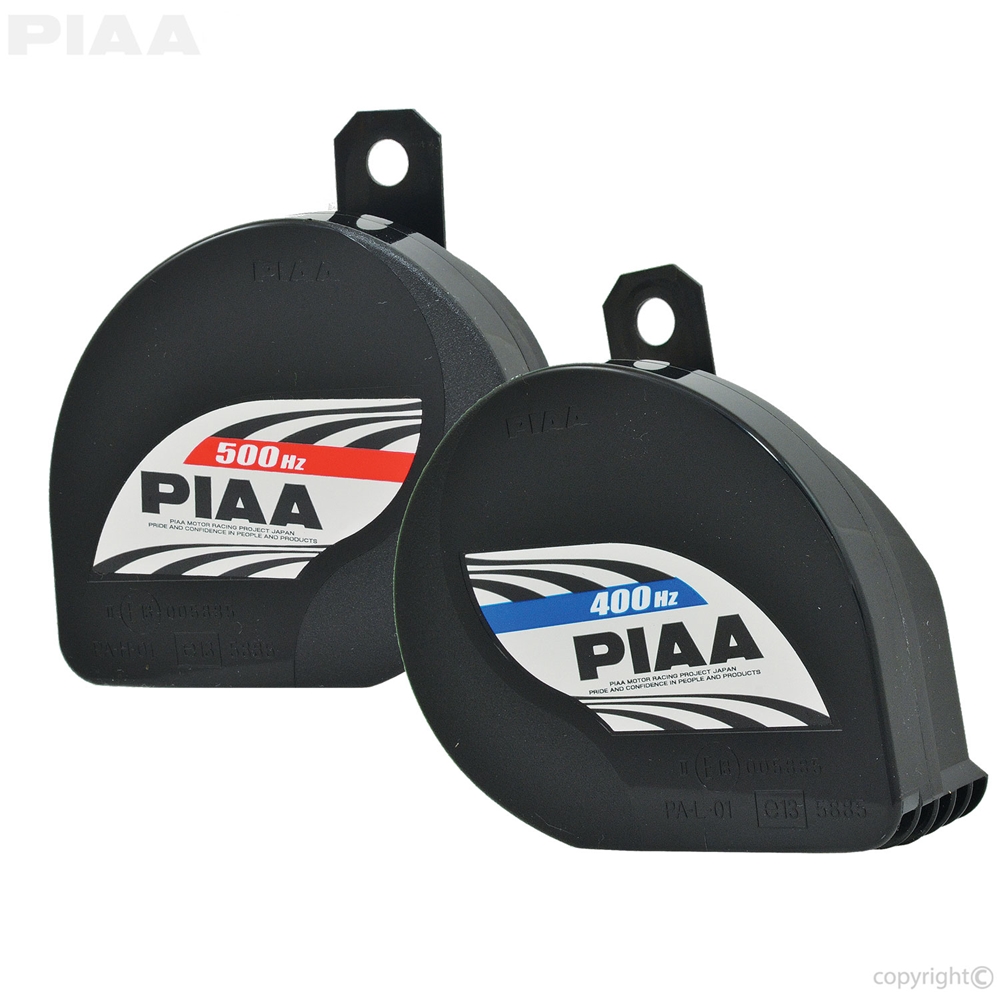
Happy with the product, I decided to get another one for the AT, and this time I was lucky to find a pack including two horns – 400Hz and 500Hz. The idea is that the combination of both frequencies produces a louder, deeper sound. I found the 500Hz one on the Super to be more than enough, but since I found the pack on Ebay for the same price I had paid for a single 500Hz one, I ordered it.
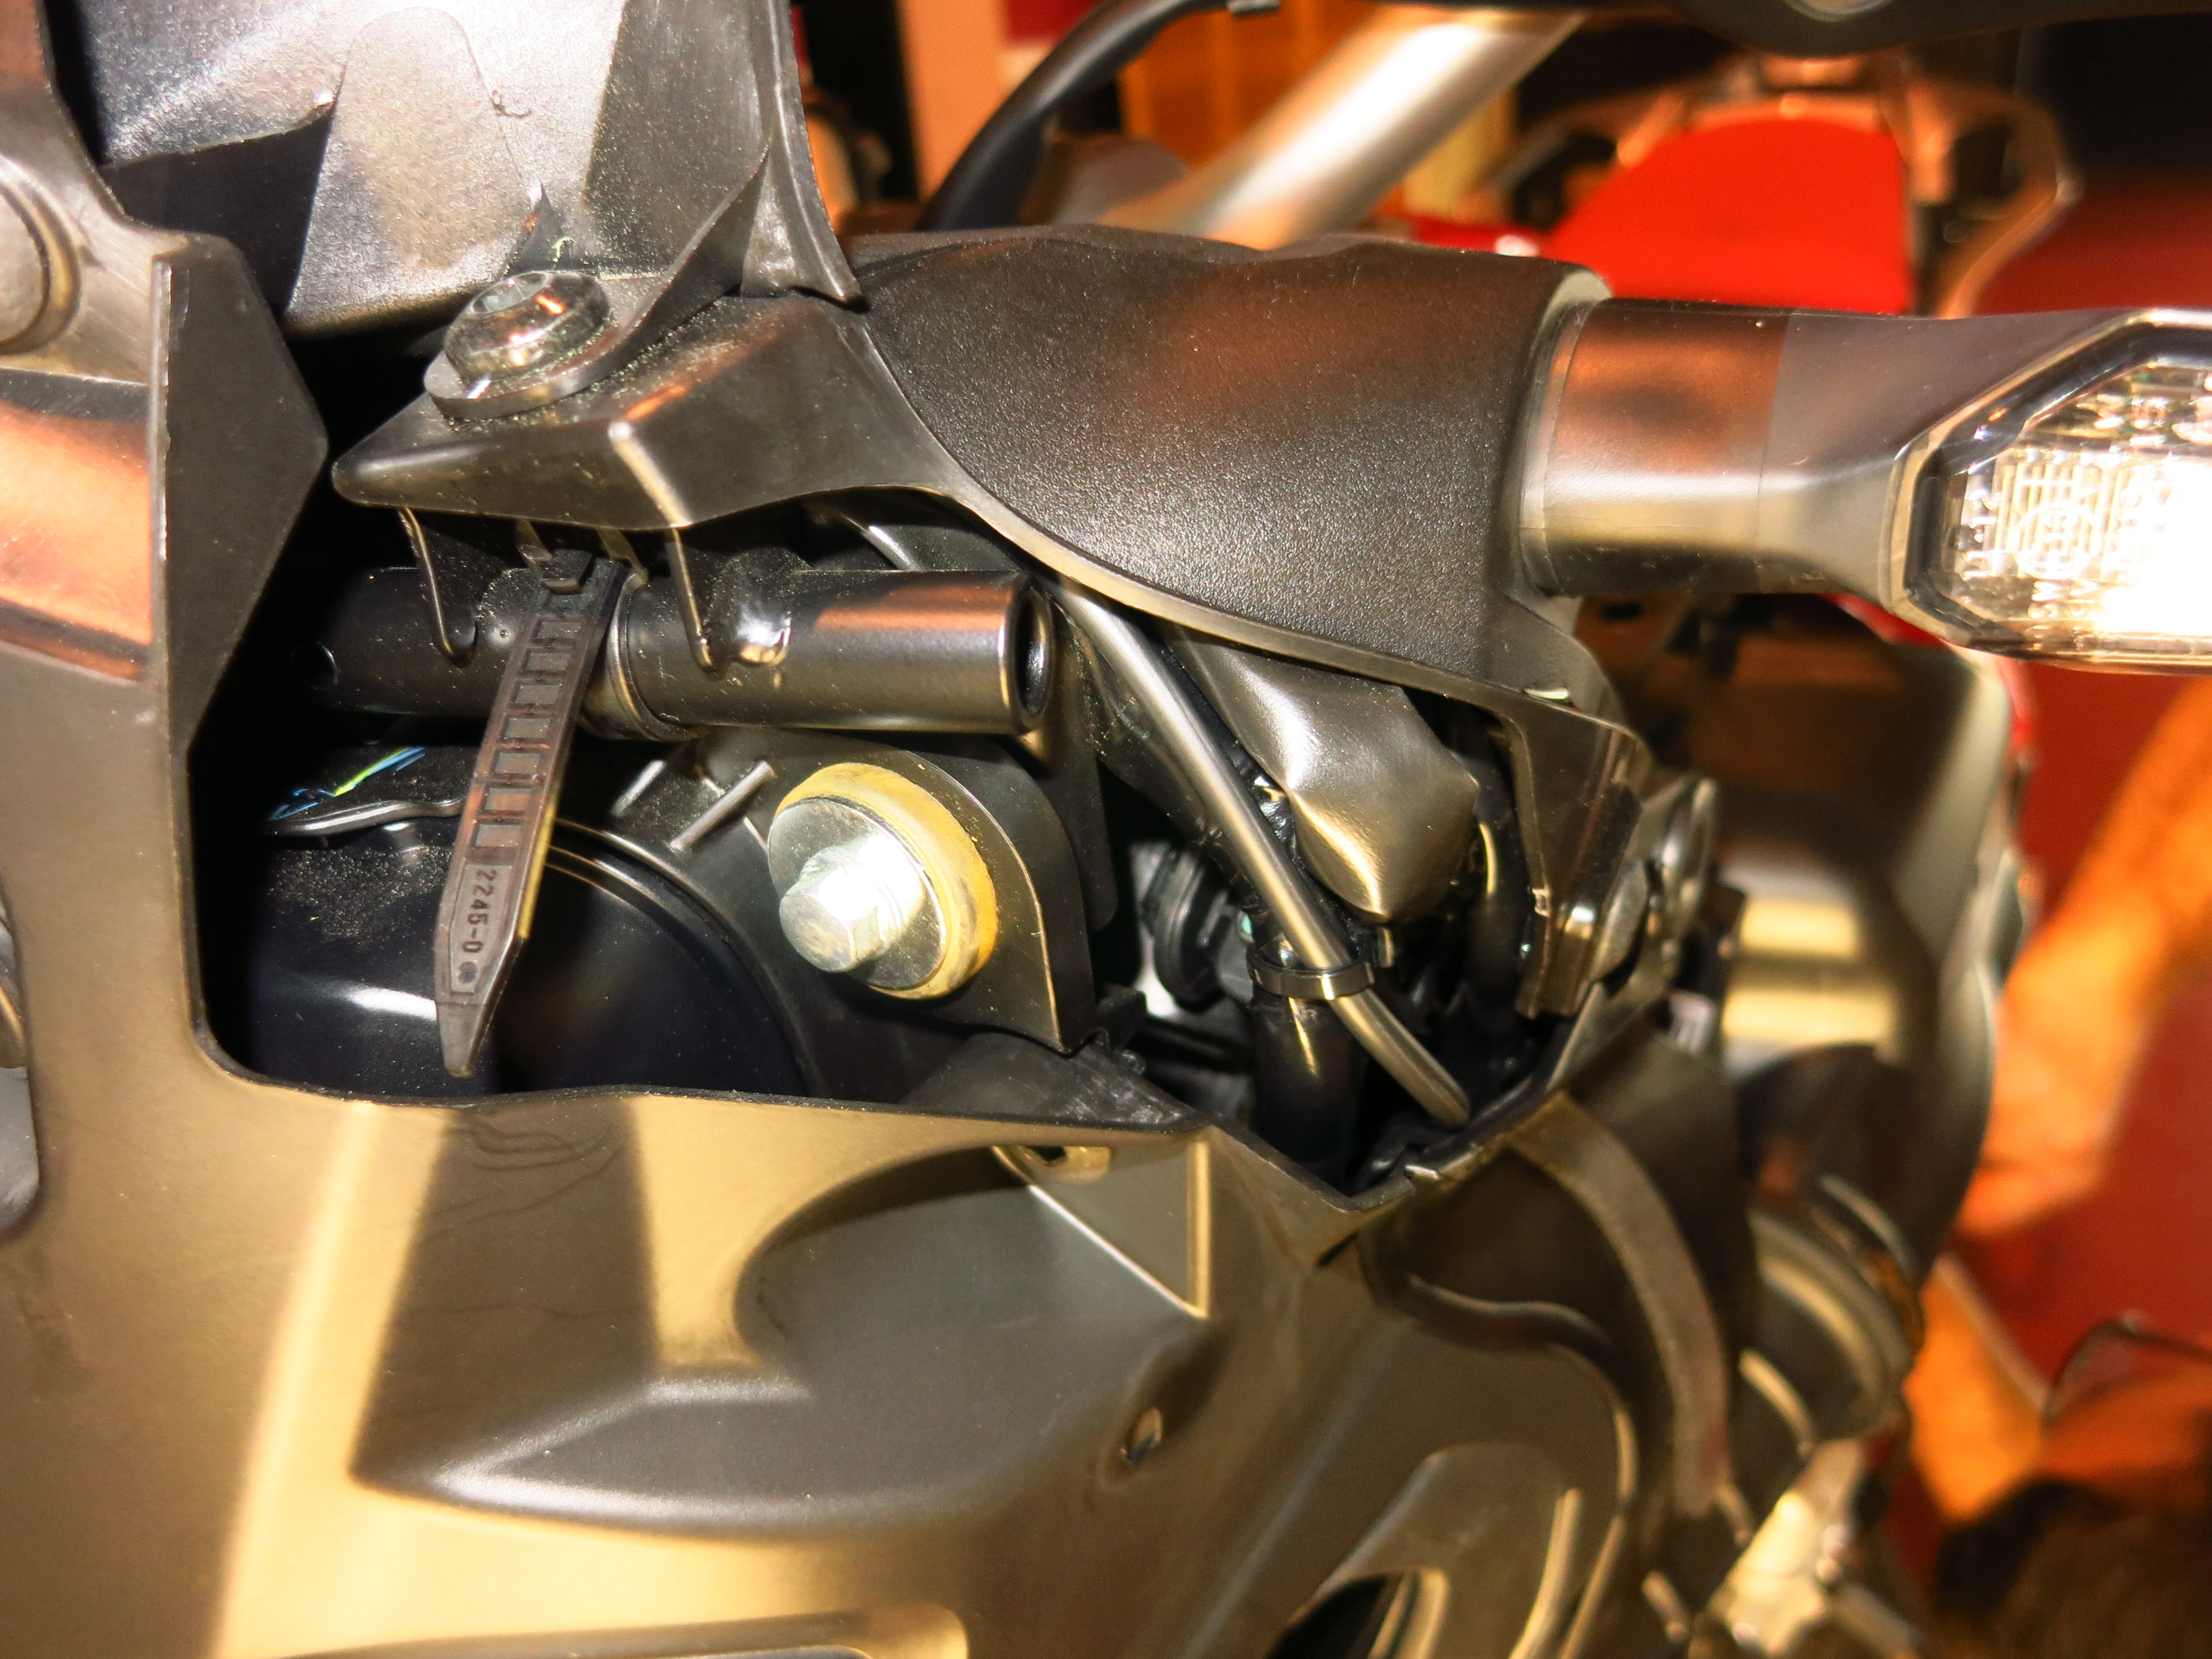
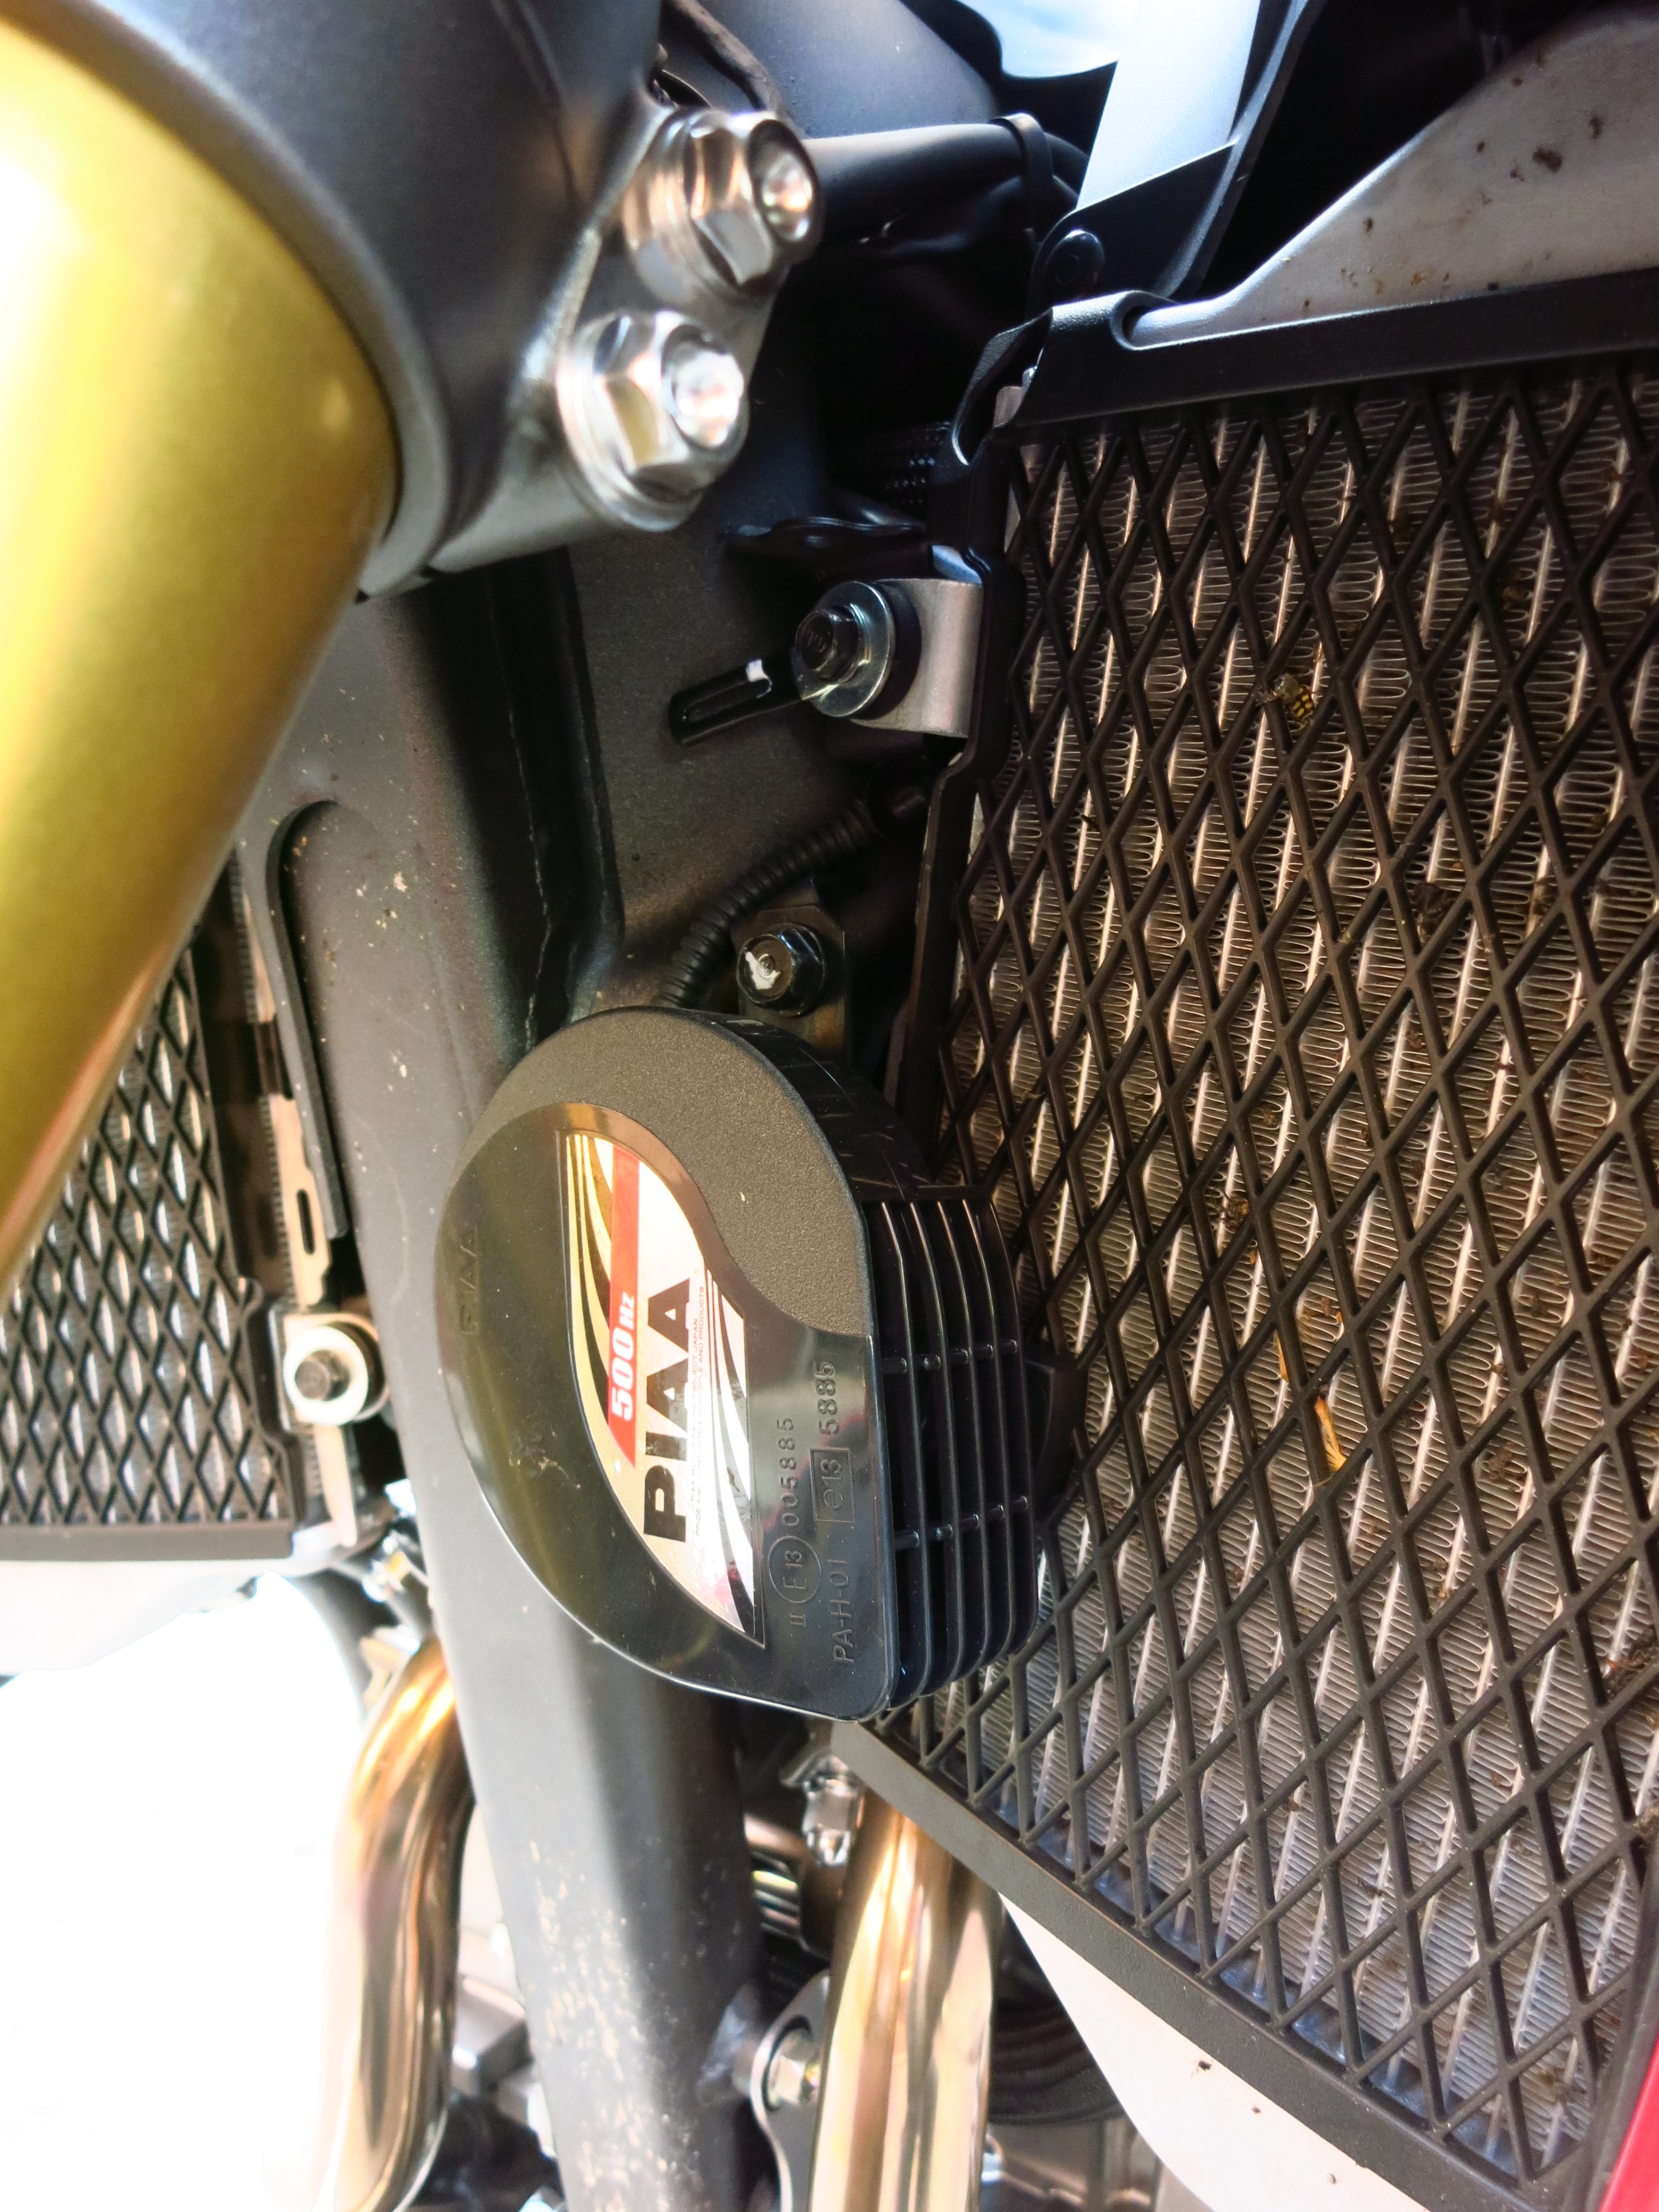
The problem came when I tried to find a place to install them in the AT. Space is even more restricted on the Honda, and after trying different combinations, it was clear that the only easy option was to fit only the 500Hz in the same place as the OEM horn. The PIAA is quite compact, but still larger both in diameter and depth than the standard horn, so a couple of little modifications were required to install it properly.
First, to make sure it fitted as close as possible to the radiator and the grill was not directly facing the frame, which might have stifled the sound a bit, I rotated the mounting plate of the horn 180 degrees. This can easily be done by loosening the bolt that attaches it to the horn and rotating it as desired. Careful though, the nut might be stuck due to the paint, so make sure you hold the horn formly. There is a little etch at the bottom of the plate and four little plastic protuberances to secure it in different positions in increments of 90 degrees.
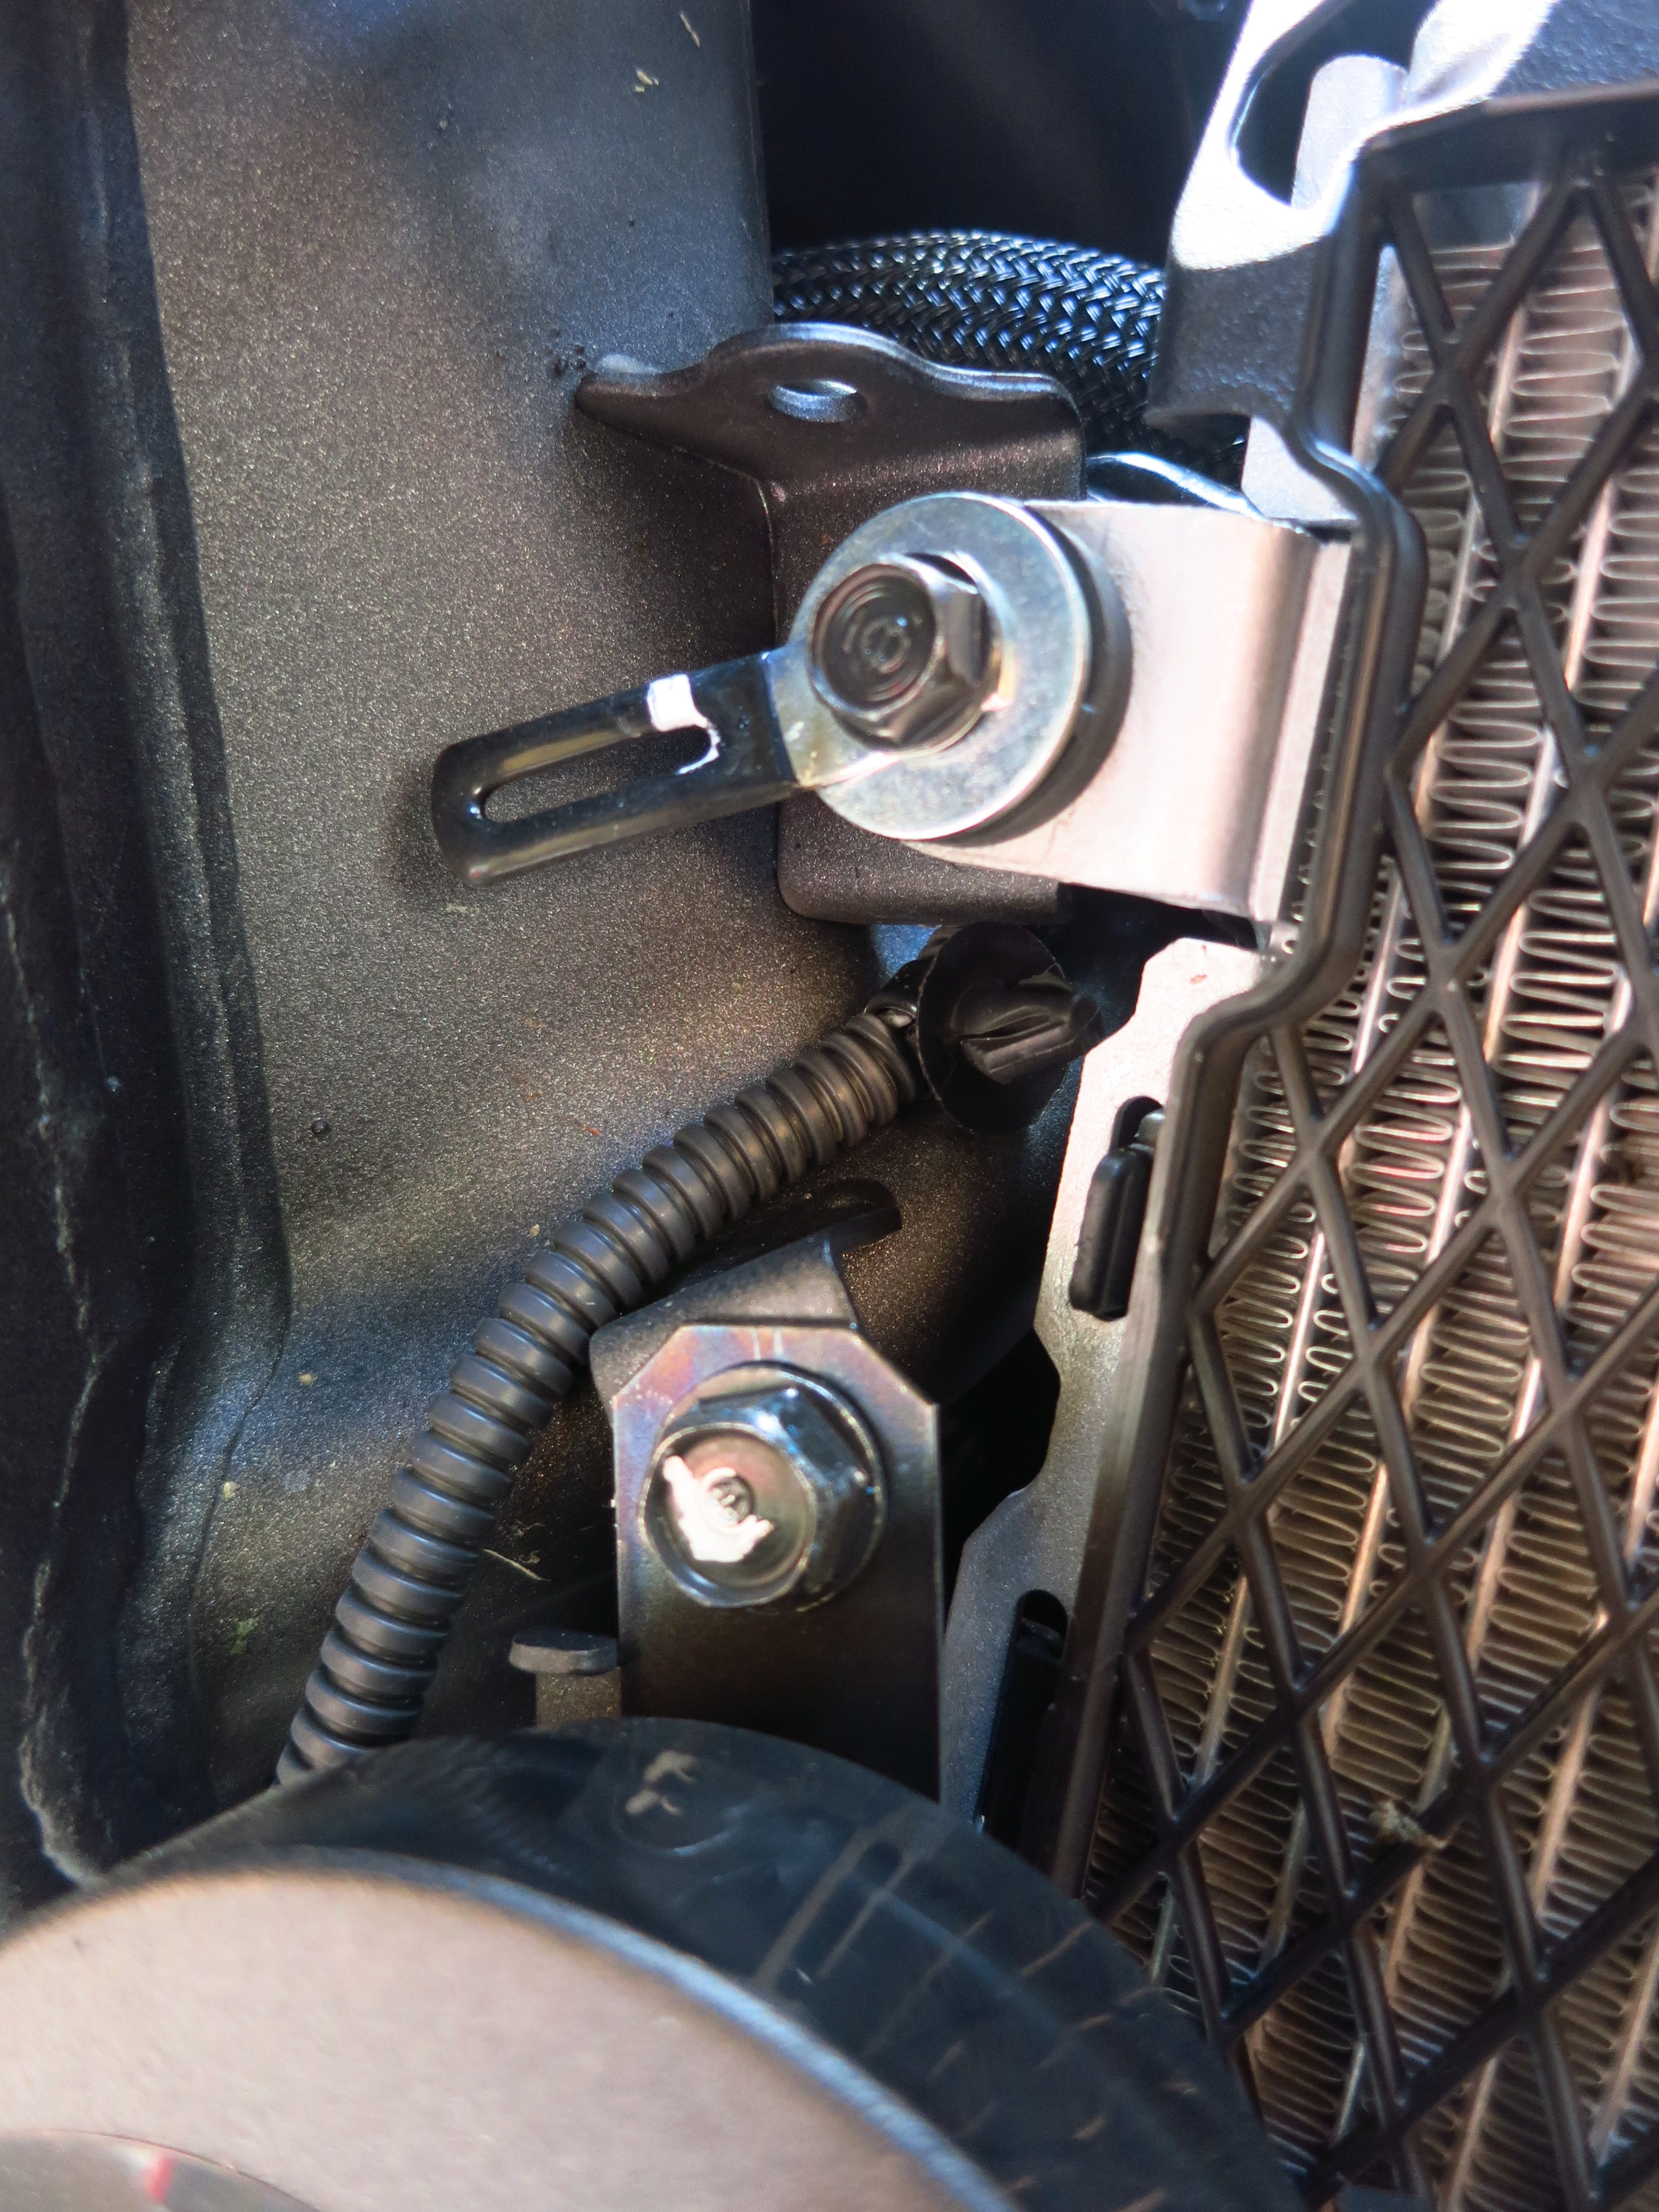
That left the connectors further down that the ones in the original horn, too low for the standard wires to reach them. You can simply buy or make an extension, but it is only a matter of a couple of inches, and a job well done would include covering them in heat-shrink tubing to protect it properly. After a bit of fiddling, I discovered that it was possible to re-route the bike wiring by unclipping it from the mount next to the radiator and then passing it under the mount. It has a heat shield and even in the new position it did not get much closer to the radiator, so there was no risk of damage and now it was possible to connect the horn without further modifications.
It is a very tight fit, clear of the bottom of the triple clamps by only a couple of millimetres when in full left lock. I took measurements to ensure that the mudguard would not touch it under compression, and it seems that the only possible situation in which that might happen would be fully bottoming out with the wheel turned right full lock, which is highly unlikely to happen in normal use.
I might have been able to install the second horn on the other side if I made a bracket myself to attach it to one of the radiator mounts, but I still have not installed the crash bars and they use those mounting points, as do the radiator protectors I also want to fit. I will wait and see if it is possible once everything is in place.
With a draw of 2.7 amps I do not think that a relay is necessary, so all in all it a is a pretty straightforward installation and the gain in safety is considerable.
Even the most oblivious mum changing lanes in a monster SUV while sending text messages with one hand and fighting kids in the back seat with another is bound to hear me now.
Well, not exactly… after a weekend away running the bike in, it was more like 1,245km.
When I bought the bike I also got the Honda Plus card, which extends the warranty to four years and gives you the right to the use of a replacement bike while yours is being serviced, which is great for me as I need the bike daily to go to work. I booked the 1,000km service the same day I picked up the AT to make sure that the replacement bike would be available, and on Wednesday she went in for her first visit to the dealer’s workshop.
They took the AT in the moment I arrived and asked how everything was going. I told them about the problem with the 6th gear – occasionally it was difficult to change up into it and then it would jump into neutral – and they assured me they would look into it.
I filled in some paperwork and was given, as I feared, a replacement scooter… Well, at least it was not that bad, it was a brand new SH300 and even though I do not like scooters I have to admit that this one made a pretty convincing city runabout. I will go into my riding impressions more into detail in an upcoming post, for the moment suffice to say that it was more than adequate to take to work outside the city until I could pick up the AT the following day.
In fact, the bike was ready on the same day, but since I did not finish work until 22:00 I could not pick it up until Thursday. The first service came at 143.64€ and included an oil and filter change and greasing and checking the chain. I had been hoping they would also clean the bike, but they did not… I am going to have to remove the mosquitoes from the weekend myself.
The head mechanic told me that he tested the bike himself but having changed the oil he found nothing wrong with the 6th gear. He said that these issues tend to disappear with fresh oil and a bit on running in, and another owner on the local AT forum told me that that after 2,000km the gearbox on his bike had become noticeably smoother. I must say that the problem has not happened a single time since then.
All in all, I was quite satisfied with the quality of the service and the price, which was within the average of what I have read about in the forum. Since I was there, took the opportunity to order the tall screen as well. We will see how wind protection improves with it, and if it is not enough, I will fit a deflector on top of it, which was the definitive solution on the Super Ténéré.
Life sometimes surprises you with little coincidences, and after picking up my new Africa Twin yesterday, today my old V-Strom reached the 150.000-kilometre mark while on duty. Best motorbike ever.
And as if the welcoming of the new machine with such an important milestone (no pun intended) was not enough, this morning my Facebook account had another suprise in store for me. Do you know how from time to time it suggests certain posts from X years ago? I got this one today:
Yep, it has been three years to the day since I signed in to the course to get my unrestricted motorbike license! To think it was just a few months before heading to Mongolia…
We’re back! It has been some time since the last time I published, but fear not… the blog is finally back on track. But first, a quick recap of the events that led to this post:
(read in a deep voice)
Previously, on Stroming The World…
My faithful V-Strom was replaced by the first new baby, an almost new Super Ténéré that I enjoyed for a few months here and there before it was stolen right from my front door. Fortunately, the insurance company paid a decent compensation and I was left with two choices – try to find another good deal on a second-hand Super or wait and save money until the new Africa Twin was on sale. I so wait I did until I could get a test ride on the new AT, which I happened in early February. The bike was amazing, and the decision was made.
Fast forward to Wednesday, last week.
Having saved enough for the new AT, I had made enquiries at a few Honda dealers in Barcelona, but they were all aware of the high demand there was for the bike and everyone was asking list price for it. Then a good friend from Sant Just texted me to say that he had dropped by his local dealer and had a very tempting offer in black on white. Besides the offer, they also had a Rally red motorbike in stock, which was the only color I had not seen in the metal, so I went to have a look.
Ever since the bike had been officially unveiled, I had spent hours looking at pictures of it, imagining what colour I would get, but these things can change a lot when you see the real thing. I thought that the silver model looked a bit bland, and it did when I saw one, unlike the black, which had not really caught my eye in the brochure but had captivated me in the dealer where I took the test ride. The one I actually rode was the one in the classic Honda tri-colour paint scheme, and that was the one I, like many others, had a crush on. However, now the moment had come to make a decision and order one, I found it a bit too fussy, even more so if I was going to fit it with crash bars, metal panniers and other stuff, so I was practically sold on a matte black one.
Or so I thought… when I walked into the dealer and saw the red one, I fell in love. It looked way better than in the pictures – not so much going on at the same time as in the tri-colour, but not as dark as the black one. It was elegant enough to drive to work every day and sporty enough to look in its element blasting down a dirt road. Perfect.
Any last minute thoughts on the tri-colour were blown away when I learned that the expected delivery dates were around October, and I put down a payment on the red one.
I use the bike to commute every day, and I did not want to run the new one in like that, so we agreed that I would pick her up on Friday the following week to take her for a long ride on the weekend and have her serviced once I came back before putting her to her daily duties.
Why wait a week and a half? you may ask. Why not just do it the following weekend? Because it was Nat’s birthday on Saturday, and we were having lunch with some friends. They did call me on Friday to say that if I wanted, I could pick the bike up on Saturday, and my friends could not believe that I would not, at least, take her home until the following weekend. The reason I didn’t is very simple – I knew that if I went to the dealer and got on that bike, by lunchtime I would already be 500km away from Barcelona… So I patiently waited until I had a free morning… today!
After a thorough explanation of all the controls of the bike and booking the first service for next week, the new baby is finally tucked away in the car park, waiting to hit the road on Saturday morning. We will take three days to ride a combination of motorway and back roads and make sure the bike is properly run in. A longer post will follow when we come back. In the meantime, here are the very first pictures!
18th of January, first day of the Africa Twin week in the Honda dealers in my country. It is 9:30 in the morning and below me Barcelona has shaken off the last shreds of morning mist. The months long wait has been worth it: I am very likely to be the first regular customer who has the chance to take the new AT for a spin.
When this bike was Little more than a mud covered prototype with a camouflage paint scheme I swapped my indestructible V-Strom for a Super Ténéré because I came across a bargain I could not miss, but as the months went by and more information trickled to the press about the 21st century incarnation of the legendary Africa Twin I could not help but wonder if that was the perfect motorbike I was looking for.
Months later the prototype became the CRF 1000 L Africa Twin. As technical specs were confirmed, so grew the expectation, and not just mine, specialised media and adventure bikers all over the world were looking forward to getting their hands on one.
It was around then than my mint condition Super Ténéré was stolen. Luckily, the insurance company delivered on their promises (these are the times when you realise how important a good insurance policy is), and by the time the date of arrival of the AT to the dealers had been set in January I was faced with a dilemma: should I try to find another good deal on an almost new Super Ténéré or wait, save and go for an AT?
When I was looking to replace the V-Strom a strong candidate was the Triumph Tiger 800 XC. On paper, it was the perfect bike, but when I tested it I was disappointed. We did not get on well. Before making a decision it was essential that I tried an AT in the metal.
I surfed the net almost constantly for a couple more months, gathering all the details I could find about it, the official presentation took place in South Africa, the press fell in love with it and I was more and more anxious to sample one, until at long last the arrival of the first test units was announced. As soon as I could, I dropped by Honda Control 94, in Aragó street, were the sales man told me to call him the following week. Meh. The next dealer was Honda Moto Aranda in Pau Clarís street, where pulled out a schedule immediately and asked me ‘when do you want to test it?’. Marvellous.
Back to the present. I have arrived at the dealer at 9 o’clock and I have finally been able to see it person. Impressive. It is a gorgeous bike, well proportioned, tall, sleek. The one on static display is matt black, and even though I love that colour, I was not very convinced when I saw it in pictures. Big mistake. In the metal it looks great.
The test bike is painted in the classic AT colours – pearl white, red and blue, with golden rims and handlebar. Even if the black one is beautiful, it is easy to foresee most customers going for this paint scheme. It brings out the bike’s details and shows its heritage.
After a short explanation on how the dashboard works (lots of info), it is time to fire it up and go for a ride. The engine has a very attractive sound, the 270-degree crank gives it a special sound and unlike the Super Ténéré the exhaust has a throatier, deeper note. There will soon be third-party options, but the standard pipe sounds wonderful.
I put the bike in gear (the test unit is the ABS and HSTC model, but without the auto box) and I joint the rush hour traffic in Barcelona. This is throwing her in at the deep end – nothing reveals how tractable (or not) a bike is like riding in these conditions. First impressions are a list of positive points – the gearbox is smooth as silk, the clutch, which despite being cable-operated offers no resistance and can be depressed with one finger, is progressive and together with plenty of low-down grunt the bike is ridiculously easy to use in the city. The handlebars are wide but high, so it is above most cars’ mirrors, and it has an excellent turning circle, which helps a lot when zigzagging between stopped cars.
Thousands of red lights before reaching the road that connects Horta with Cerdanyola through Collserola give me the opportunity to study the dash and the riding position in detail. This bike could have been tailor-made for me. The riding position is upright, natural, with high handlebars that put zero strain on the wrists or the back. With the standard seat in its lowest position I can easily reach the ground, resting both feet on the soles and with my knees bent. I could set it to the highest position and I would still be able to move the bike around without problems (I’m 1,84). The fact that it is a narrow bike where the tank meets the seat makes it feel smaller and lighter than it really is, after five minutes of first getting on it you feel comfortable and confident. It is a bike that makes things easy for you. It is also very easy to ride standing on the footpegs, although I would fit some raisers if I had to ride like this for long distances. A few grannies were surprised to see me looking at them at eye level from their seat on the bus.
The dash offers a lot of information, but Honda has managed to make it very easy to navigate the various displays without letting go of the bars thanks to the buttons on the left handlebar and, most importantly for me, traction control and ABS can be adjusted or disconnected with dedicated buttons without having to stop the bike, forget about having to dig into menus, reset things or pressing combinations of buttons. Simple and easy.
Indicated fuel consumption in very heavy traffic for the first three and a half kilometres has been about 29mpg. After the initial shock and leaving the worst of traffic behind, the rest of the ride through the city and up the starting point of the BV-1415 road yields a more reasonable 50mpg.
On the open road, and with no other cars sharing it with me, the AT is a pleasure to ride. Yes, the engine only produces 95hp, but let me make it clear here and now that you can forget about figures. It is a very torquey unit that pulls strongly in any gear and it sounds great too. At no point do you think ‘it could do with 30 more hp.’ If you really need more, you might be riding the wrong kind of bike, and in any case, all the more powerful models have offroad modes that limit power to these figures to keep things under control in the dirt, so… why more?
Not only is the engine delightfully smooth and vibration-free, it is also perfectly mated to the chasis. I have not altered the suspension settings from what they were at the dealer, and it is an effective setup, but one of the best things about this bike is that in comes with first-class suspension as standard, with all the regulations you need to set up the bike according to your preferences if you know what you are doing. It does not have electronic suspension. So what? It does not need it? A well set up suspension does not need constant adjustment, and those who will take this bike to the places it has been designed to go do not want to risk a faulty servo motor in the middle of nowhere… Adjusting preload with a screwdriver is 100% reliable.
As for spirited riding, high speed cornering is stable and precise, and its agility is at an incredible level. I do not know what Honda have done with this bike, but as I am writing these lines I still find it hard to believe that a bike with a 21” front wheel turns into corners more keenly than my other two bikes, both with 19 inchers. You do not have to coax the bike into turning or changing direction, it just flows from one corner to the next, surprisingly good fun. Obviously, I do not have the time to get to know the bike and its limits, but I have the feeling it give a lot more than what I am asking for today.
After the city and the winding road, it is time to make it back on the motorway to see how well it manages airflow and how the engine feels at cruise speed. Despite this unit having the standard low screen, above 120km/h the wind is clean and free of turbulence, it is clear that they have done a good aero job on the bike. I would personally fit the taller screen or maybe a wind deflector if you are going to ride often on the motorway, though. At an indicated 130km/h the engine is turning at about 4,000rpm, so you can keep up a good cruising speed without much noise or vibrations, and with power to spare. The best thing? An average 58mpg.
With about 40 minutes left on the bike there is one last thing I want to try… How does it work in the dirt? With not much time left (I had to get back to the city centre to return the bike) and not wanting to get into trouble (the tires are road-biased and after all it is not my bike) I manage to find a dirt road in good condition and try it out.
Like the Super Ténéré, the ABS system is very well set up and can stop the bike without much trouble in hard-packed dirt. Still the system can be switched off in the front wheel for those who want to get more serious off road. Traction control has three levels of intervention and it can also be switched off altogether, although in the most permissive setting it allows you to play hooligan before cutting in to help. Again, off road mode for offroad heroes.
On sand and gravel the bike is confidence inspiring. It feels very light, which makes it easy to correct any slide or mistake, and when I reached the end of the dirt road I feel comfortable enough with it to cross a couple of those ruts dug by rain erosion. As a witness to how easy this bike is, when I tested the Super Ténéré (also on road tires) before buying it I did not feel brave enough to venture even into an easy dirt road, the weight demanded respect. With this one, however, I feel capable of tackling more complicated terrain far from tarmac on my own. The weight is low and centralised, which makes the bike easy to control and I imagine that in case of a fall, if I am able to lift my V-Strom when loaded, the AT cannot be much harder.
On the way back to the city centre traffic is much better and riding at 80-90 km/h on the ring road the bike manages an impressive (always indicated) 74 mpg.
Once at the dealer, the next customer is already at the door, helmet in hand, waiting for the bike to come back so that he can have a go too. It looks as if it is going to be a busy week for her…
There are as many kinds of bikes as riders, and I imagine that some people will be quite indifferent to the Africa Twin. As for me and what I do with my bike, the best verdict I can give is that this bike seems to have been tailor-made for me. Simply perfect.
The good:
Smooth engine and gearbox
Power delivery
Suspension
On road and off road behaviour
Riding position
Light and agile
Sound
Does not have a beak 🙂
The bad:
.. the fit of the two halves of the left handlebar controls case was a bit off, but these are almost pre-production bikes.
The centrestand is not included as standard, and nor is a 12v socket.
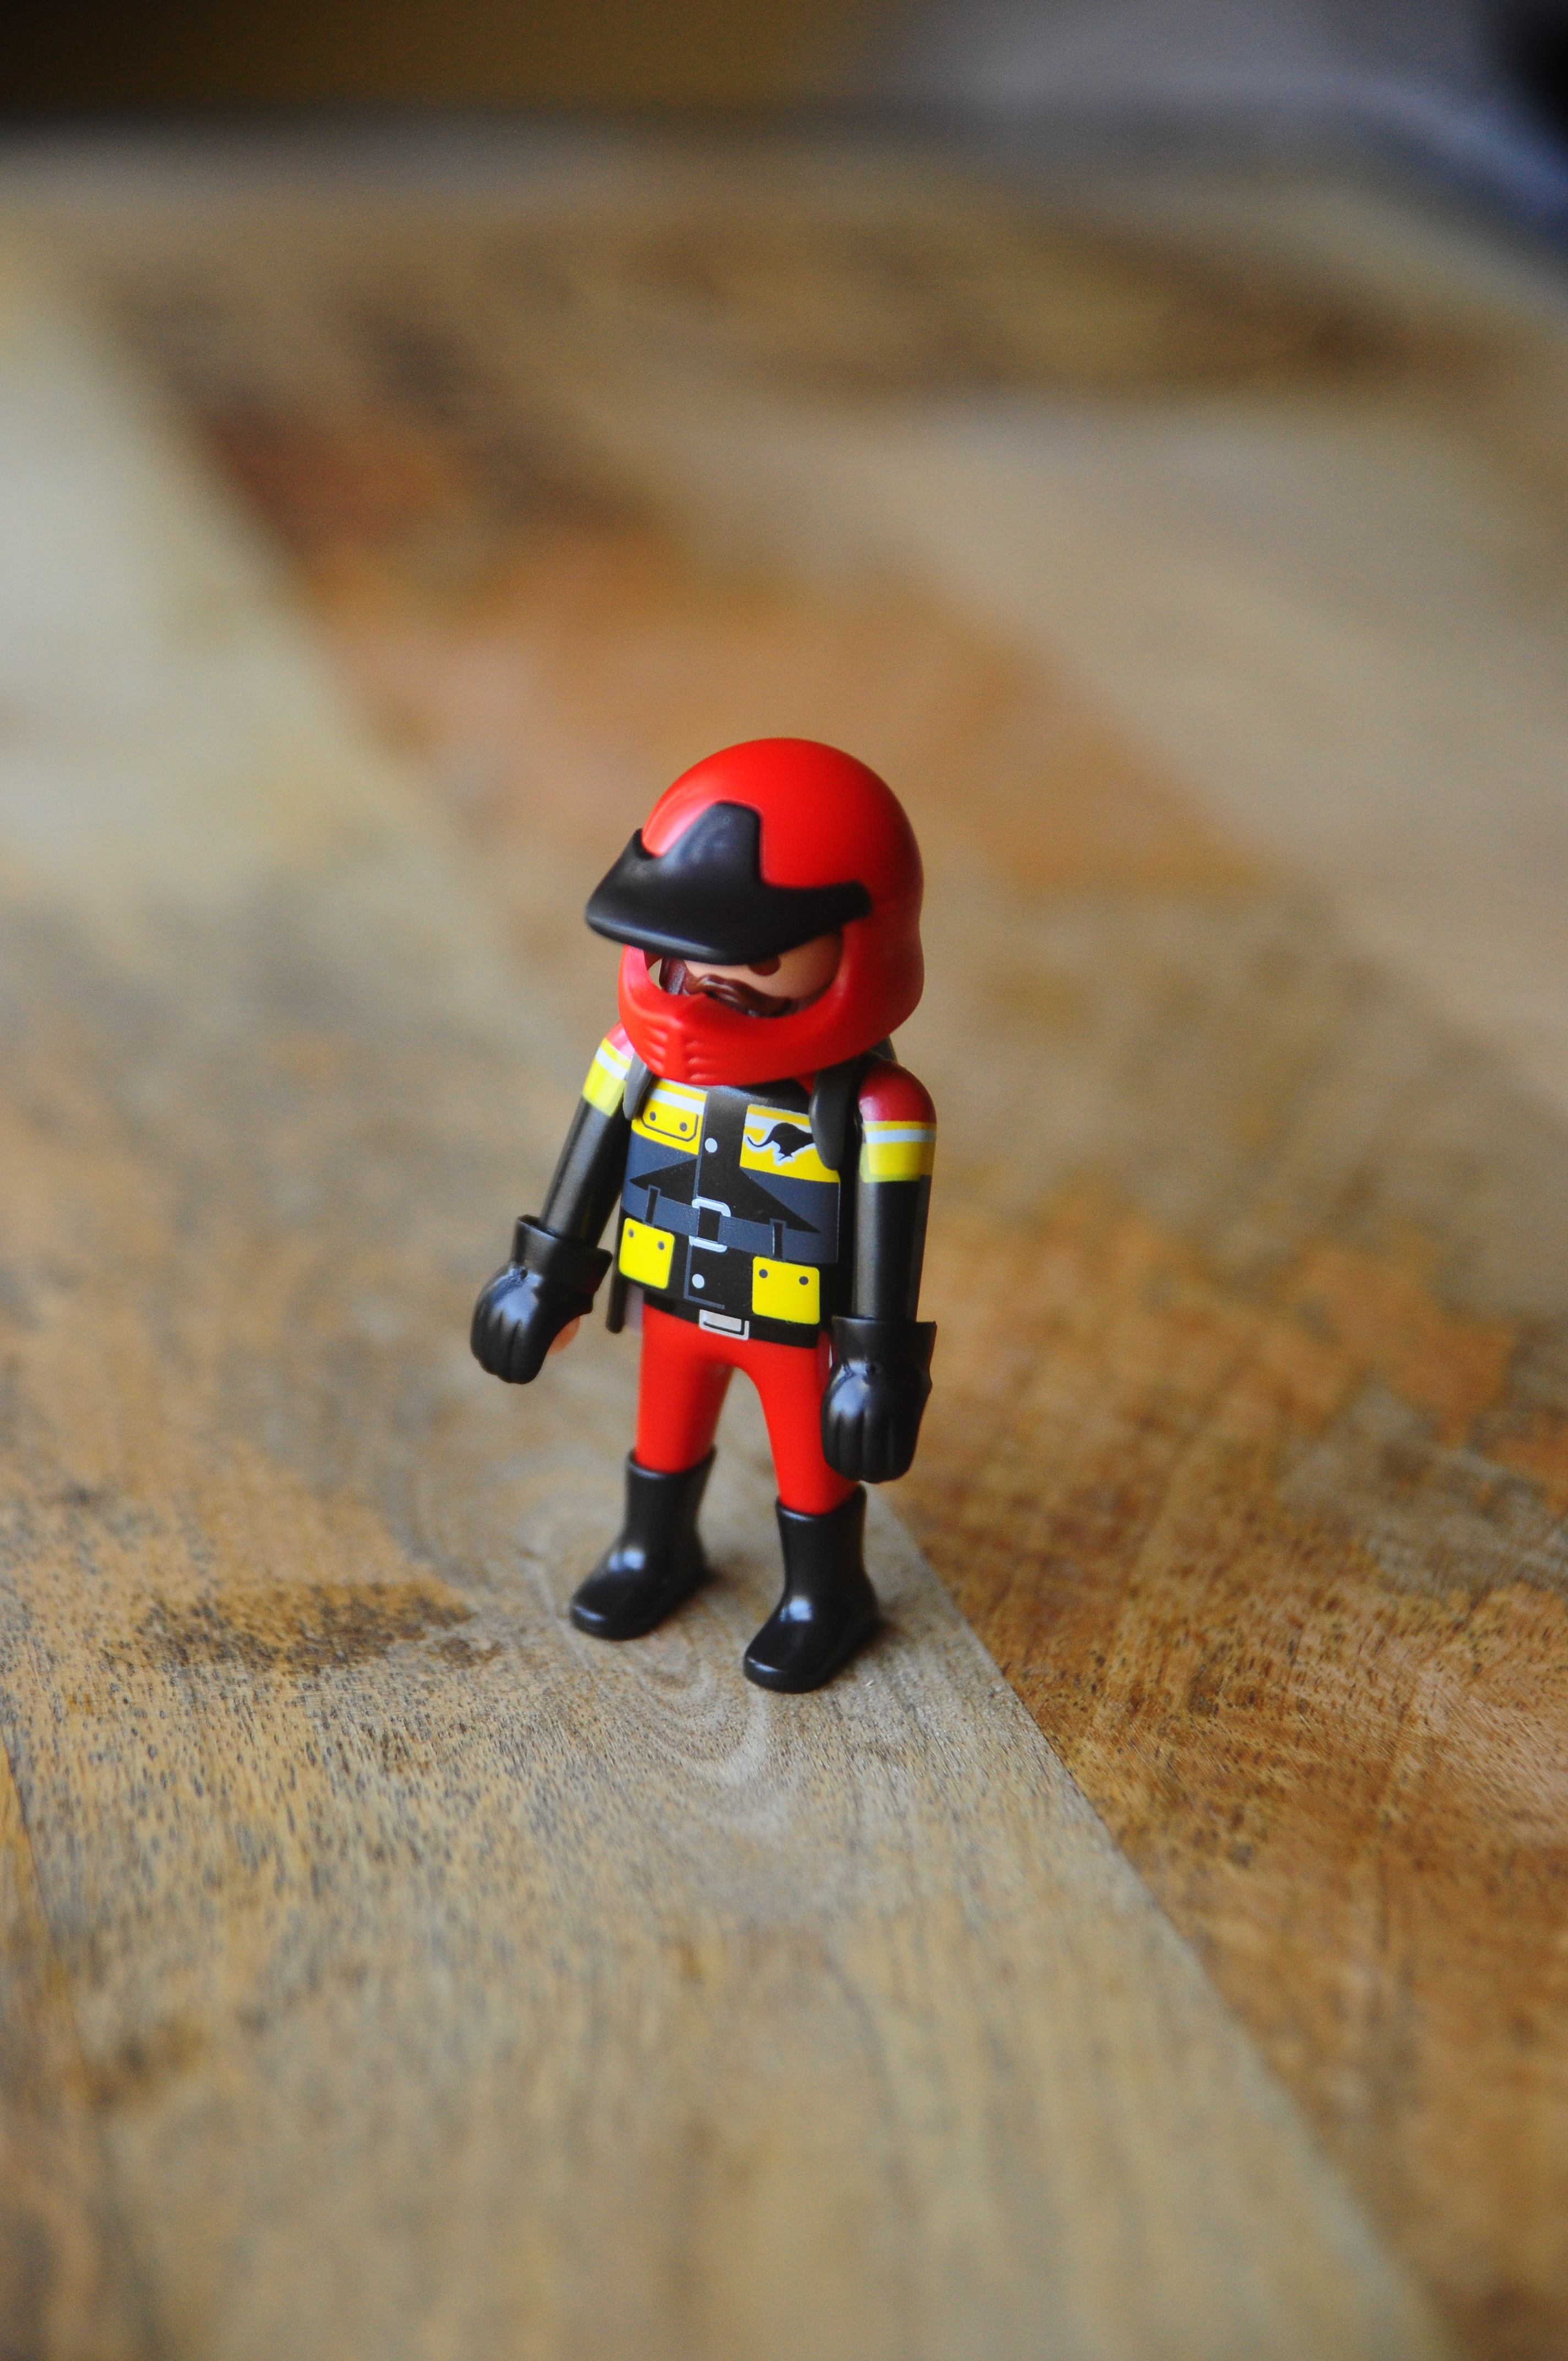
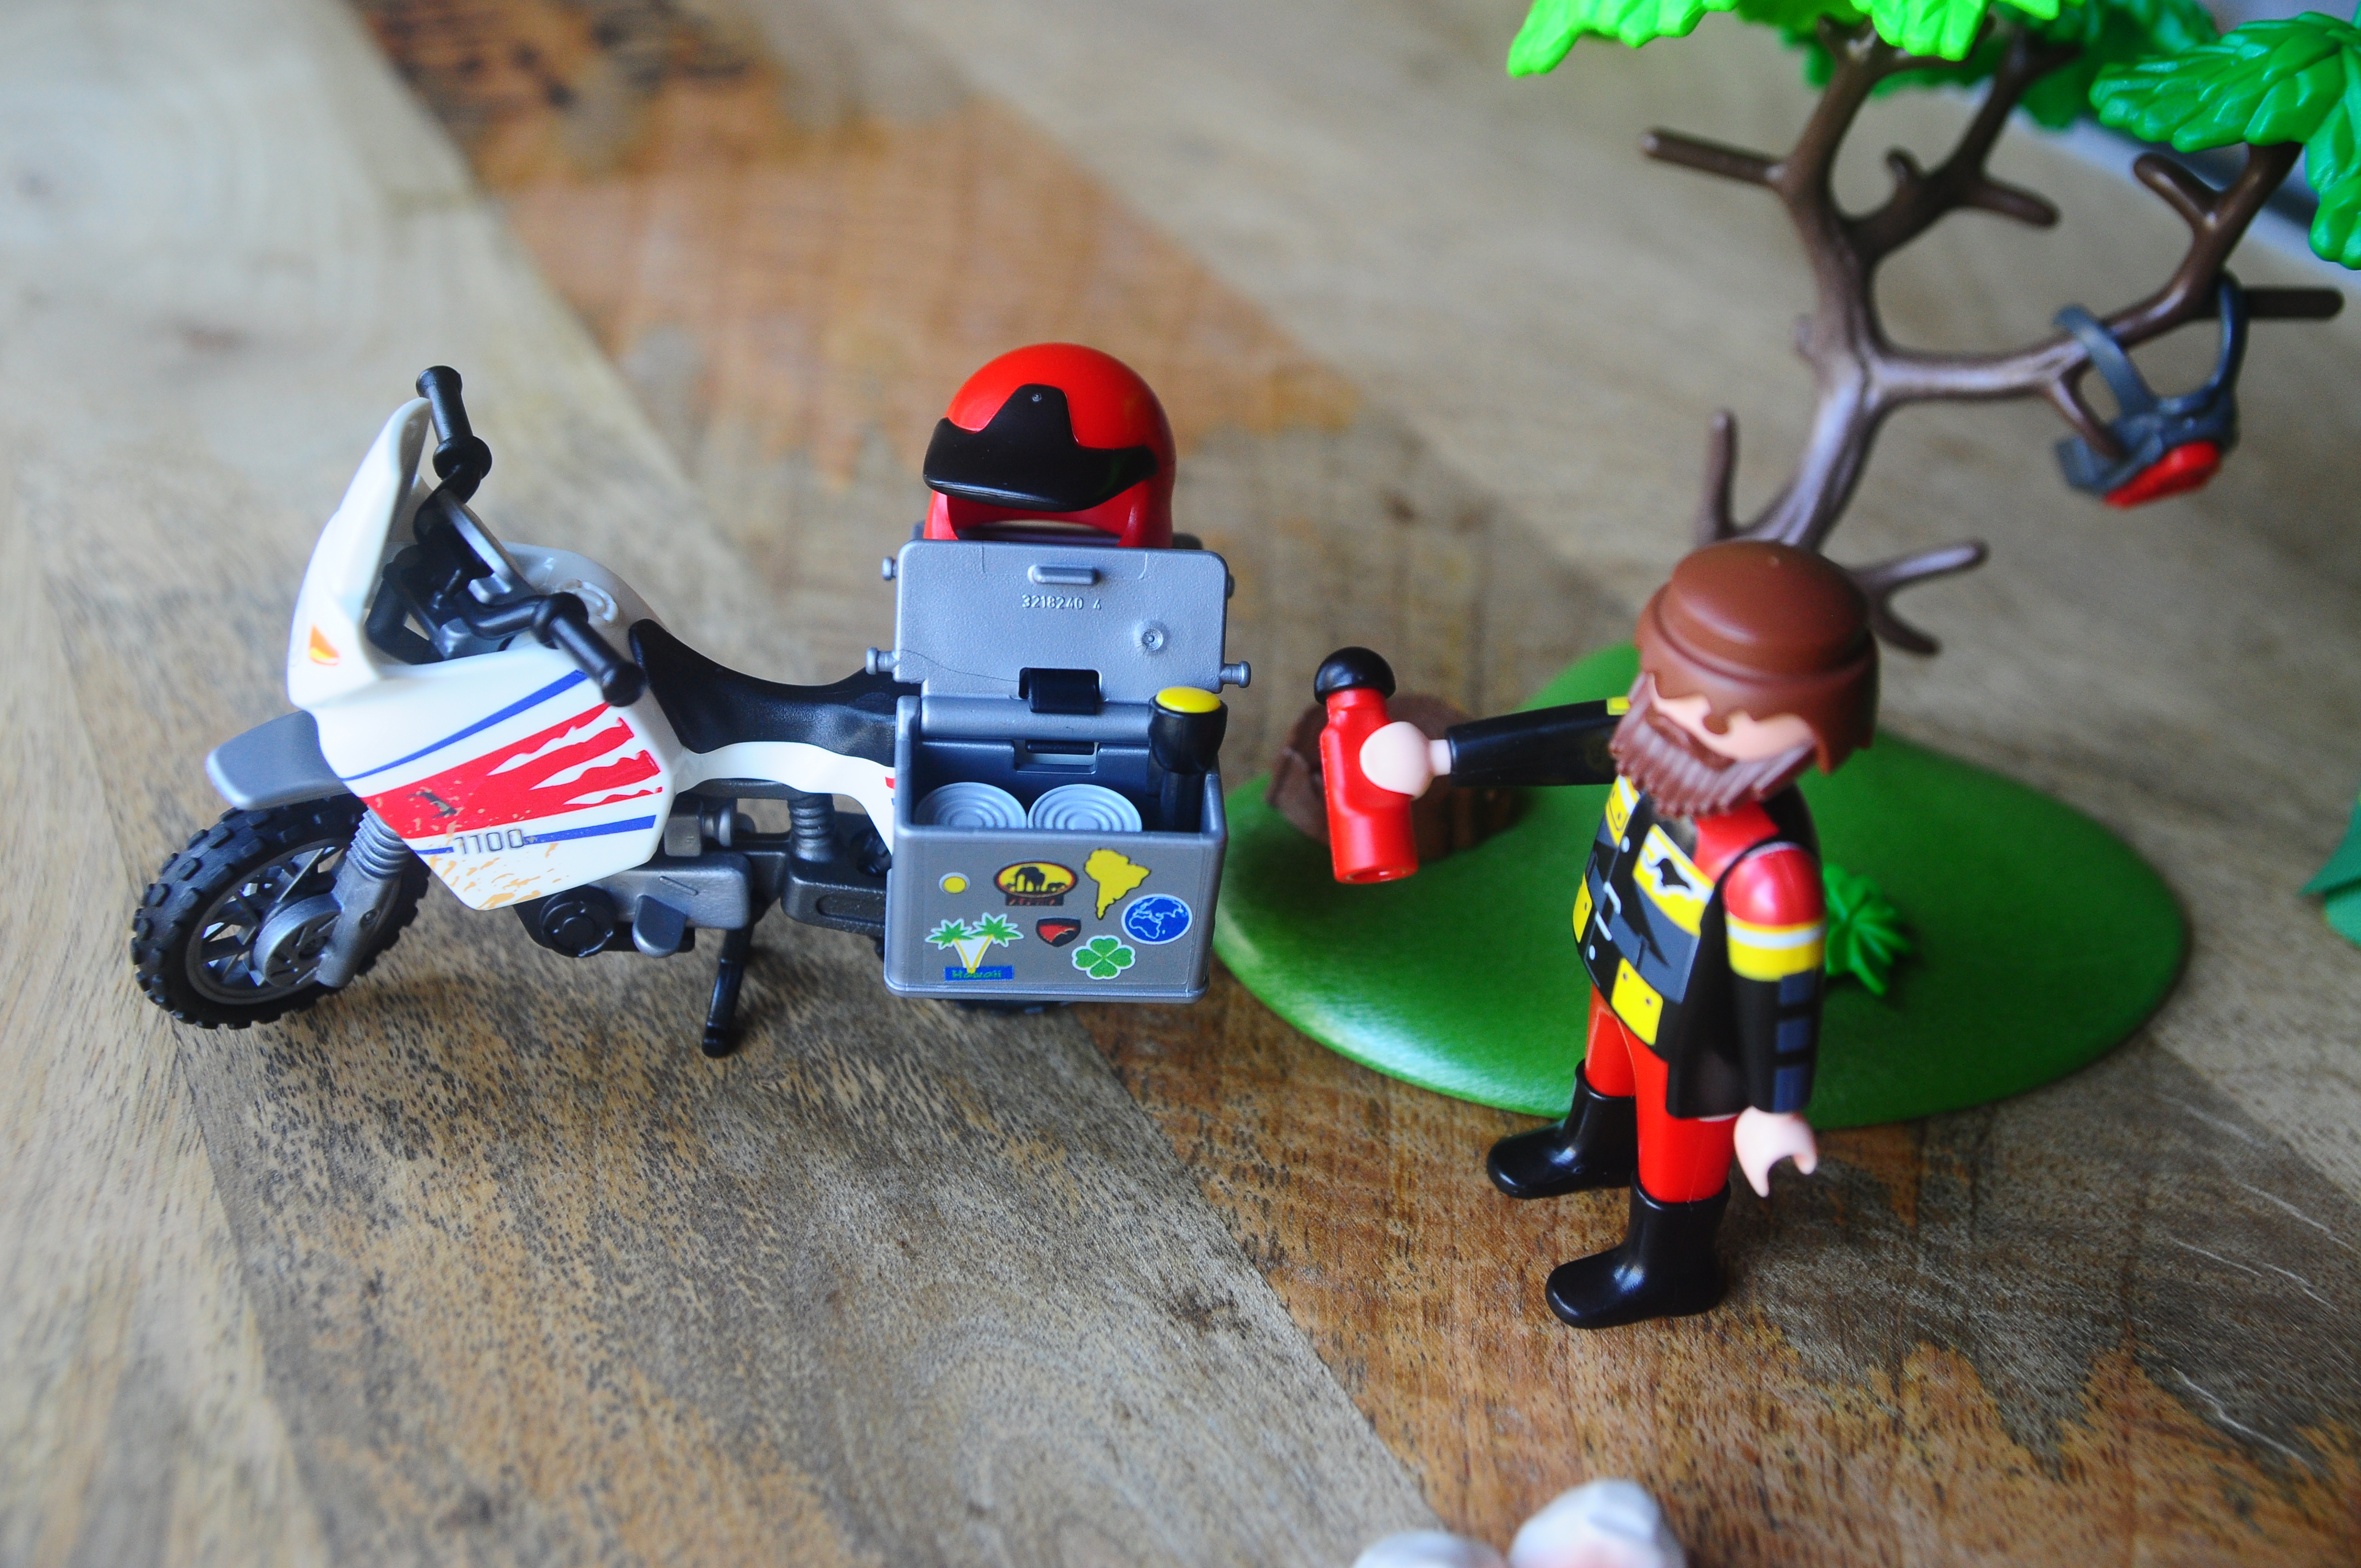
This Christmas I got a really coolest present ever: a Playmobile Adventure Rider! OK, the box says “Summer Fun”, but that sounds too generic, look at the guy and tell me he is not a true adventure rider…
He comes dressed in a riding jacket, with an off-road helmet, a backpack, and is the first klicky I have seen with gloves.
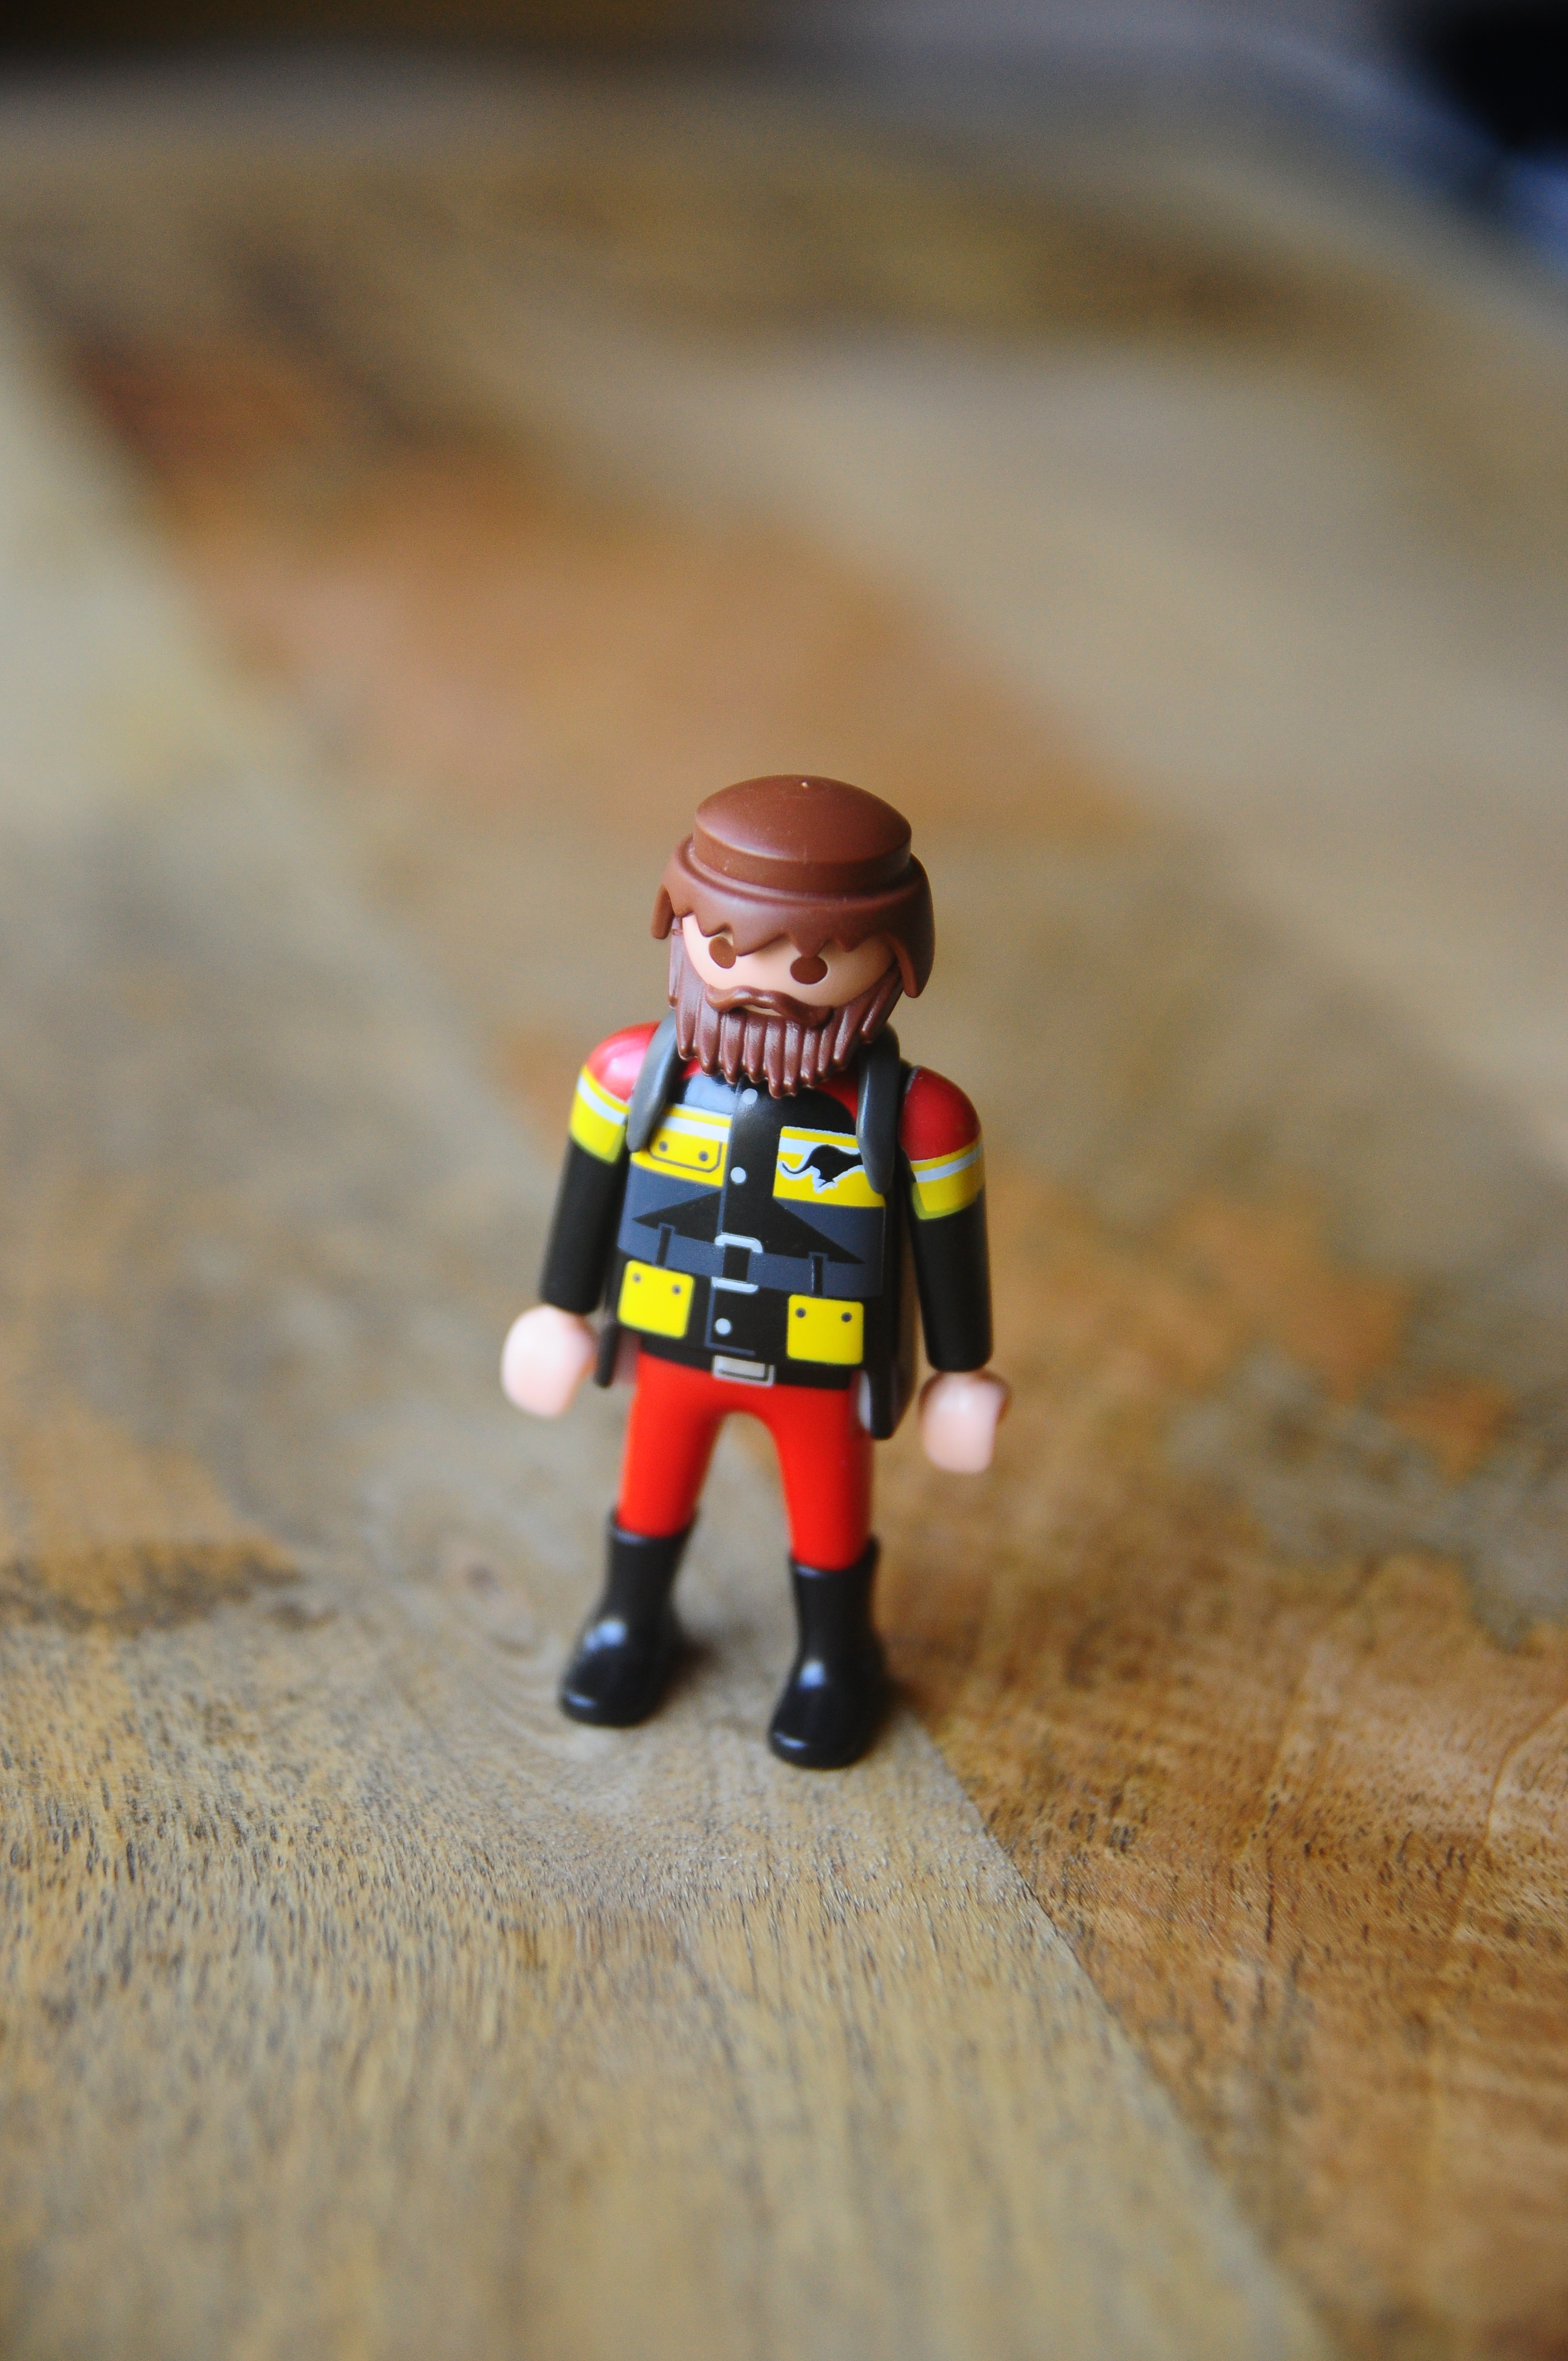
But when you remove his helmet, the best part is…
He has a beard like me!
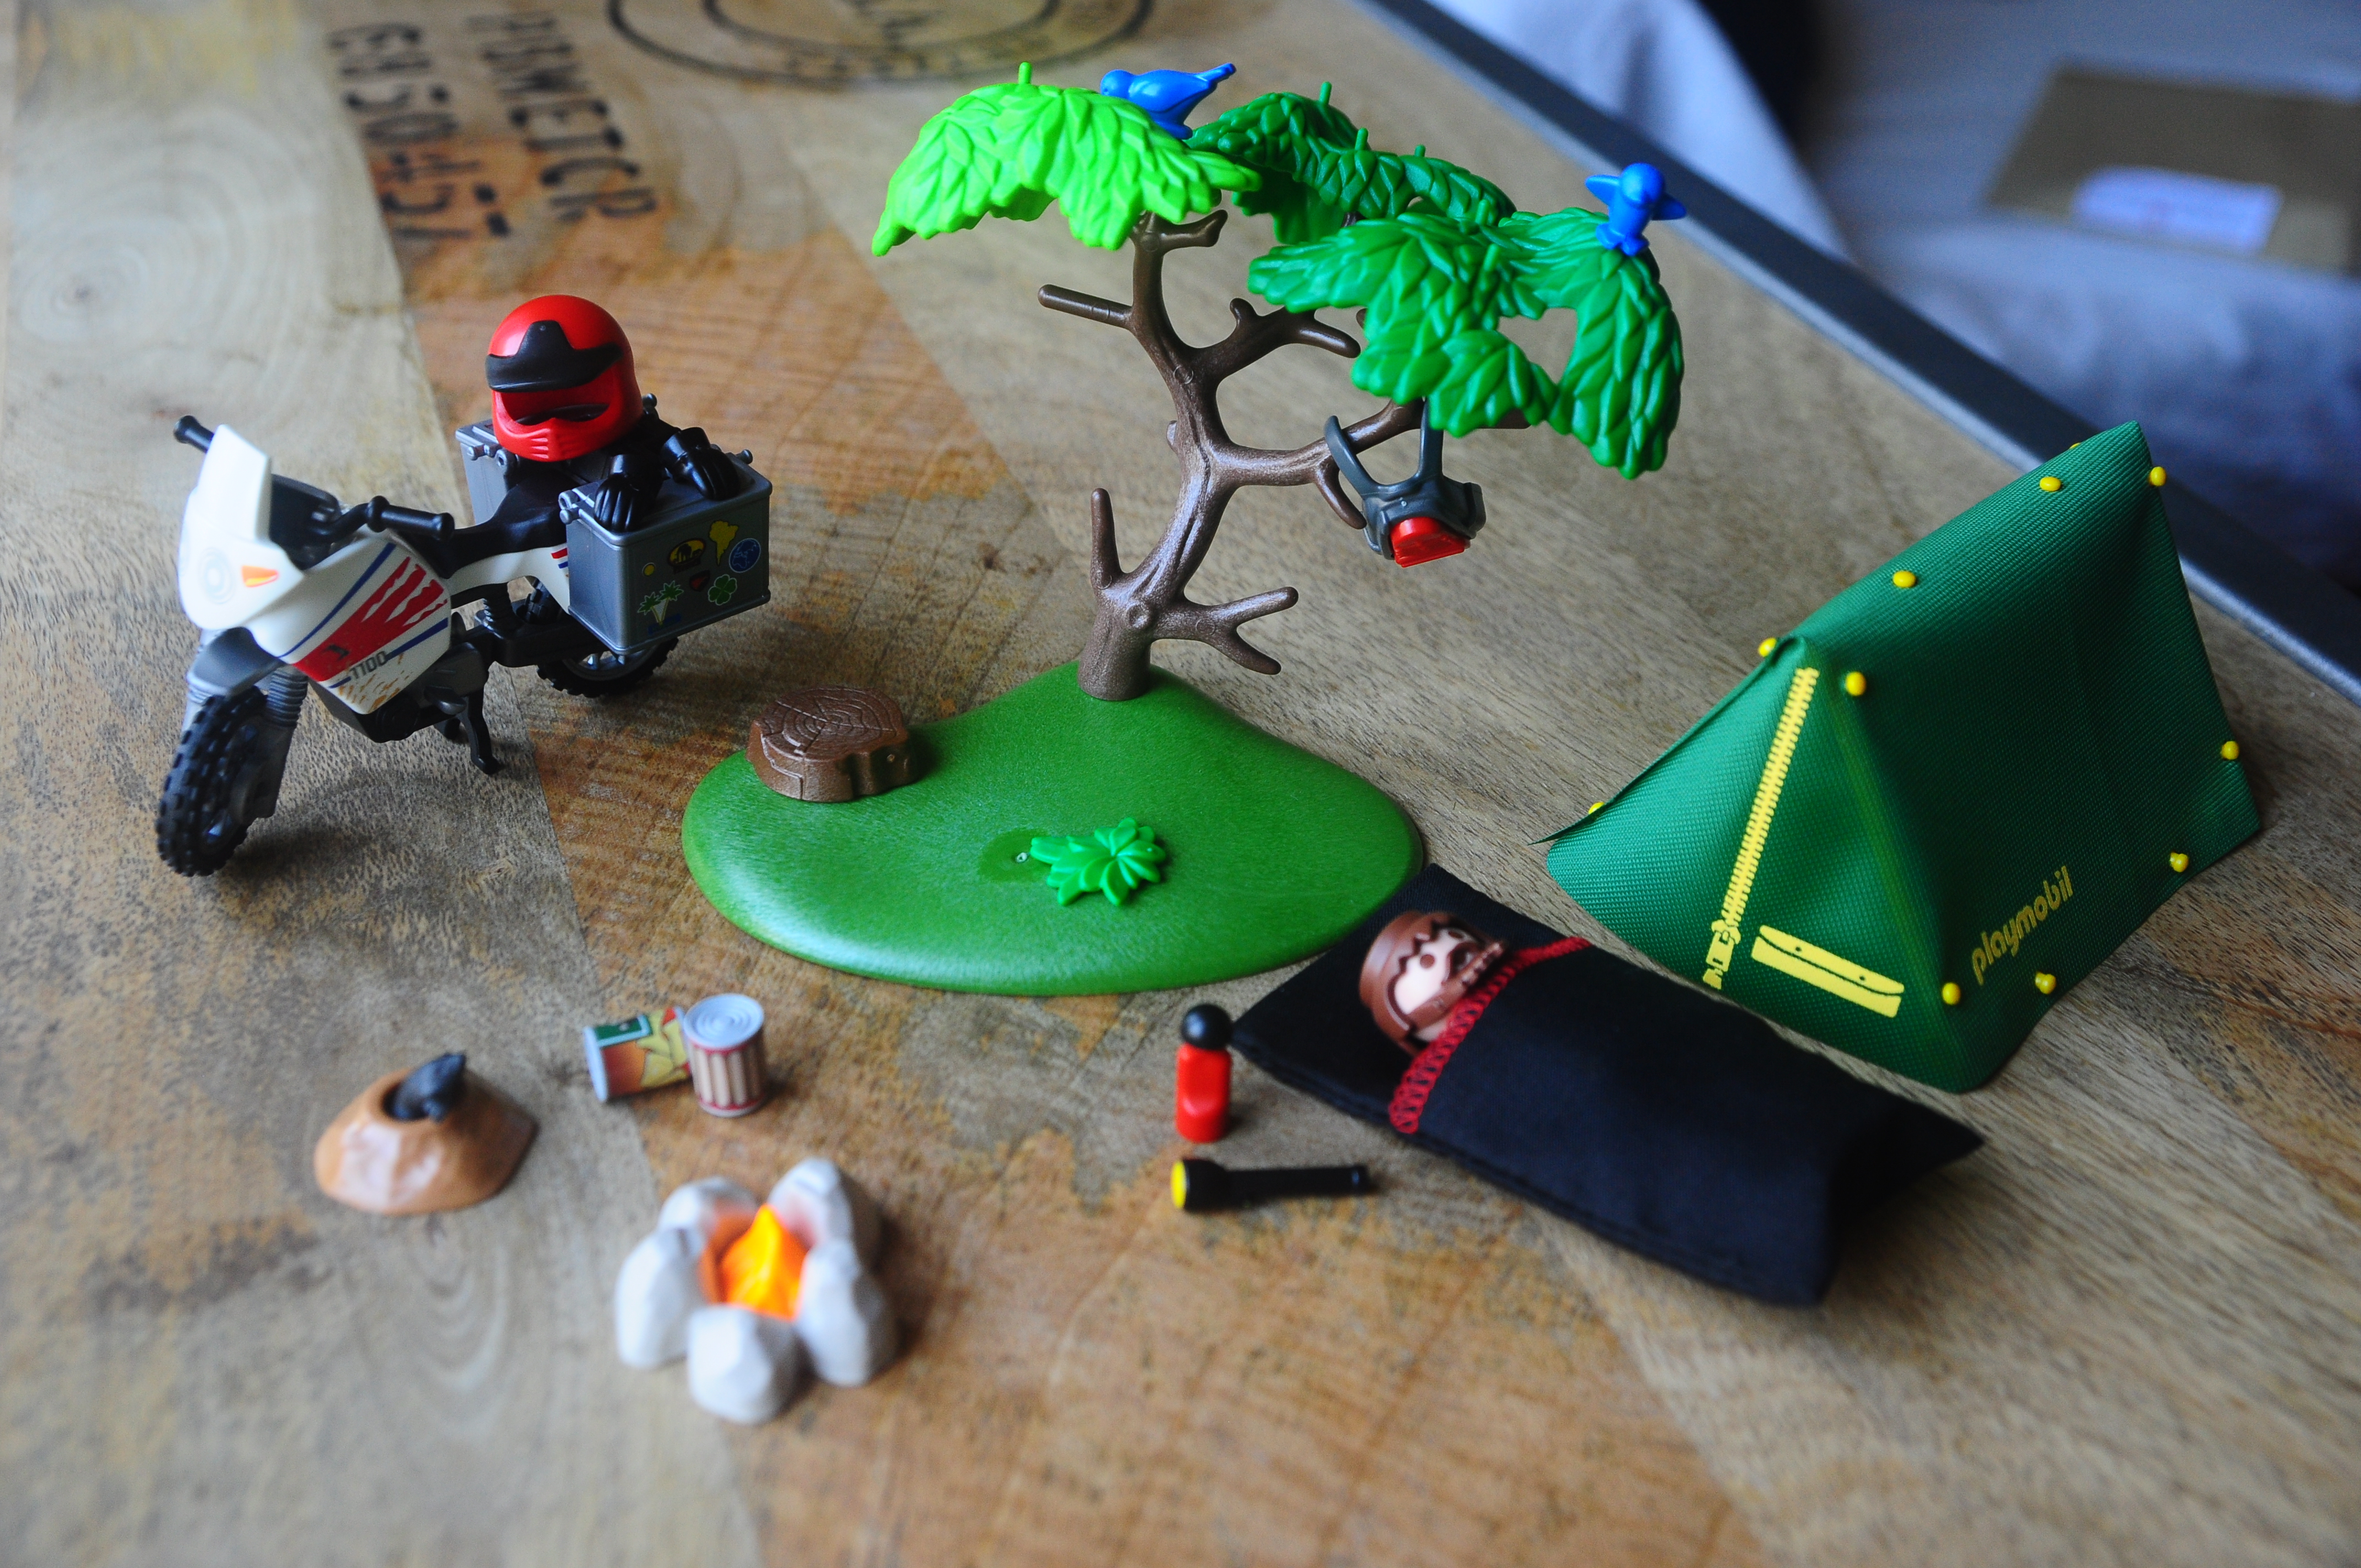
As any good adventure rider, he has a mud-splattered dual sport bike sporting knobbly tires and aluminum panniers.
He is well aware of the soft vs. hard luggage debate, but he says that he prefers aluminum boxes so that he has a place to display the stickers of all the places he has visited.
Here we can see him after a long day ride across the unknown – he has found himself a nice spot to camp and is getting ready to enjoy a proper rider’s meal: tinned sausages and ravioli.
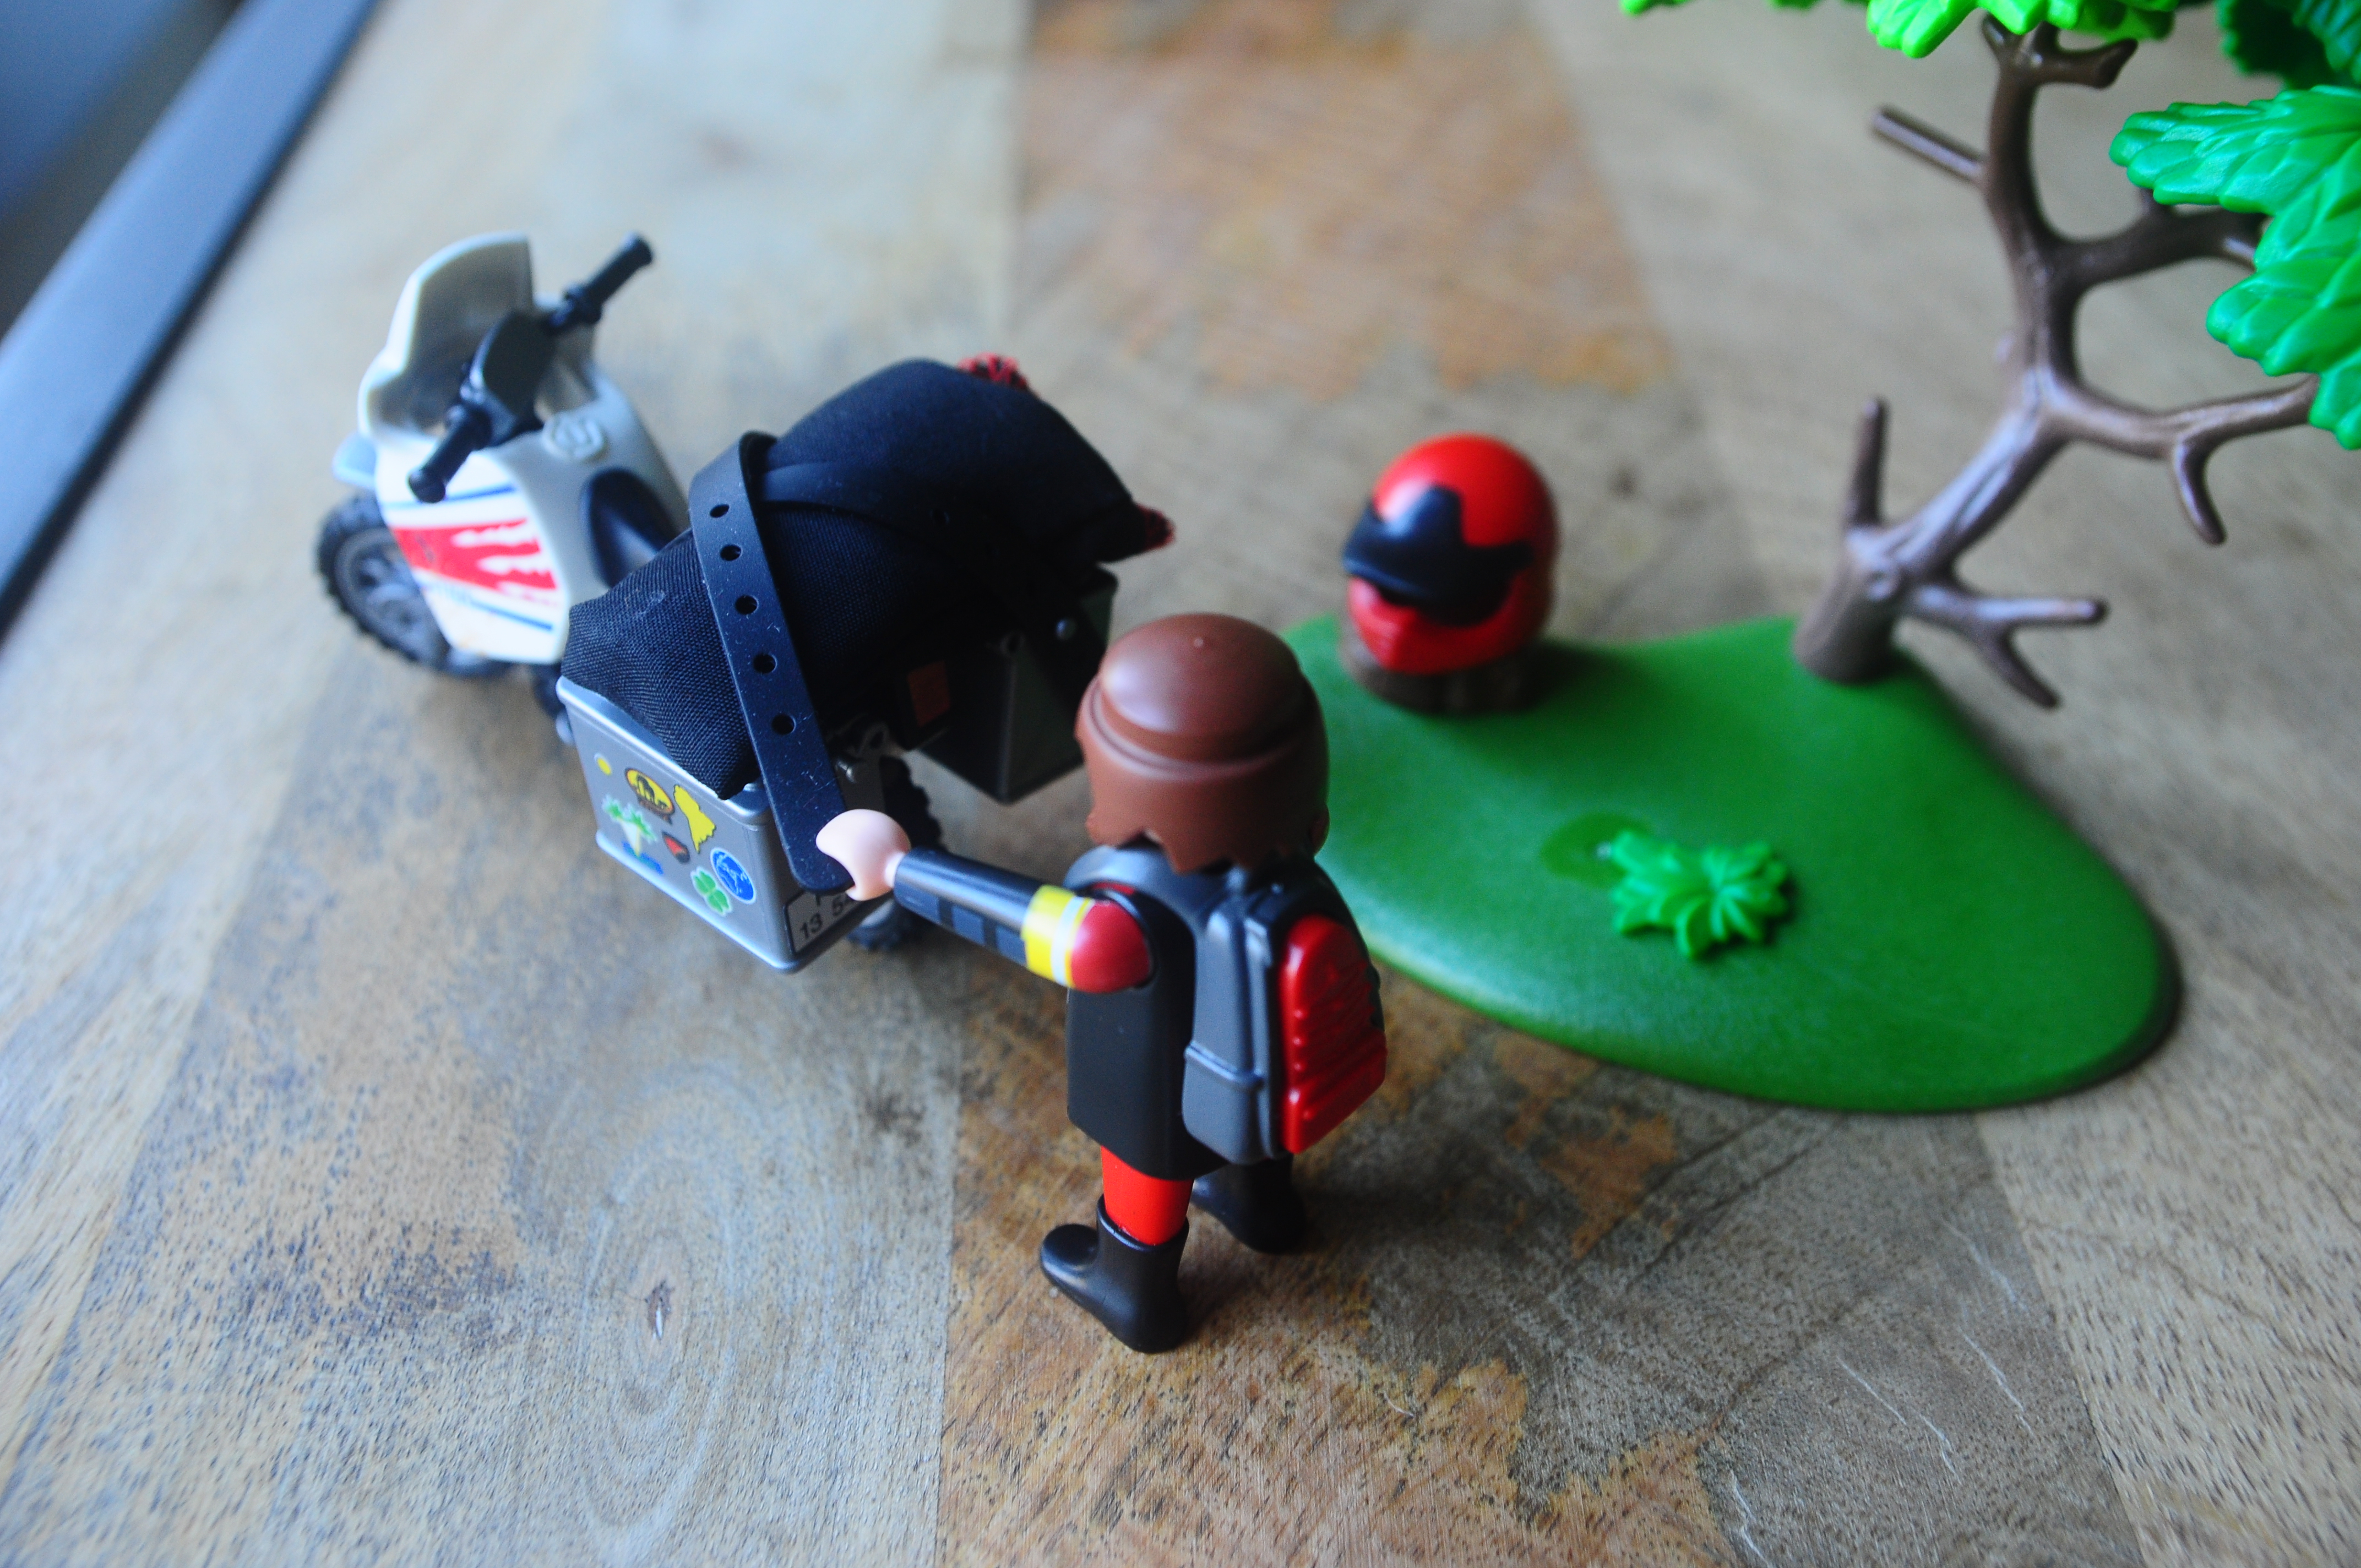
It seems that it is going to be a warm night, so he has decided to sleep under the stars even though had already set up his tent.
But he is not alone, attracted by the smell of food from the empty tins, a mole has come out in search of some dinner.
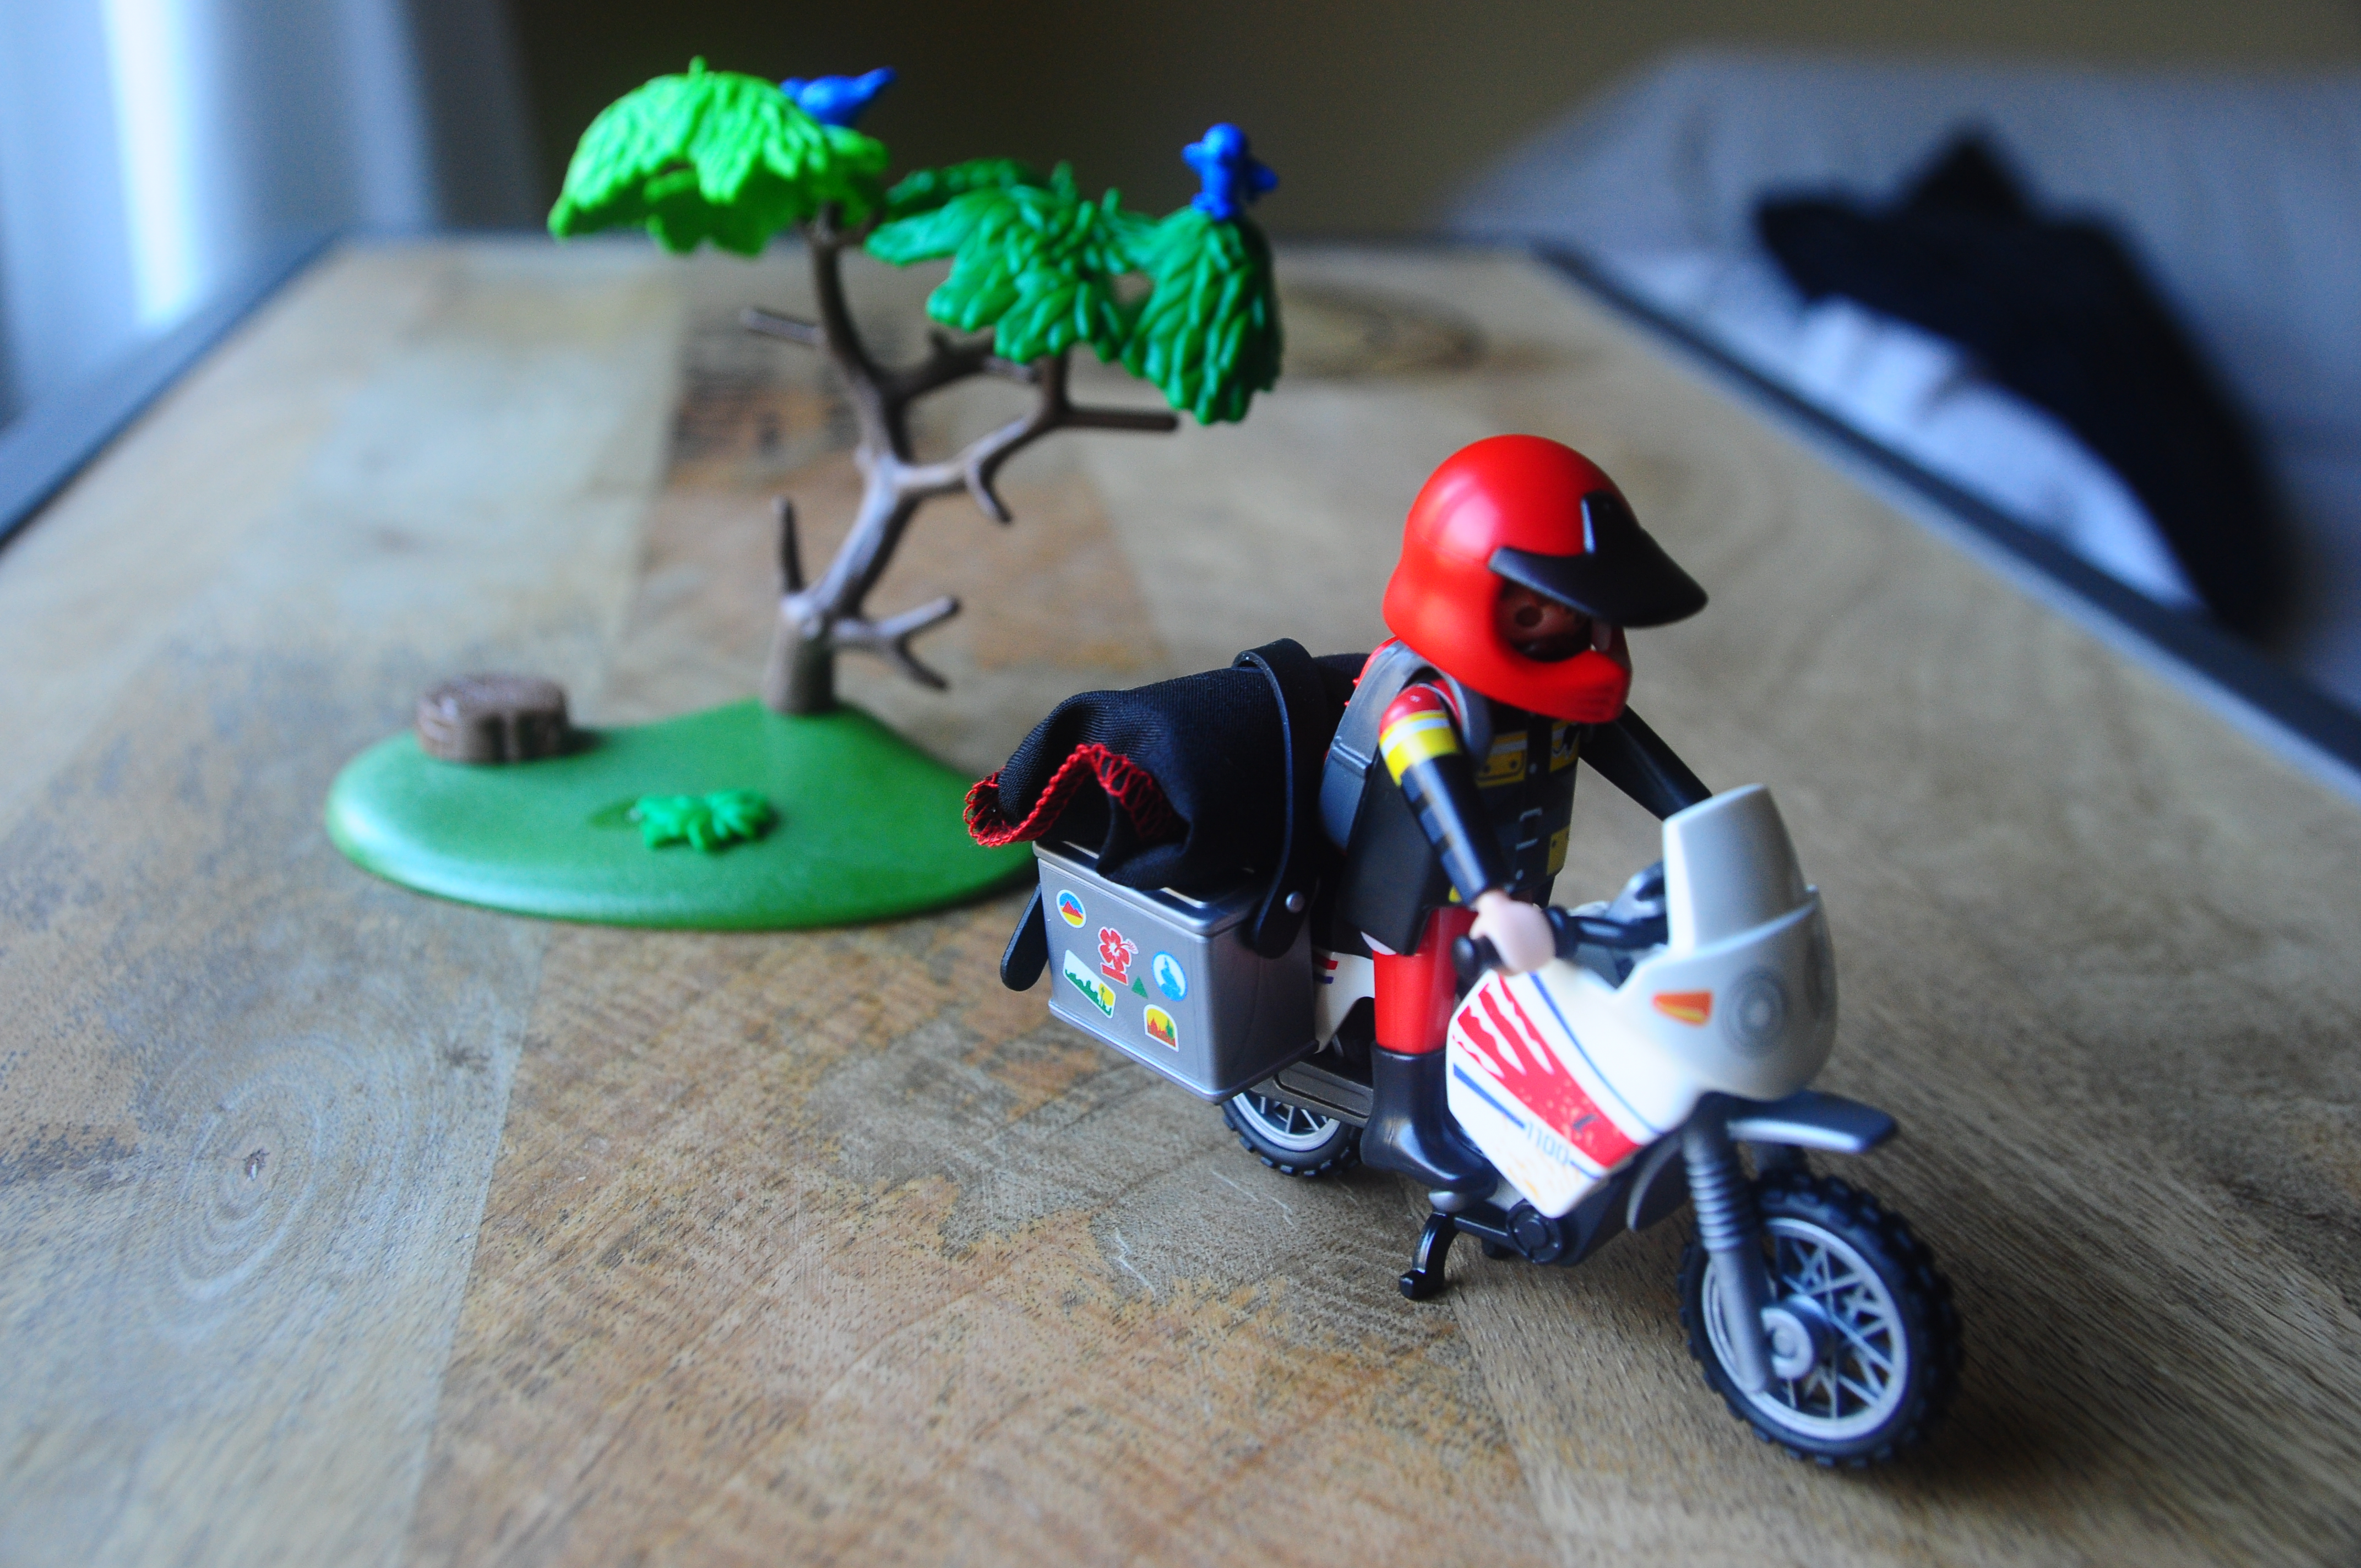
Morning comes, and with it, the reassuring routine that accompanies him throughout his adventures – put the panniers back on the bike and pack his bags…
The Kawasaki J300, the first scooter from the japanese maker. Honda, Yamaha and Suzuki, the other three big Japanese makers, have long had presence in this market with numerous products, and Kawasaki did not want to be left out of such a lucrative market as Europe. Nevertheless, the launch of this supposedly sporty scooter has come under some criticism.
Whoa… wait a second. A scooter? Isn’t this supposed to be a blog about bikes? Or at least adventure travel?
Well, yes, it is. The thing is that my V-Strom needed a new chain and steering bearings, so I had to leave in the workshop. Since I need it daily, I dropped by Hamamatsu motor one morning to see whether I could arrange a day in advance so I could get the job done on the same day, but Fabio, the owner, helpful as usual, told me to bring the bike anytime I wanted because they could lend me a replacement bike. Great. We arranged it for a couple of days later.
On the agreed day, I leave the bike in the hands of their mechanic and they lend me a Burgman 125, but with my work bag already under the seat (it fit perfectly, plus points for that model) we realize that the seat won’t lock in place. After fiddling with the key and trying to adjust the mounting points of the seat to make it fit better, the mechanic concludes that I can’t ride around a bike that can’t be locked and they roll out another one – the Kawasaki J300 they use as demo bike.
Well, look at that, an extra 175cc to run all the errand I have to run this morning, and on top of that, a new model. Take the chance and write something for the blog, I though.
So, let’s see what all this scooter craze is all about (they sell like hot cakes in Barcelona). As this is a bit of an improvised test I do not have the right gear for it: no Bikkembergs shoes, no down jacket with a hood and zero crash protection, no open helmet with a loosely fastened strap, no iPhone 6 to check my social media at each set of lights. Well nevermind, I’ll have to make do with a pair of motorbike boots and a motorbike jacket.
After realizing that the space under the seat is much smaller than in the Burgman, I sling my bag over my shoulder, sat on the thing and hit the start button. The 300cc single-cylinder engine fires up instantly and I join the flow of Barcelona traffic passing by the dealer’s gate. The first impression is that it brakes a lot, but when you put it in perspective, even a good mountain bike with hydraulic brakes is more efficient than my old V…
I gradually get acquainted with the brakes, I was making the ABS system work constantly on the back wheel as I am used to grabbing without hesitation a lever that to me is the clutch, and with the forward position, with the handlebars much closer. The mirrors don’t help to make me feel comfortable in traffic, either, too small and too close together. A bit more familiar with the bike when I reach Meridiana Avenue, I stop ahead of the cars at a set of lights ready to go for a usual scooter start. Around me, other similar weaponry, most of them with smaller engines. The lights turn green and, to my surprise, I am left behind by all the scooters waiting with me behind the zebra crossing. What is wrong with this? It’s a 300, it should easily have all those mopeds for breakfast…. At the next set of lights I find out what the problem is – I am riding this things as if it were a motorbike. Bit of gas, release the clutch, accelerate progressively once on the move and ride the torque. It seems that is not the way to go with a scooter, it is much more dual. Lights turn green, twist the throttle all the way with zero sympathy for the oily bits and brake hard 20 meters down the street at the next set of lights. Ridden like this, it makes its way more than swiftly among the traffic, but I would never, ever buy one of these things secondhand. What hard life they have…
Once outside Barcelona, on the motorway, it is time to test how it rides on fast roads. Now that I don’t have to put my foot down at every set of lights, I get myself comfortable and examine the riding position. Leg protection is clearly better than on a bike, but the screen is too low and offers little wind protection for the upper body and head, it is impossible to ride with the visor up. There is no foot rest behind the front bodywork to stretch your legs à la T-Max, and with the feet on the platform my toes point slightly inwards, making the position a bit uncomfortable.
Aside from these gripes, the J300 reaches 140km/h without difficulty and feels quite stable. To go back to the criticism mentioned at the beginning, aside from the obvious complaints about Kawasaki, a brand known for its sports bikes, received for launching a scooter, it also came under harsh criticism for launching what is essentially a restyled Kymco 300. While it is true that it enters a very competitive market and they did not want to run the risk of investing lots of money and time designing a product from scratch and risk getting it wrong, it does not help the brand’s sporty image. The suspension settings are supposed to be different to give it its own personality, and it really does corner well, but then you pay the price in city, where it will mostly be used, with a damping that is a bit on the hard side.
Once in Sabadell I park to run an errand and realize that the helmet doesn’t fit under the seat either… OK, it is a dual sports Shoei, the ones with sun visor, maybe a regular full-face helmet might fit, but it looked a bit tight. I have to drag the bag and the helmet with me. When I lock the seat, I notice a small fit and finish problem – it has two hooks, but only one locks. For both to lock properly, I have to slam the seat decisively. On a more positive side, the J300 is incredibly easy to get on and off the centerstand and to maneuver when stopped.
Next stint – back home for lunch; after a bit of city and motorway, it is now time to take it to a winding road to get a final opinion. Here the suspensions work great again, the scooter behaves well, it is agile and the engine has enough power to even have a bit of fun. The main problem for me is that at the end of the day, it is still a scooter, with everything that implies regarding dynamics. The CVT has a bit of lag before sending the power I’m dialing with my hand to the floor; when leaning into a corner or a roundabout that slight power gap is not very confidence-inspiring. The other big problem is the riding position. On spirited riding or motorway speed, sitting in the same position as if I were on the toilet gives me zero feeling of control. I can’t use the feet or the legs to help steer the thing, and I keep having the feeling that I am going to fly off the side of the seat at any moment.
Before riding back to the city again I stop to take a few pictures and assess the looks of the scooter. With sharp and edgy lines and a front headlamp that reminds a bit of her Z bigger sisters, the J300 does live up to its sporty pretensions, although this is a highly subjective matter, so look at the pictures and form your own opinion.
Back in Barcelona the advantages of not having to constantly shift gears are clear, but I am still not used to some things, like not being able to hold the brake with my foot and have both hands free without rolling back or forward.
After getting my bike back the following morning, the most honest verdict I can return is that I did not miss the scooter for one second. It is a great machine, with a good engine, nice, comfortable, agile and well built, and to ride around exclusively in the city, it might be a very good option, but I did not like it on the road compared to a proper motorbike, which leads me to wonder: to get around in the city, 125cc are more than enough, and to ride on the open road, any motorbike is better than a scooter. Then, why do people buy big scooters? Especially when for the same money they could get a good motorbike? Unless you can afford to keep more than one machine in your garage and you really, really want a scooter, I still don’t get big scooters.

 I sent a complaint to the vendor with these pictures attached, and got a reply in less than 24 hours: nothing wrong with the stickers, the white stripe is actually transparent to allow for differences in the paint in different bikes. What I saw white was actually the protective film behind the sticker. Well, that was embarrassing…
 Step two: without removing the white paper at the back of the stickers, put them in the desired position, make sure everything lines up correctly and fix them in place with masking tape.
 Step three: lift the sticker on either side of the masking tape, separate it from the white paper and cut the paper away. (Important tip here – you can tear the paper, but if there are transparent areas in the sticker, small shreds of paper might remain stuck to it and be visible, so it is better to cut it clean with a pair of scissors).

 Press the sticker against the tank surface from the masking tape outwards, making sure there are no wrinkles or air bubbles. A plastic ice scratcher is a good tool to do that.
 Step four: one third of the sticker securely in place, remove the masking tape, lift the other two thirds and repeat the process.
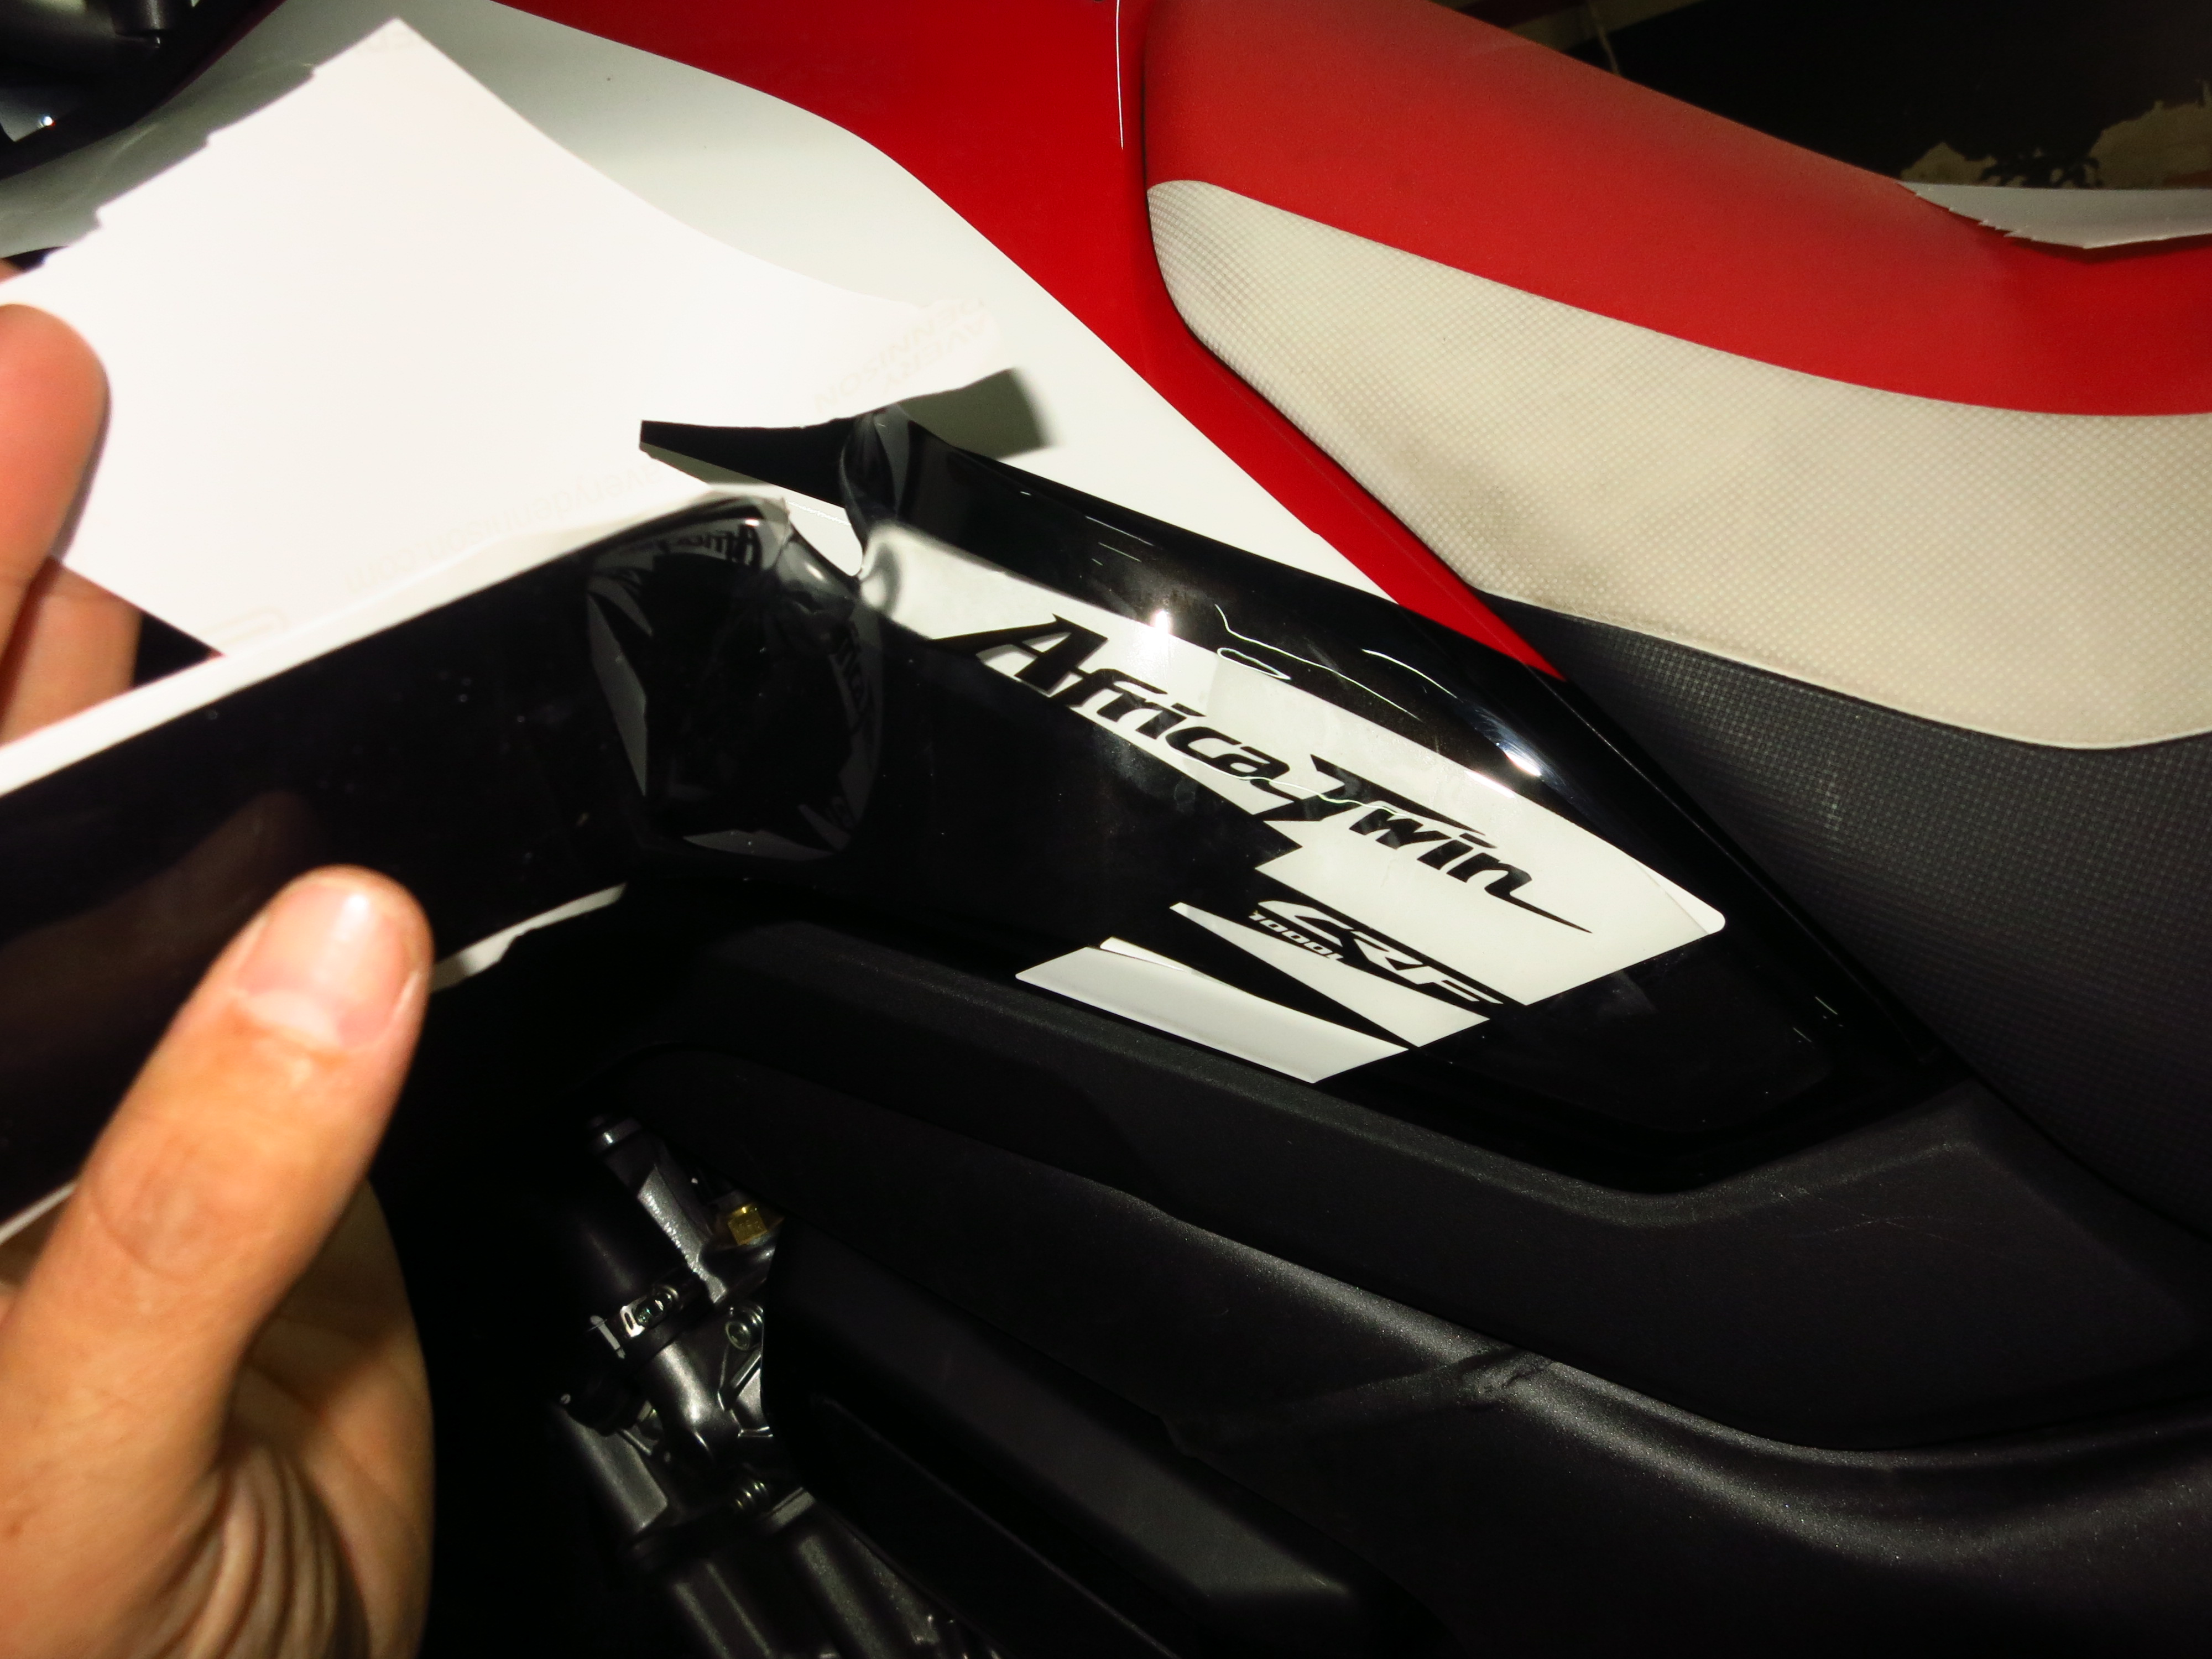 The result looks great:
 The white lines you can see are reflections from the fluorescent tubes on the ceiling.