
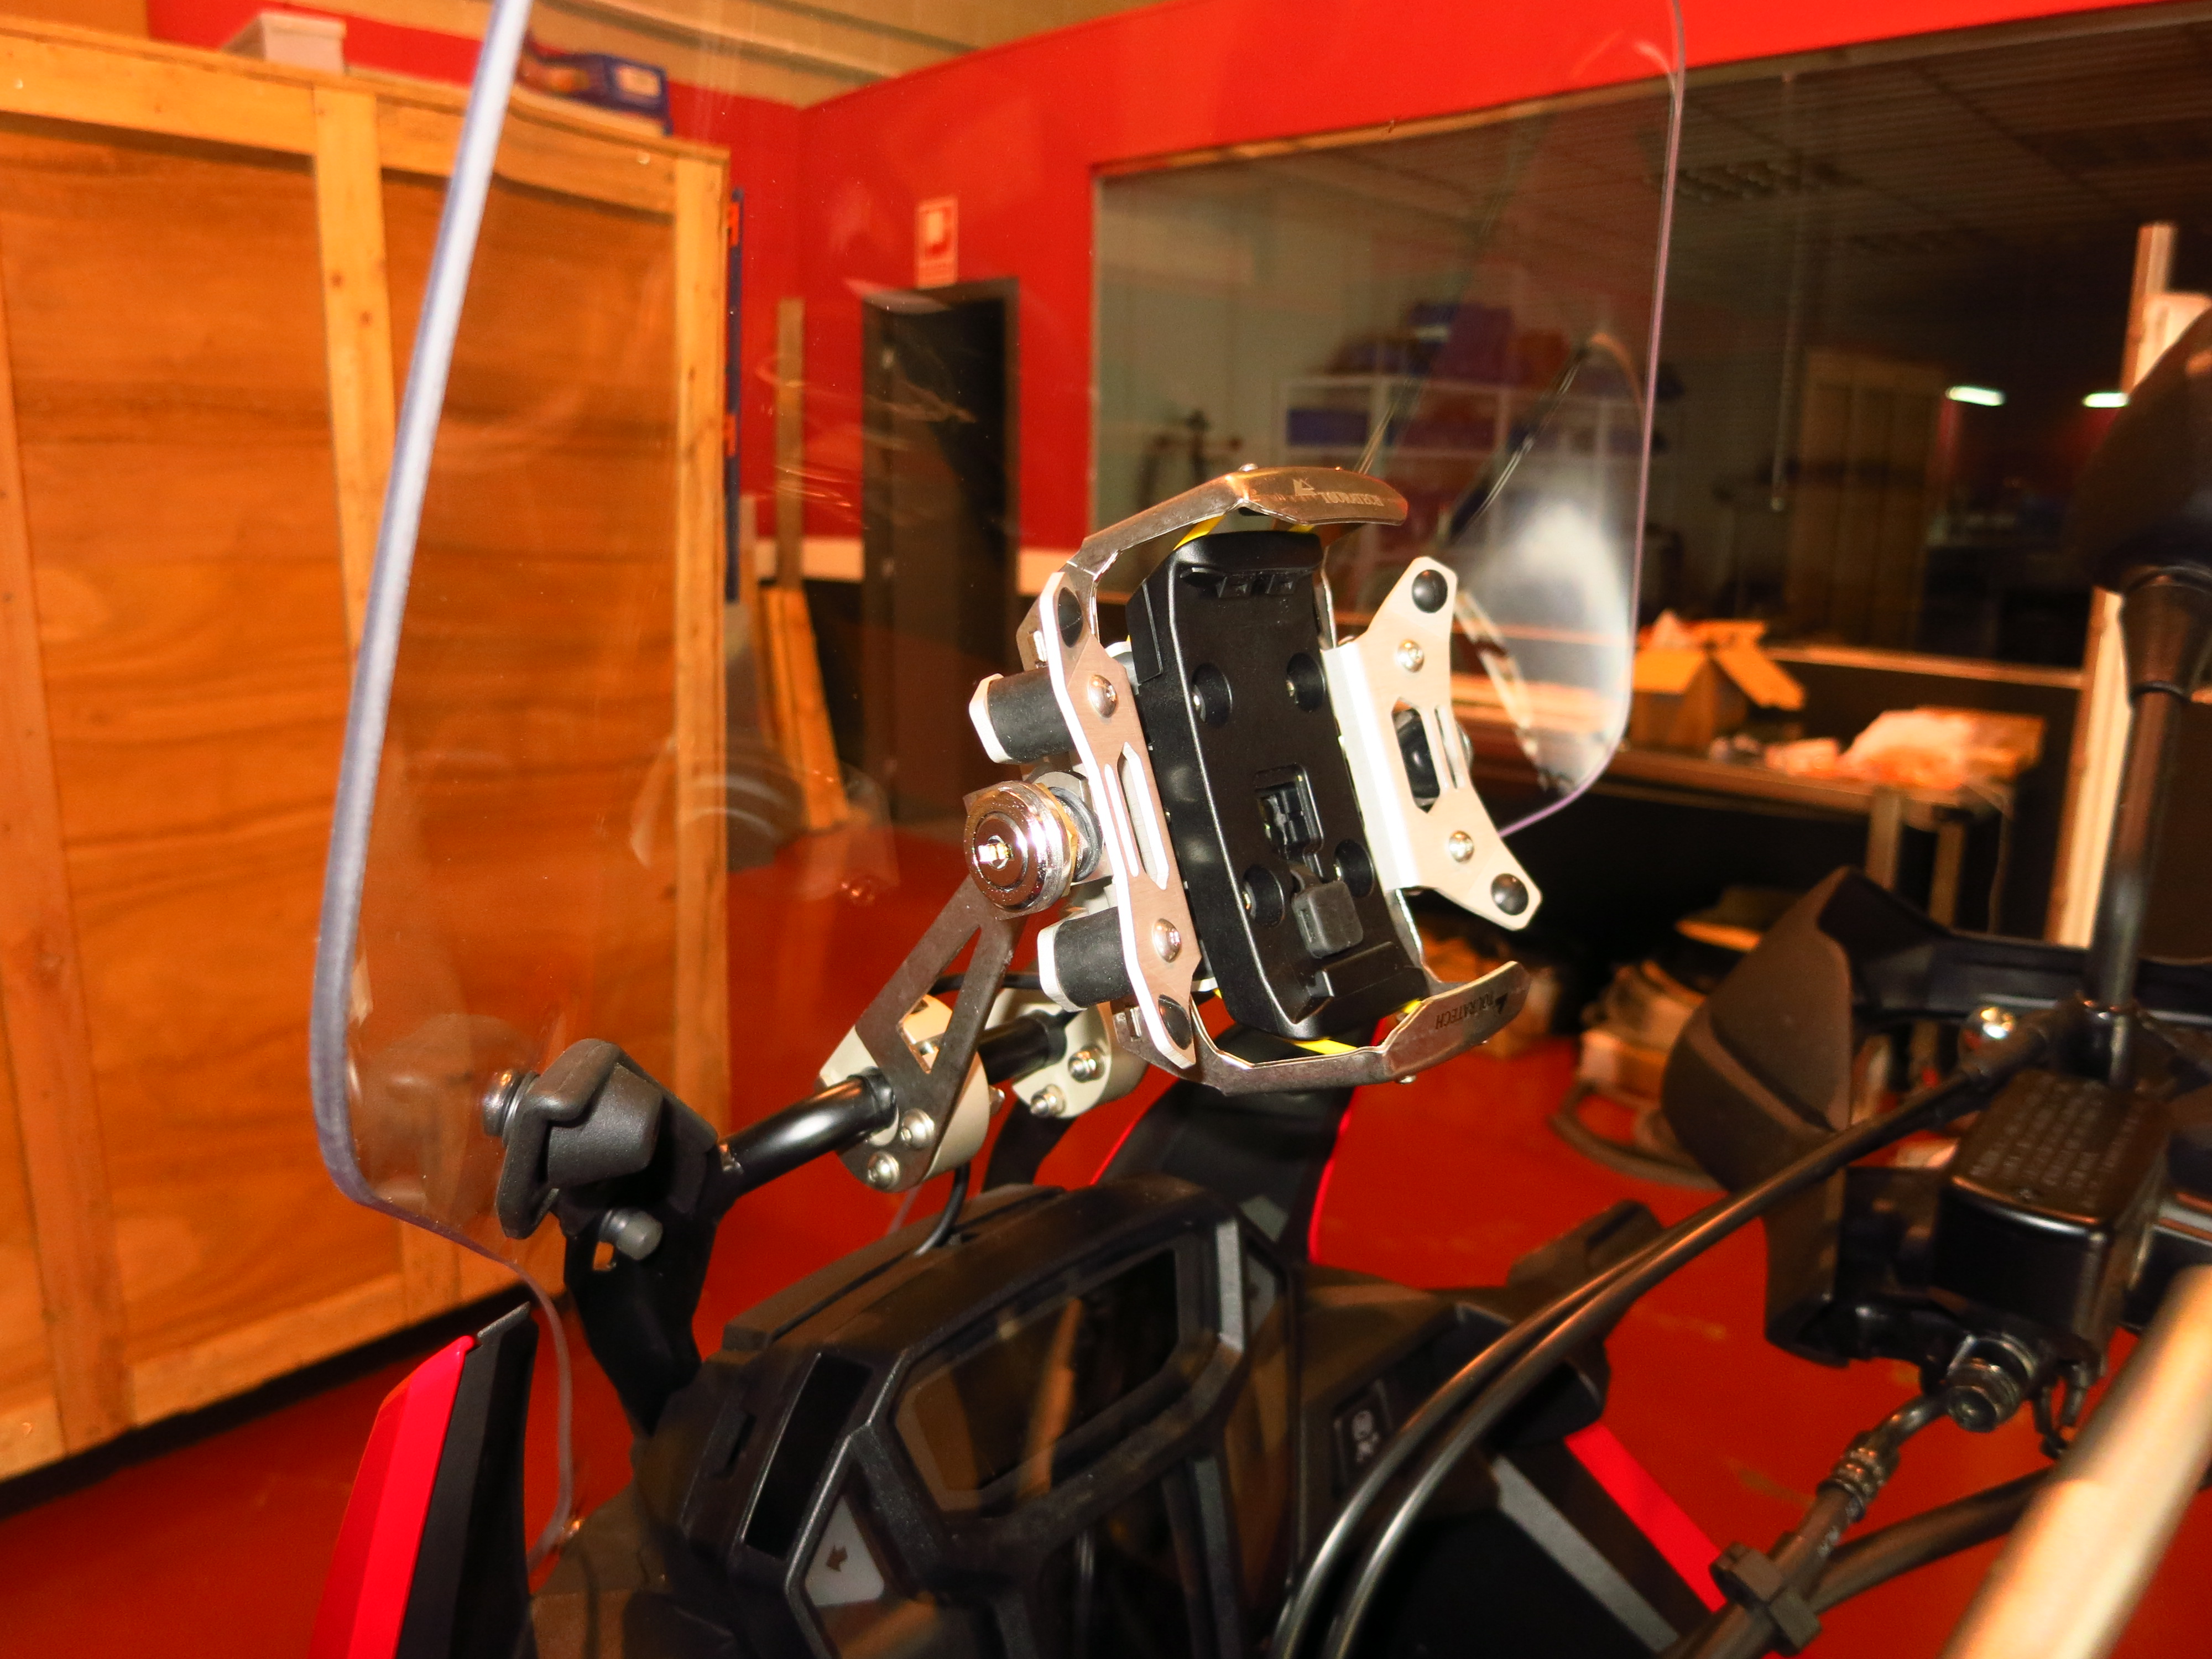
Next weekend some friends and I are taking part in the Rider1000, so it was imperative that I found some time to fit the Touratech GPS cradle for my Garmin, since I still do not have a 12V socket to plug the unit in. If you ride alone often and use a GPS, one of these lockable cradles is a good investment, it allows you to pop into a shop or pay for gas and leave the motorbike unattended for a few minutes without having to remove the unit which could otherwise get stolen very easily. Mind you, if someone really wants to steal it, they will still find a way fairly quickly…
On my old V-Strom I wired the cradle directly to the battery, but this time I wanted to do a more professional job and connect it to a switched power source. That, the fact that compared to the V space is at a premium here and my intention to fit more accessories that require wiring in the future (12V socket, heated grips, fog lamps…) made me decide to fit a fuse box to simplify wiring and keep relays to a minimum.
The first one I considered was the Rowe Electronics PDM60. It offers lots of interesting features – very tough design, no fuses (it’s electronic), highly customizable (you can set contact delay times, select power, and choose switched or constant power for each of the six circuits), and can deal with a total of 60A.

There were a few drawbacks, however – it is very expensive, if it fails you are left with no fuse protection, and availability (at the moment of buying, it was not in stock anywhere). So I bought a fuse box from Fuzeblocks. It cost half the price, was available immediately and is a simple yet practical design – it consists of a connection box with six fused circuits and a relay that powers the whole box. Depending on the position of each fuse, its circuit is constant or switched power, and the relay it uses is a simple automotive relay that can be easily found in case it fails. It can handle up to 30A, which is enough for my needs.

A friend who works at an engineering company offered to go to his job on Saturday, where we would have access to tools, connectors, soldering equipment, etc. Having the proper tools for the job makes things much easier, but it still took us three hours and a half to get it done.
First of all, removing the seat, fairings, windscreen and battery. I have always complained that the V-Strom had too much plastic to remove, that the tank had to be completely taken off the bike to access the air filter… Well, the AT is even worse. Removing both front fairings, the plastic fascia around the headlights and the windscreen takes a good while. And that is before I fit crash bars… we will see what happens then. I am not going to post instructions here, as other people have already done a very good job of it, if you want to see how to remove the fairings, here is an excellent video:
Even after removing all this plastic you do not get full access to all the wiring in the front part of the bike, but in our case it was enough for what we wanted to do.
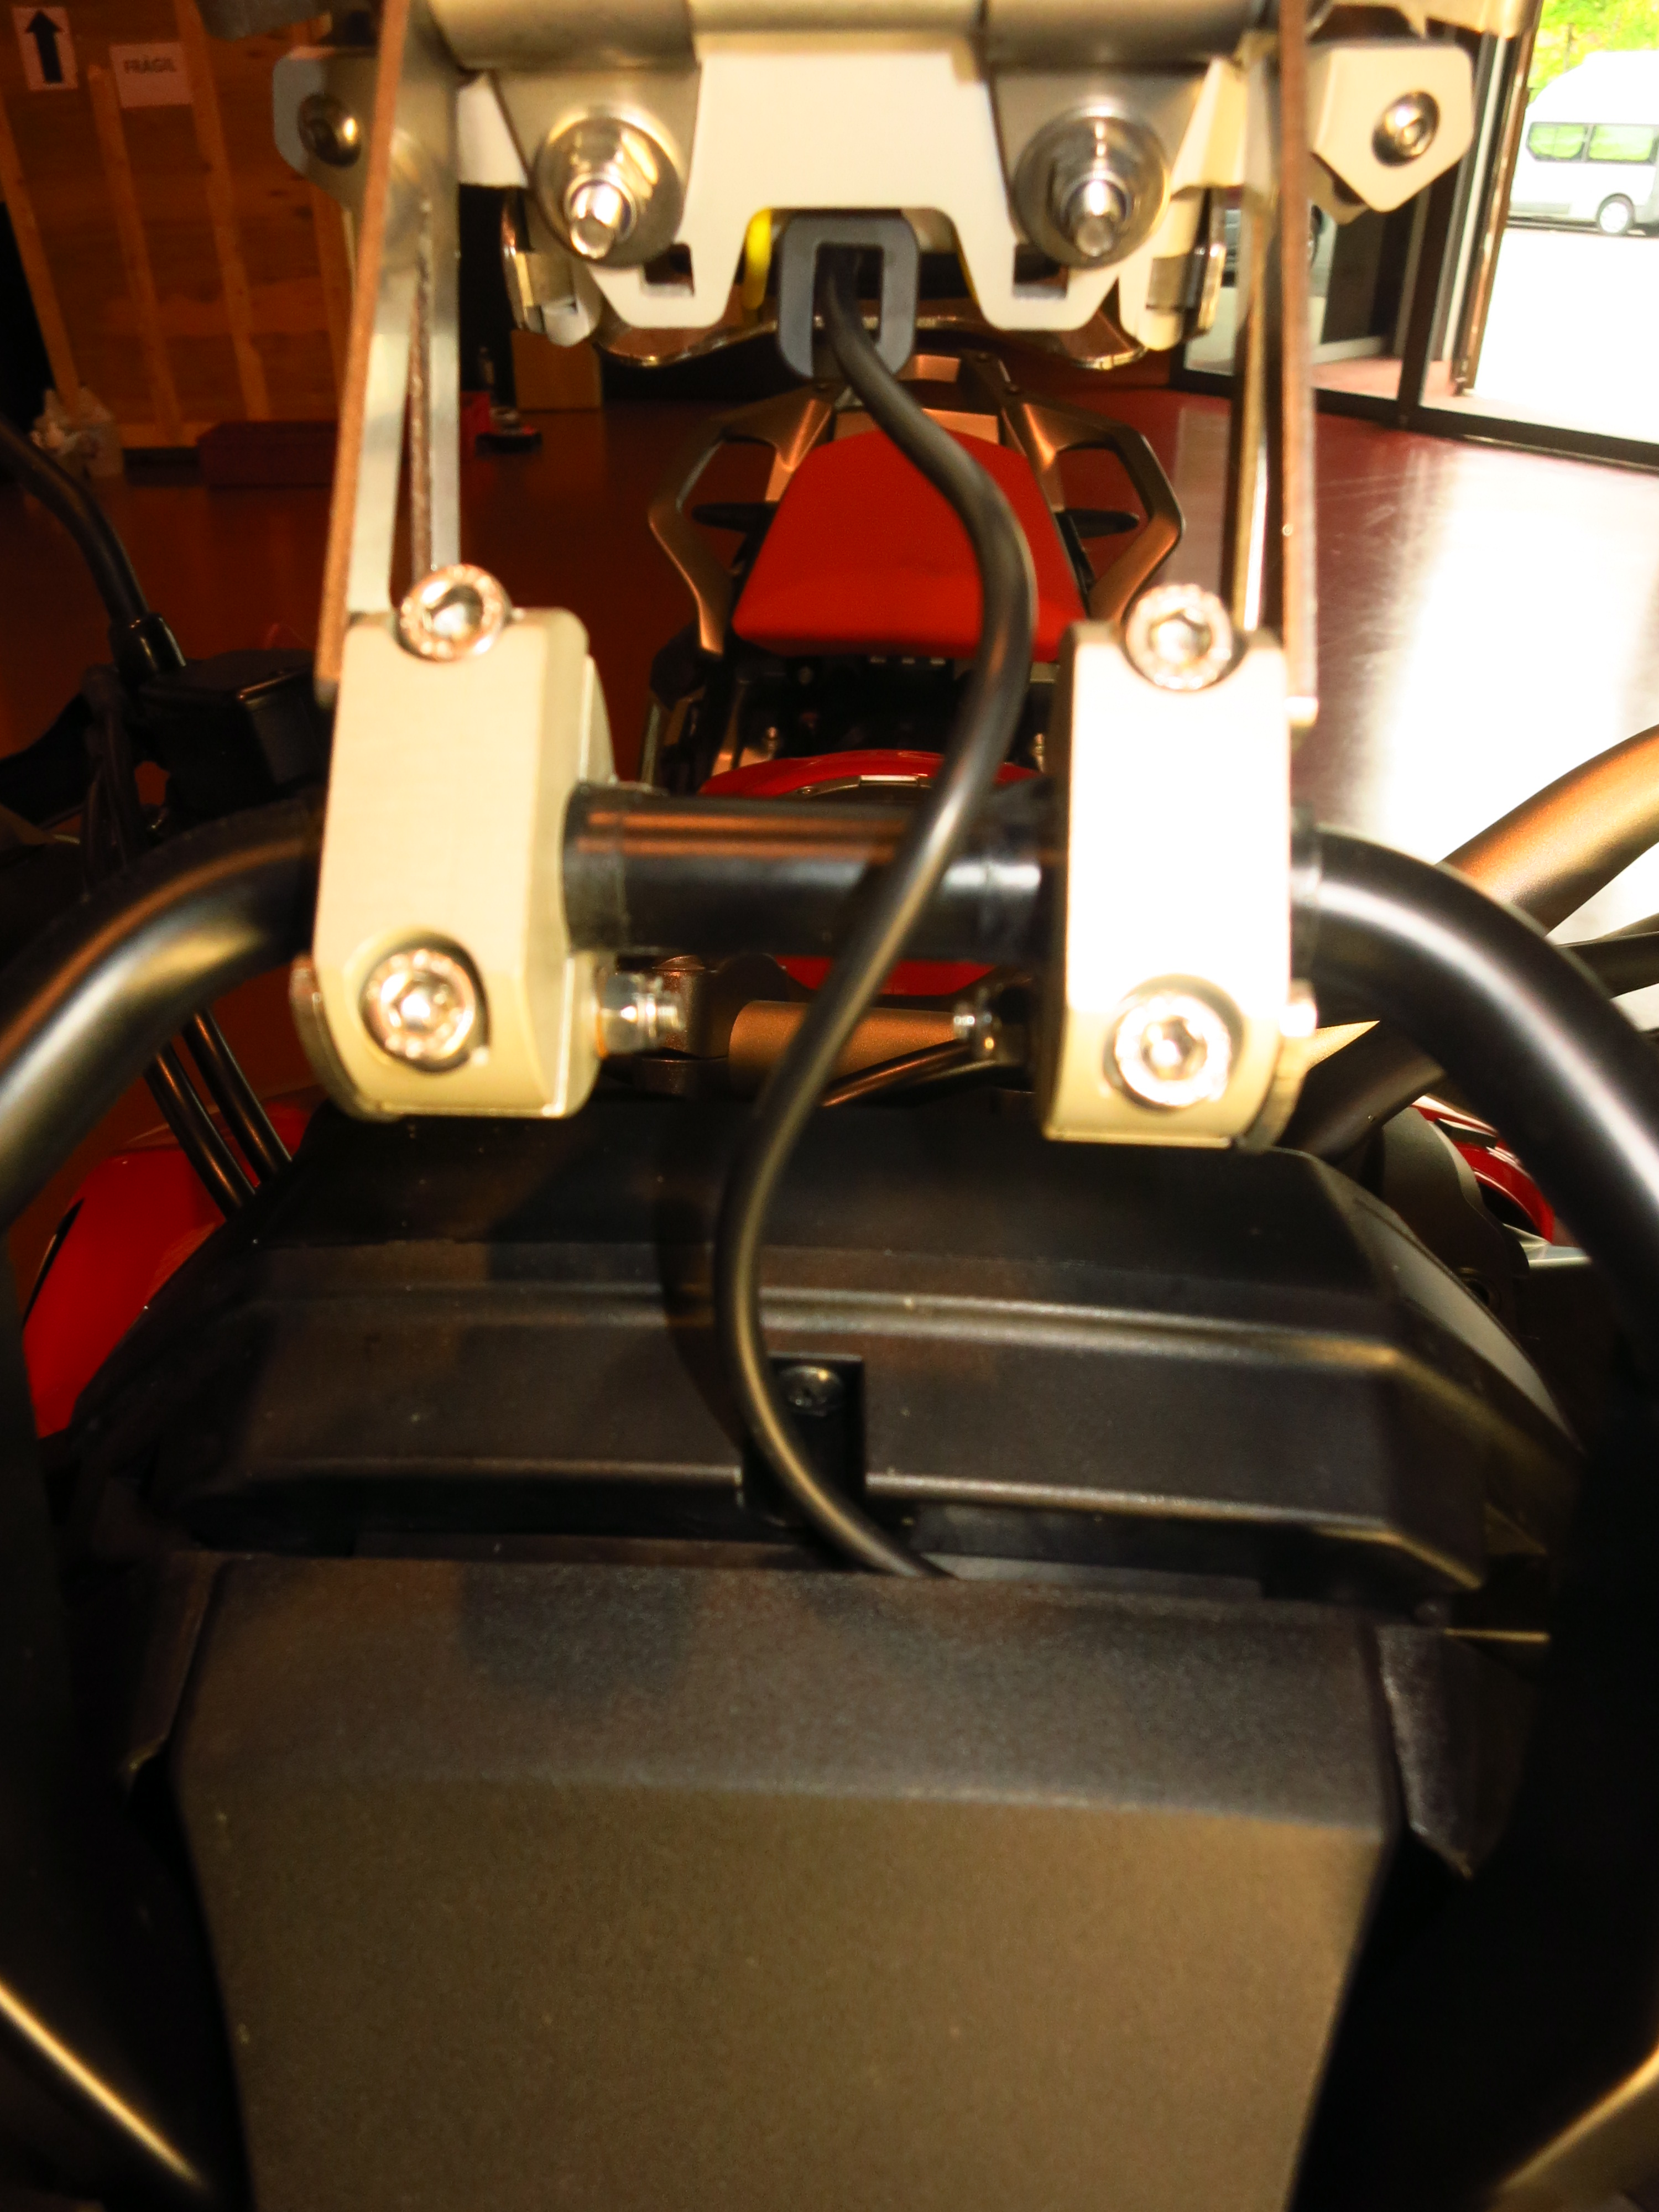
 The Fuzeblock box was going to be installed in the only place there is space for it, under the seat. There is a very nice flat surface that seems to have been specially designed for it. It needs three wires – positive and ground directly from the battery and a switched positive to activate the relay.
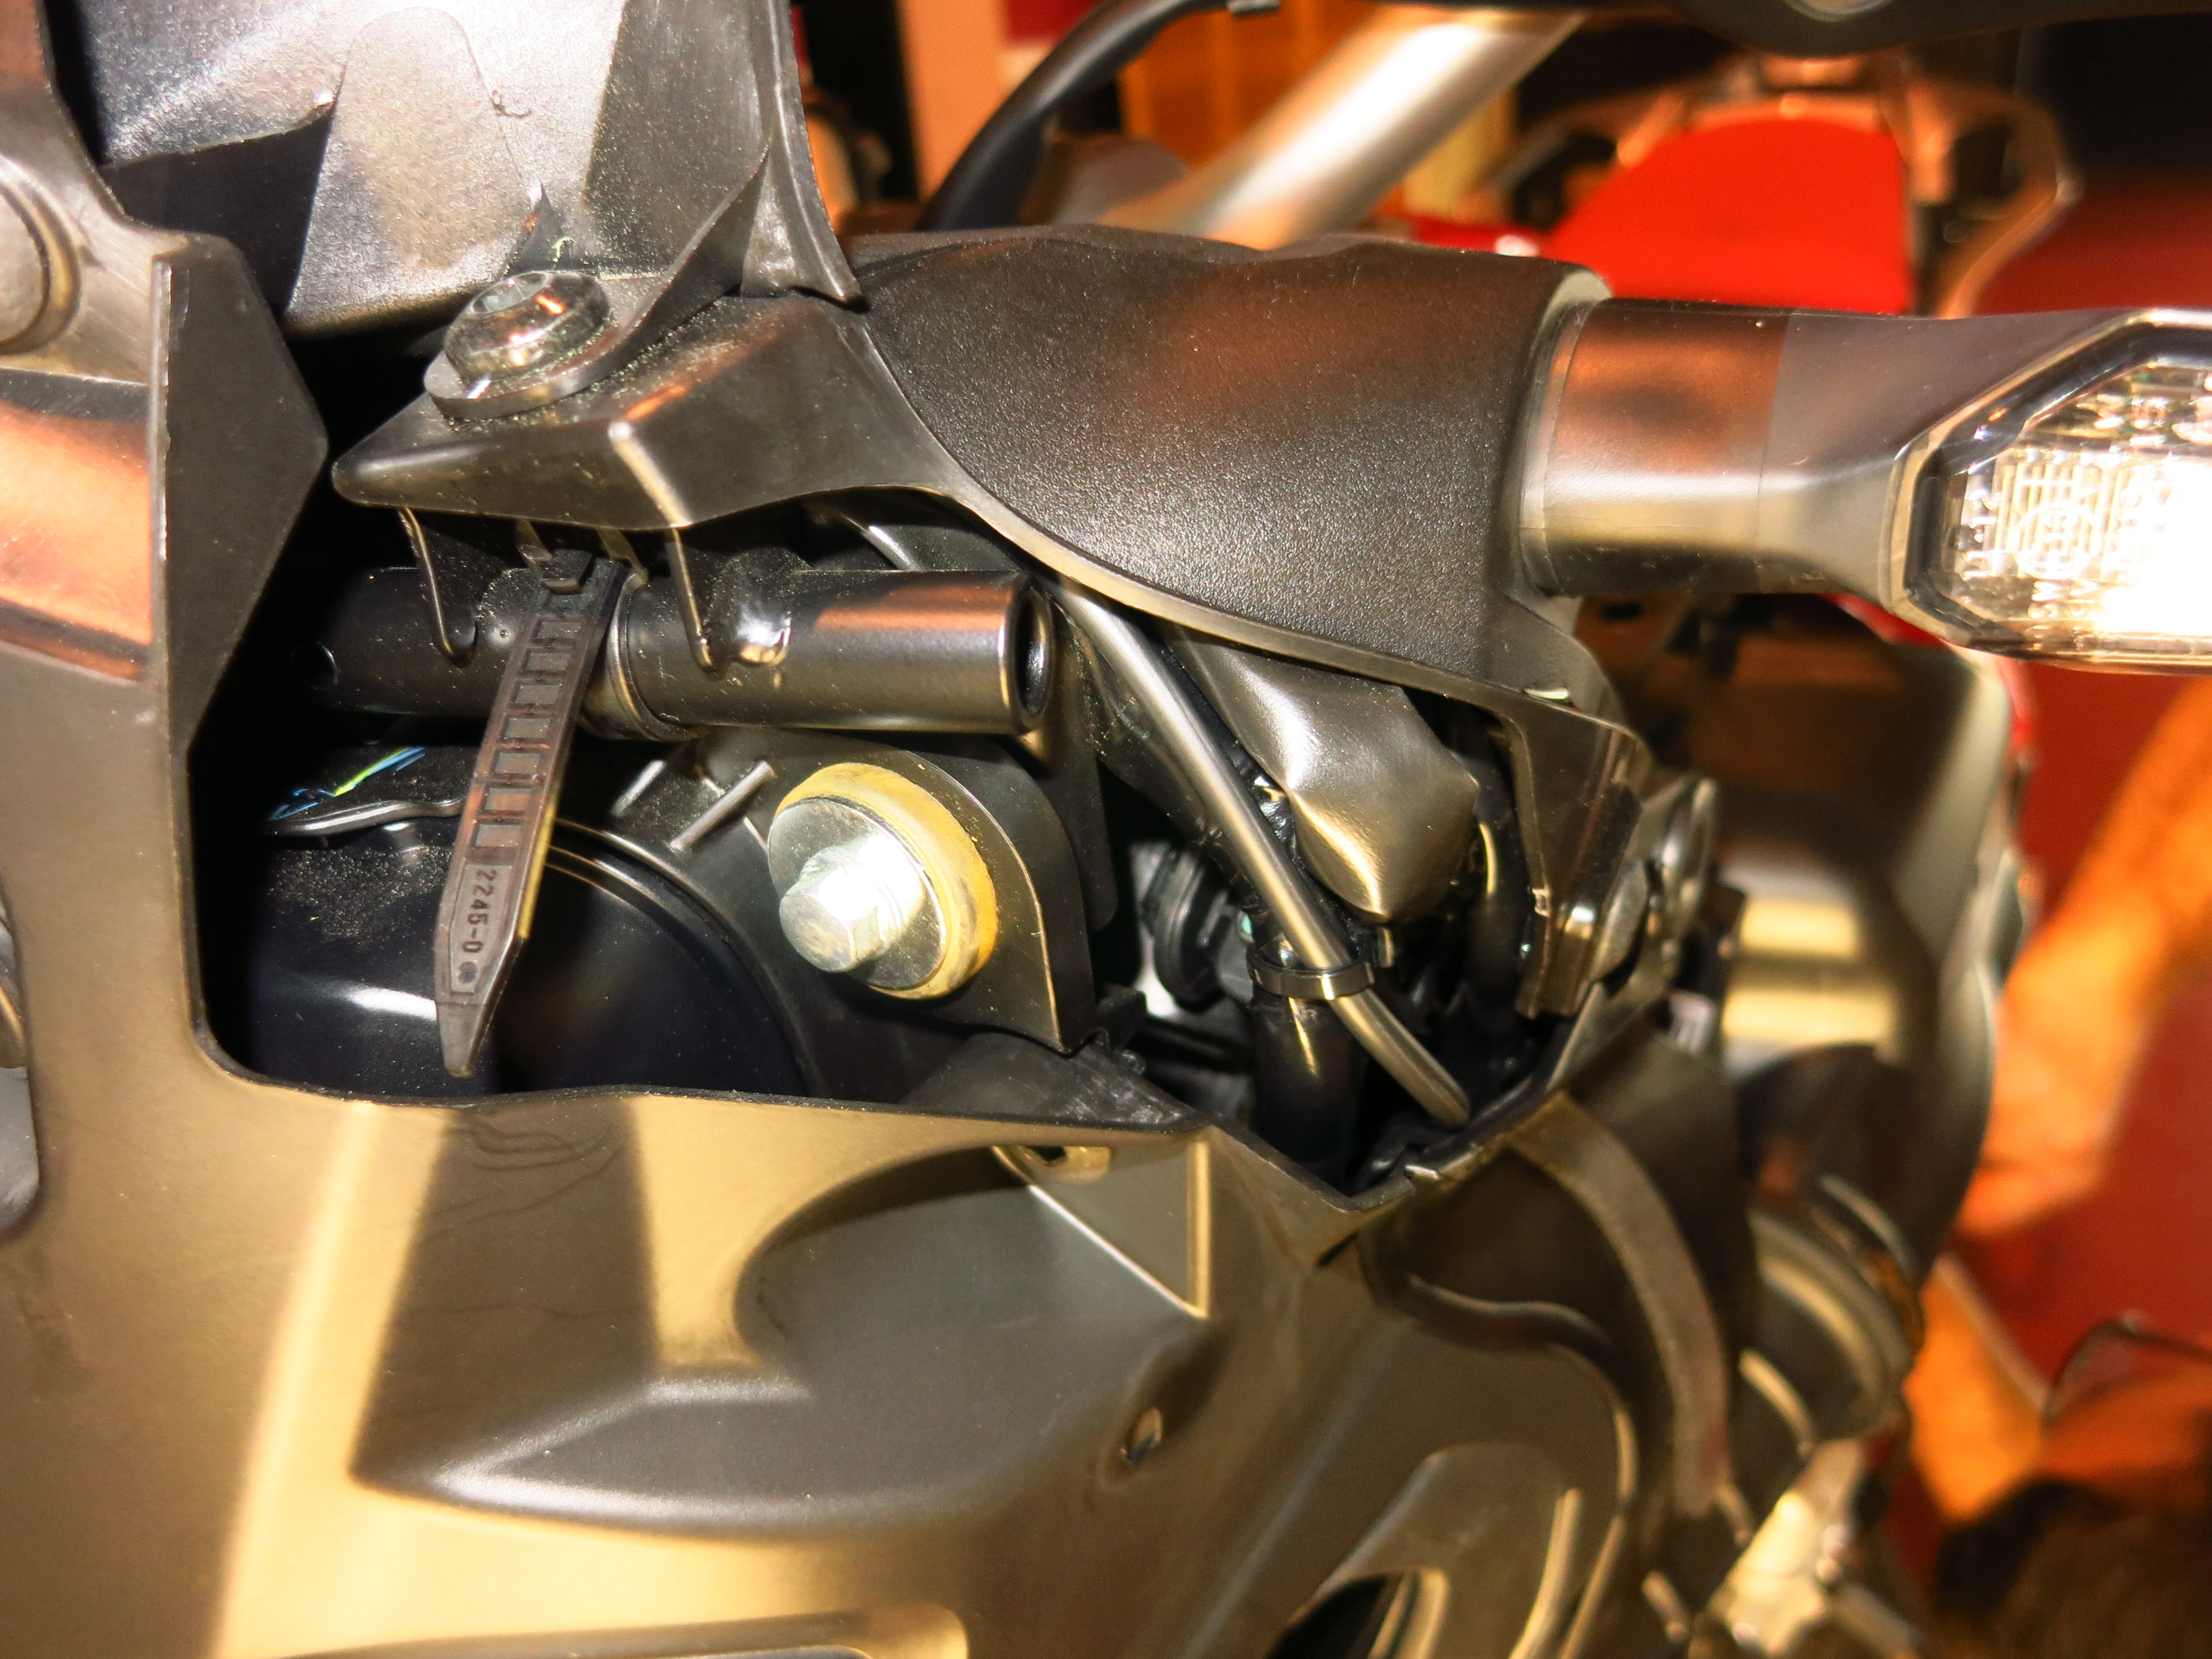
 The first step was to find a switched power source, which was an easy task thanks to the author of the video above. There is a six-pin connector under the passenger seat for the OEM alarm system. The bottom left corner wire (facing the connector) only receives tension with the contact on, which was what we were looking for. It is the most accessible point, and the closer one to the Fuzeblock.
 Next step was to route two wires to the battery. I had not been able to find instructions on how to remove the fuel tank, nor did we have time to try, but we found that we could route the wires to the battery on the left side of the tank, behind the frame and we protected them with heat-shrink tubing.
 With the Fuzeblock installed and wired, it was time to route the wire from there to the GPS cradle, which proved to be more complicated than we thought. The end of the wire that mounts in the cradle has a square connector that was too big to go through some gaps, and the other end has a control box that was simply impossible to fit through anything. To make matters worse, the wire was not long enough to reach the Fuzeblock.
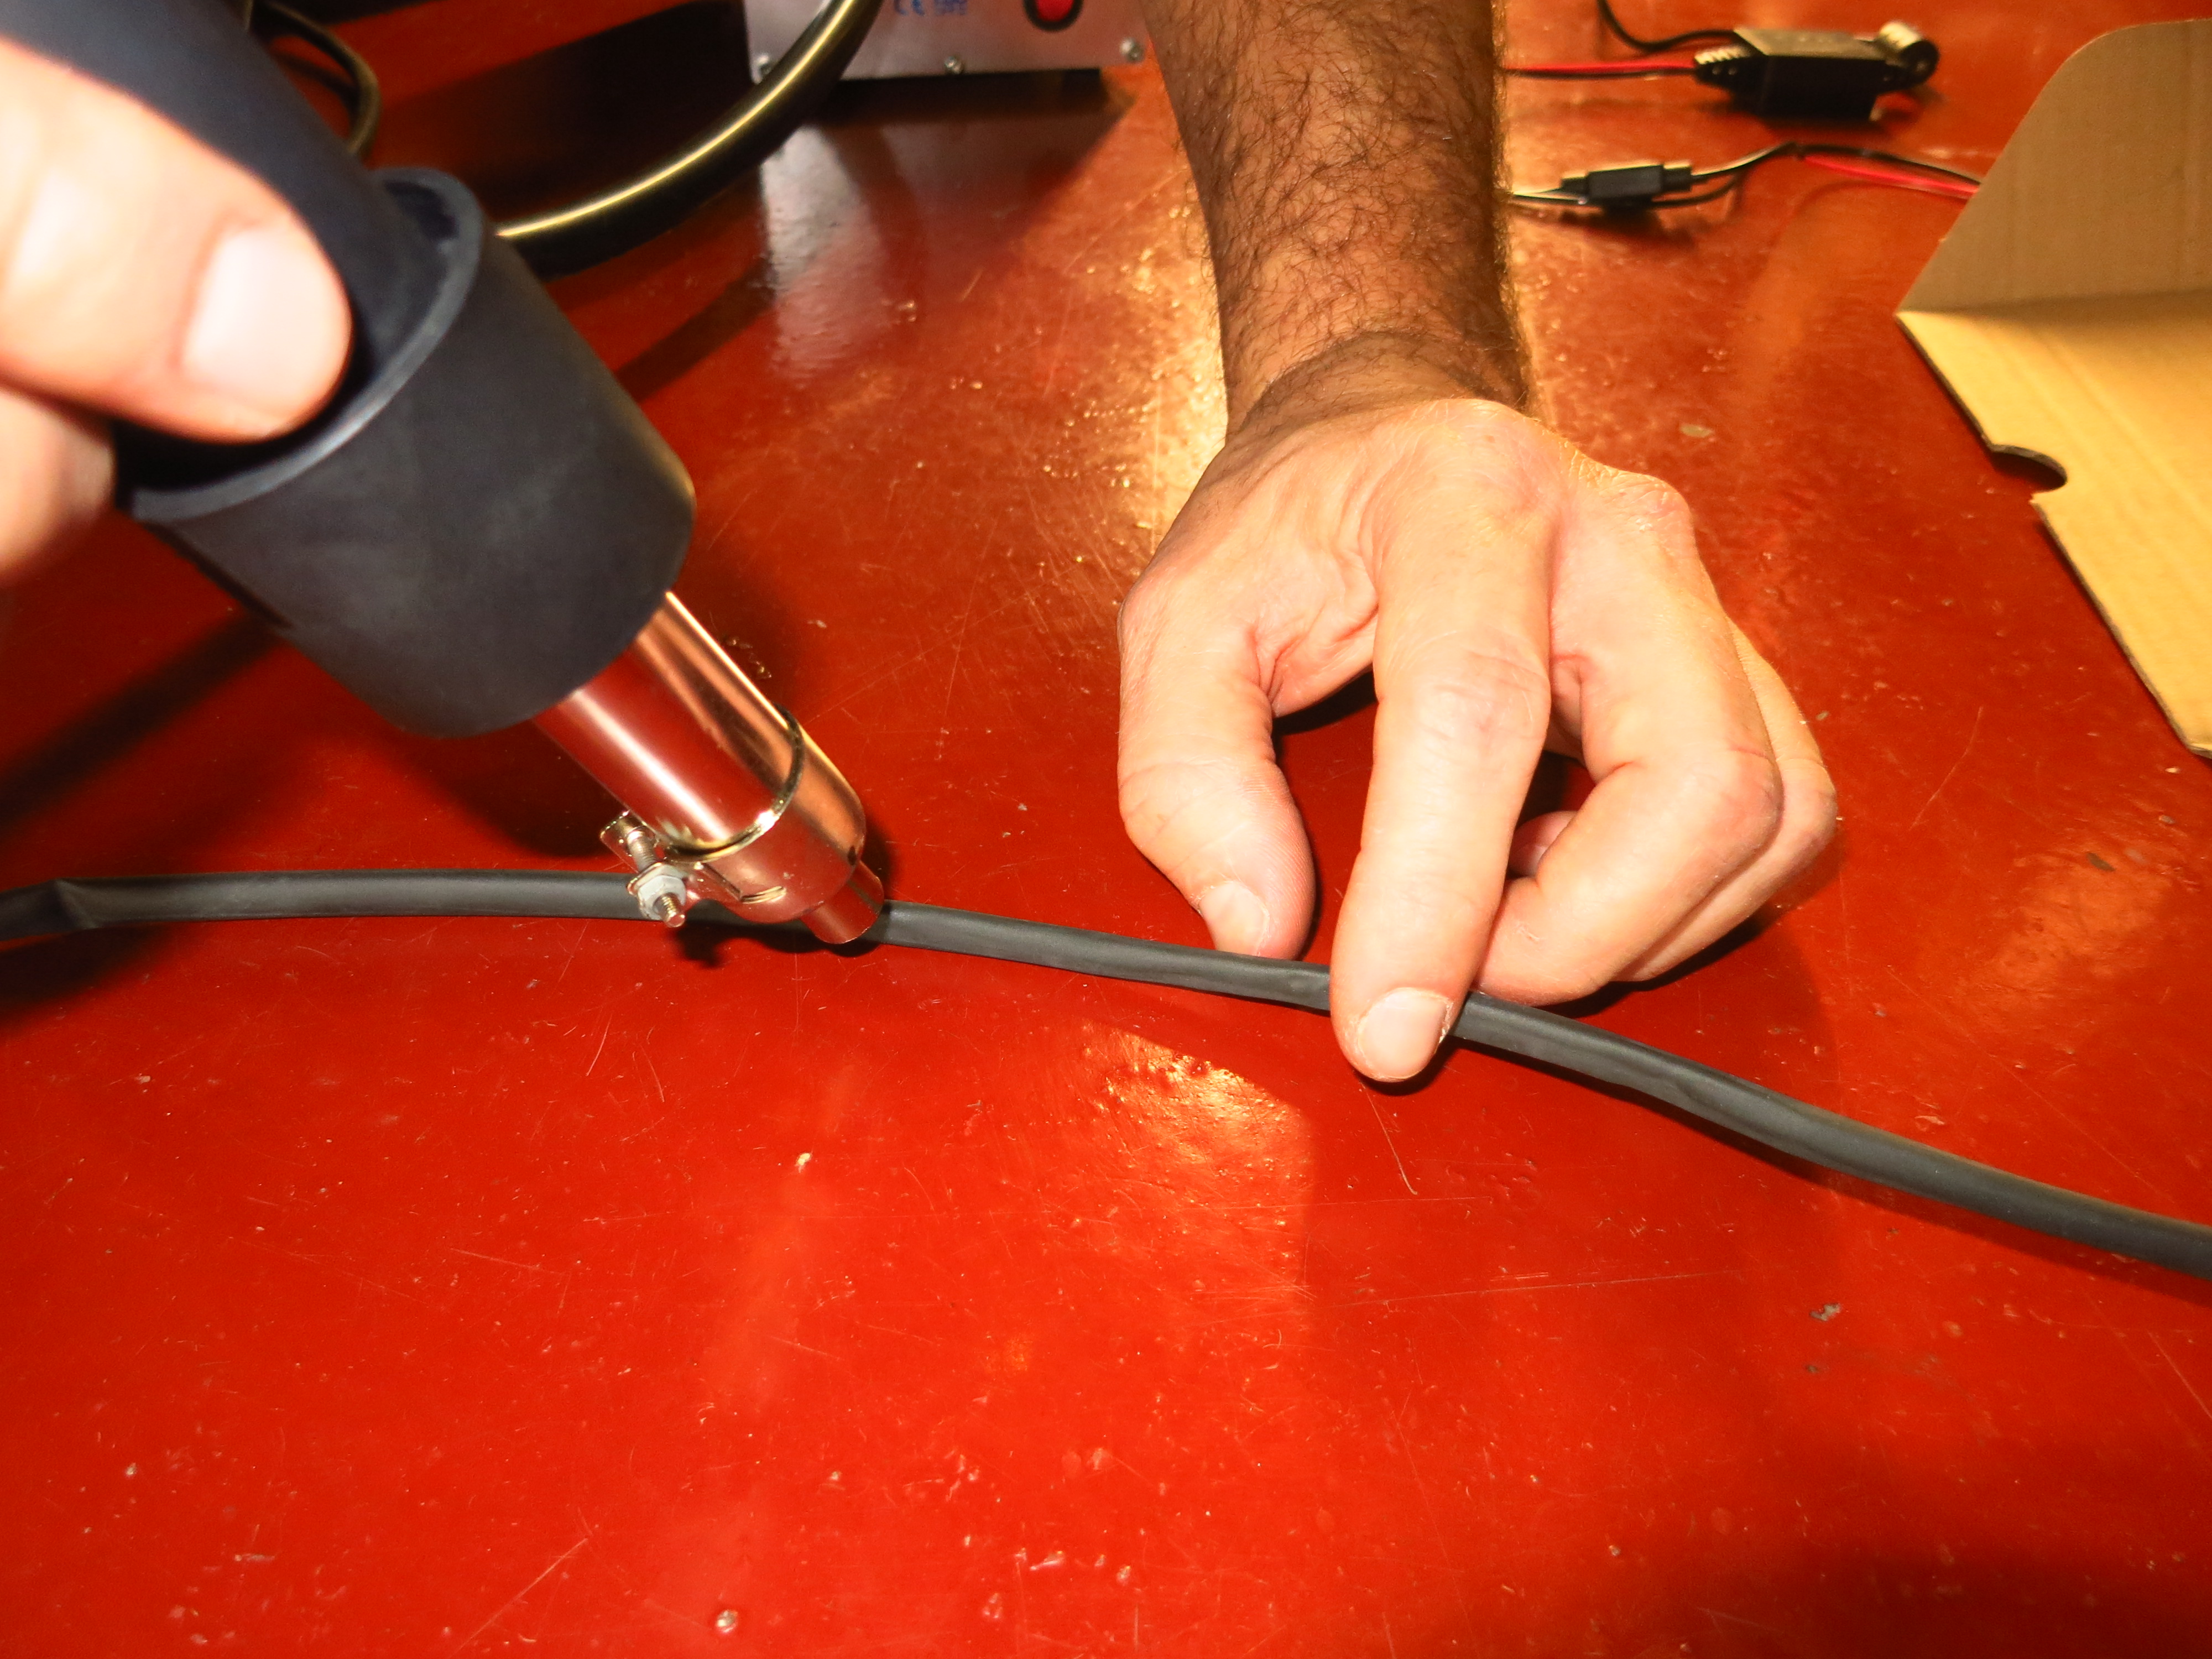
 Well, always look on the bright side of life, they say, so since we had to cut the wire to extend it, we were able to route following the main wiring inside the fascia, down over the radiator, above the battery, through the very narrow gap between the frame and the petrol tank and into the space under the seat.
 We then soldered the extension and covered it with more heat-shrink tubing. Last step was find some space for the control box (no more space left under the seat now) and tidy all the wiring a bit.
 Putting the fairing back on was also harder than anticipated. Most instructions just say ‘put them back on’, or ‘follow the reverse process’, but it seems that everybody forgets to mention how many small plastic tabs and lips there are, and everything has to line up perfectly at the same time before you can start putting the clips back on.
 Fortunately, with 12,000km service intervals I will not need to remove the fairings too often, but there is the matter of all the other accessories that I still want to install. Some things I already have, some things are ordered, some others I am saving for, but I am going to wait until I have everything ready and install everything over one single weekend. Wish me luck!
Thanks very much to my friend Jorge for his help and the equipment he provided.
