Day 2 – Saturday 30th July – More ferry and Civitavecchia to Terni (113km)
Grimaldi Ferries could be considered the Ryanair of the Mediterranean – the cheapest way to get yourself and your vehicle to your holiday destination from Barcelona, and it shows. You get what you pay for, and the advantage of this is that if what you want to pay for are your holidays on the Balkans and not a cabin on a cruise across the Med, you can board with a deck ticket and just find a quiet spot to lay down your camping matress to spend the night and no one will look at you twice. Everybody does it. So we found ourselves a “luxury” corner (one with a power outlet) and settled down for the night.
The following day was a lot quieter than first impressions had led me to expect, and time was mostly spent writing this blog, playing cards and reading between the top deck and a small deserted shaded side deck two levels down with a nice sea breeze. The journey felt a lot shorter than it really was, and despite the initial two-hour delay, we were in Civitavecchia at about 19:30.
We had a bit over 100km to get to Terni, a town more or less halfway across Italy where we were going to spend the night, and Italy welcomed us with a great country road gently sweeping across fields and low hills with the sun glowing red as it set in the background.
Day 1 – Friday 29th July – Ferry from Barcelona to Civitavecchia (0km)
I had had the new bike for more than three months; it had dutifully fulfilled its role as my daily transport to and from work and had had its occasional outing at the weekend, but day after day I had been feeling that it needed, longed for a proper trip, the beast wanted to be unleashed away from the city. So when the holiday have finally came, it was time to take it on its first long trip. Where? The Balkans.
The plan was to take a ferry to Italy, cross the country, take another ferry and start from Croatia, then ride south to Montenegro, Albania, Kosovo, Macedonia, Bulgaria, Greece and back to Italy via another ferry.
I started my holidays at the very end of July. This had an instant impact on the beginning of my holidays in two notable ways.
One, I got a reminder of how hot and damp the city is this time of year as I dragged about 40kg of luggage from my flat to the garage where the bike sleeps, one piece at a time. After a lot of sweating, pulling straps and tying knots, the game of Tetris was complete and the bike loaded.
Second, I got a taste of the joys of starting my holiday at the same time as millions of other people in the shape of a neverending queue at the ferry terminal.
Once on board, the ferry was choke full of loud people, screaming kids and dodgy-looking Eastern European truck driveres, one of whom tried to start a fight at the top deck bar. At least the two-hour delay before we set sail was made much more enjoyable by the company of an Argentinian couple who have been travelling around the world on their motorbike for over two years, and who had a lot of stories to share. You can find out more about them here and here.
As I explained when I fitted the fuse box to the AT, I still had to install a few last things, most of which requiered routing wires from the handlebars and front part of the bike, under the fuel tank, and to the box under the seat. Space is tight, the fuel tank had to come out and I did not want to have to do it every time I was going to fit something, so I waited patiently until all parts had been delivered and got down to it with only a week to spare before the AT’s first big trip. I was going to fit:
Front fog lamps
Heated grips
12V socket
Chain oiler system
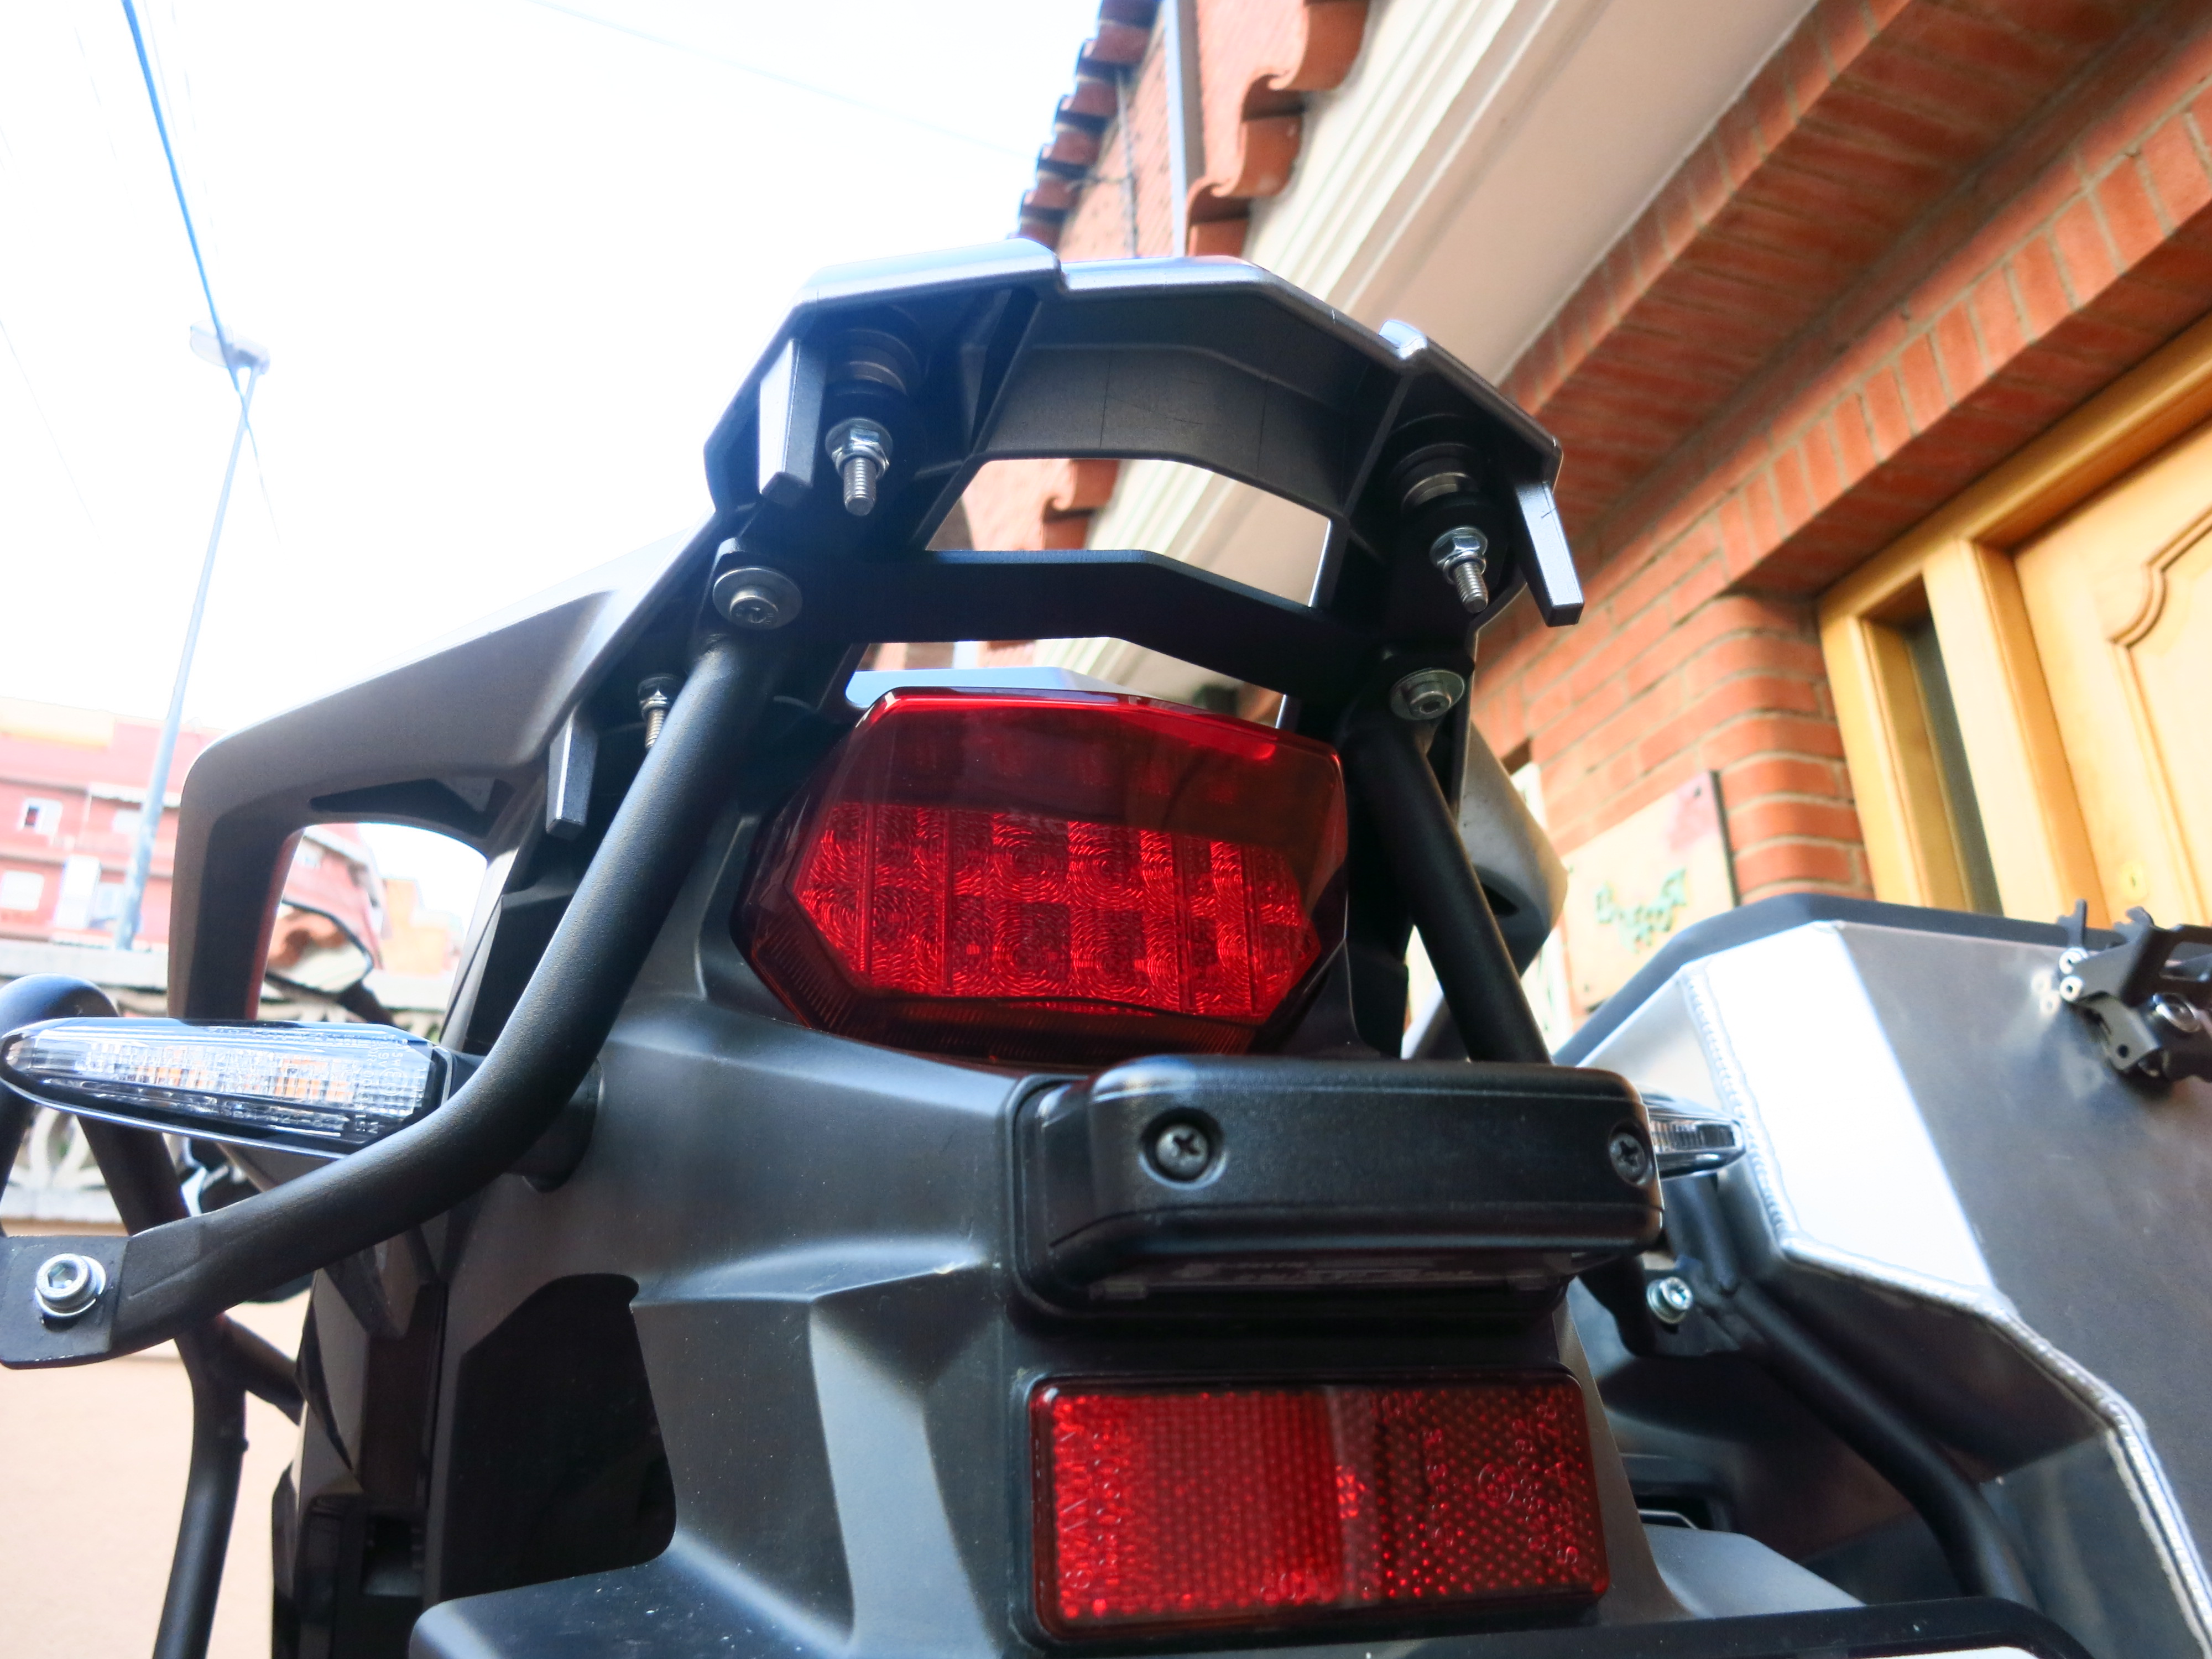
Pre-wiring for rear fog lamp (I still have not received the Holan top case)
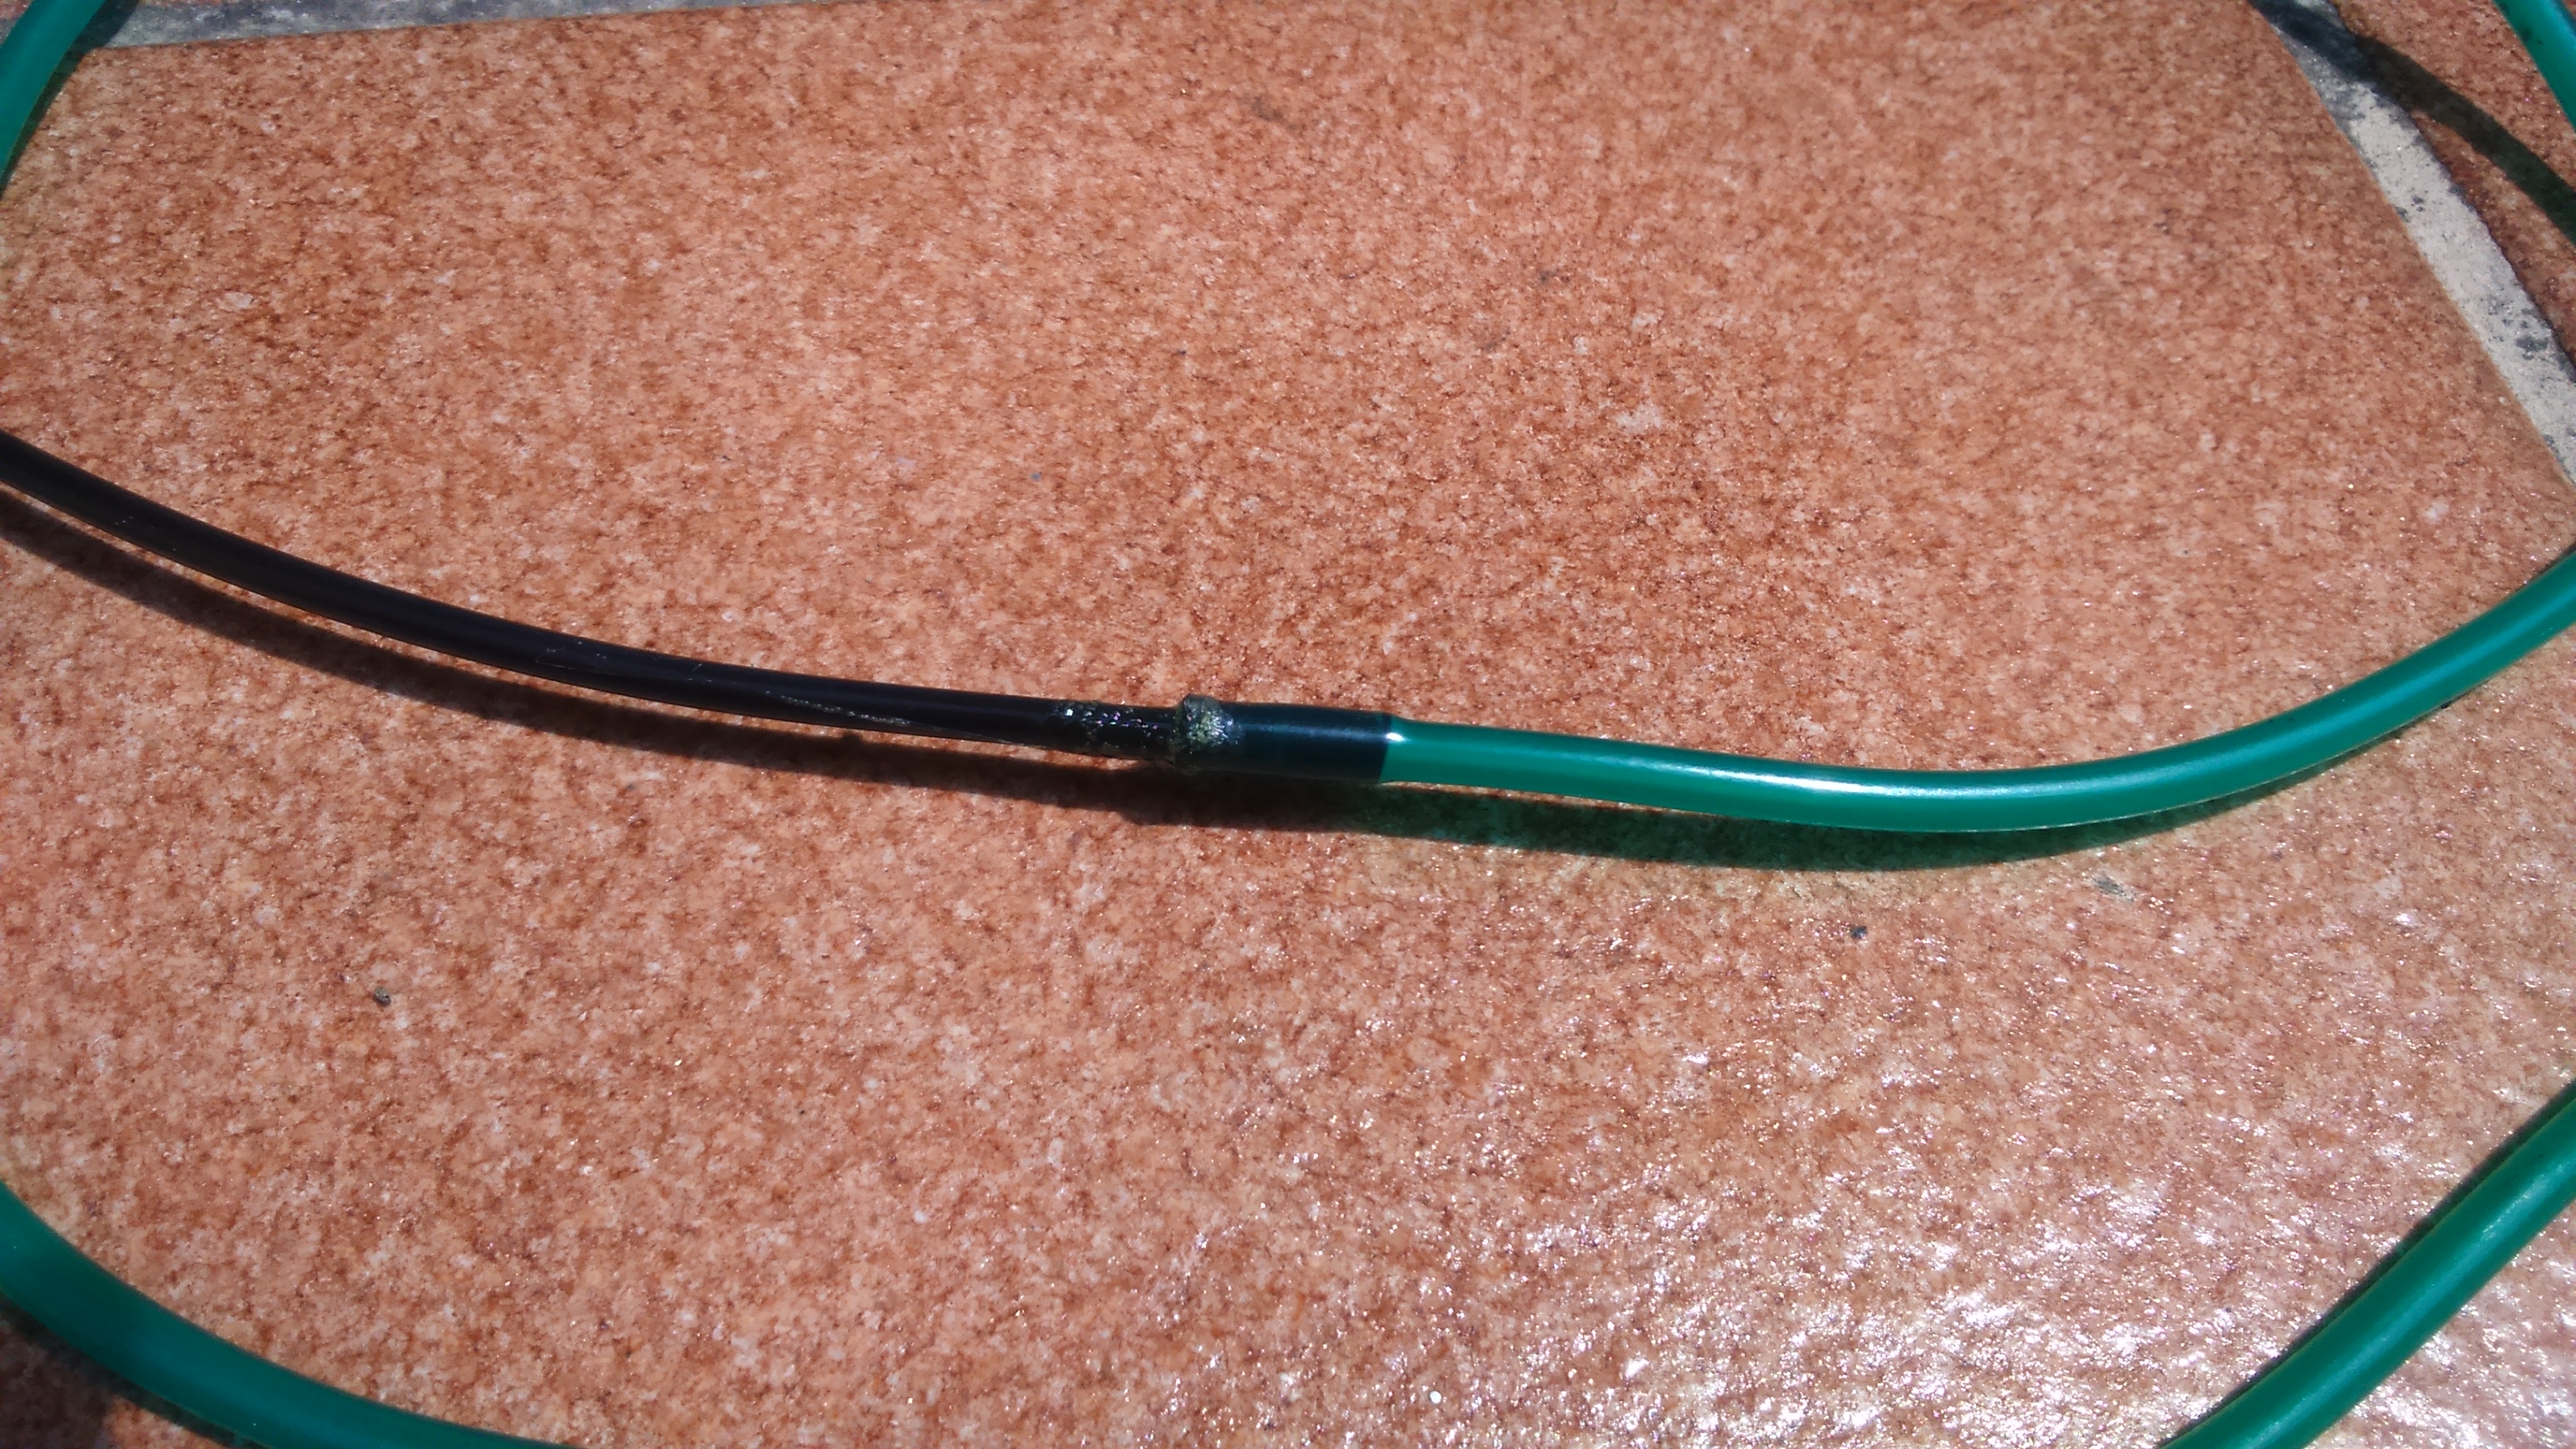
I needed the bike to go work, so I only had one afternoon to get everything done. In the days before I did all my homework, drawing the electrical schemes, cutting the wires, fitting the connector plugs, protecting them with heat shrink tubing, and generally pre fitting everything I could before the wiriing.
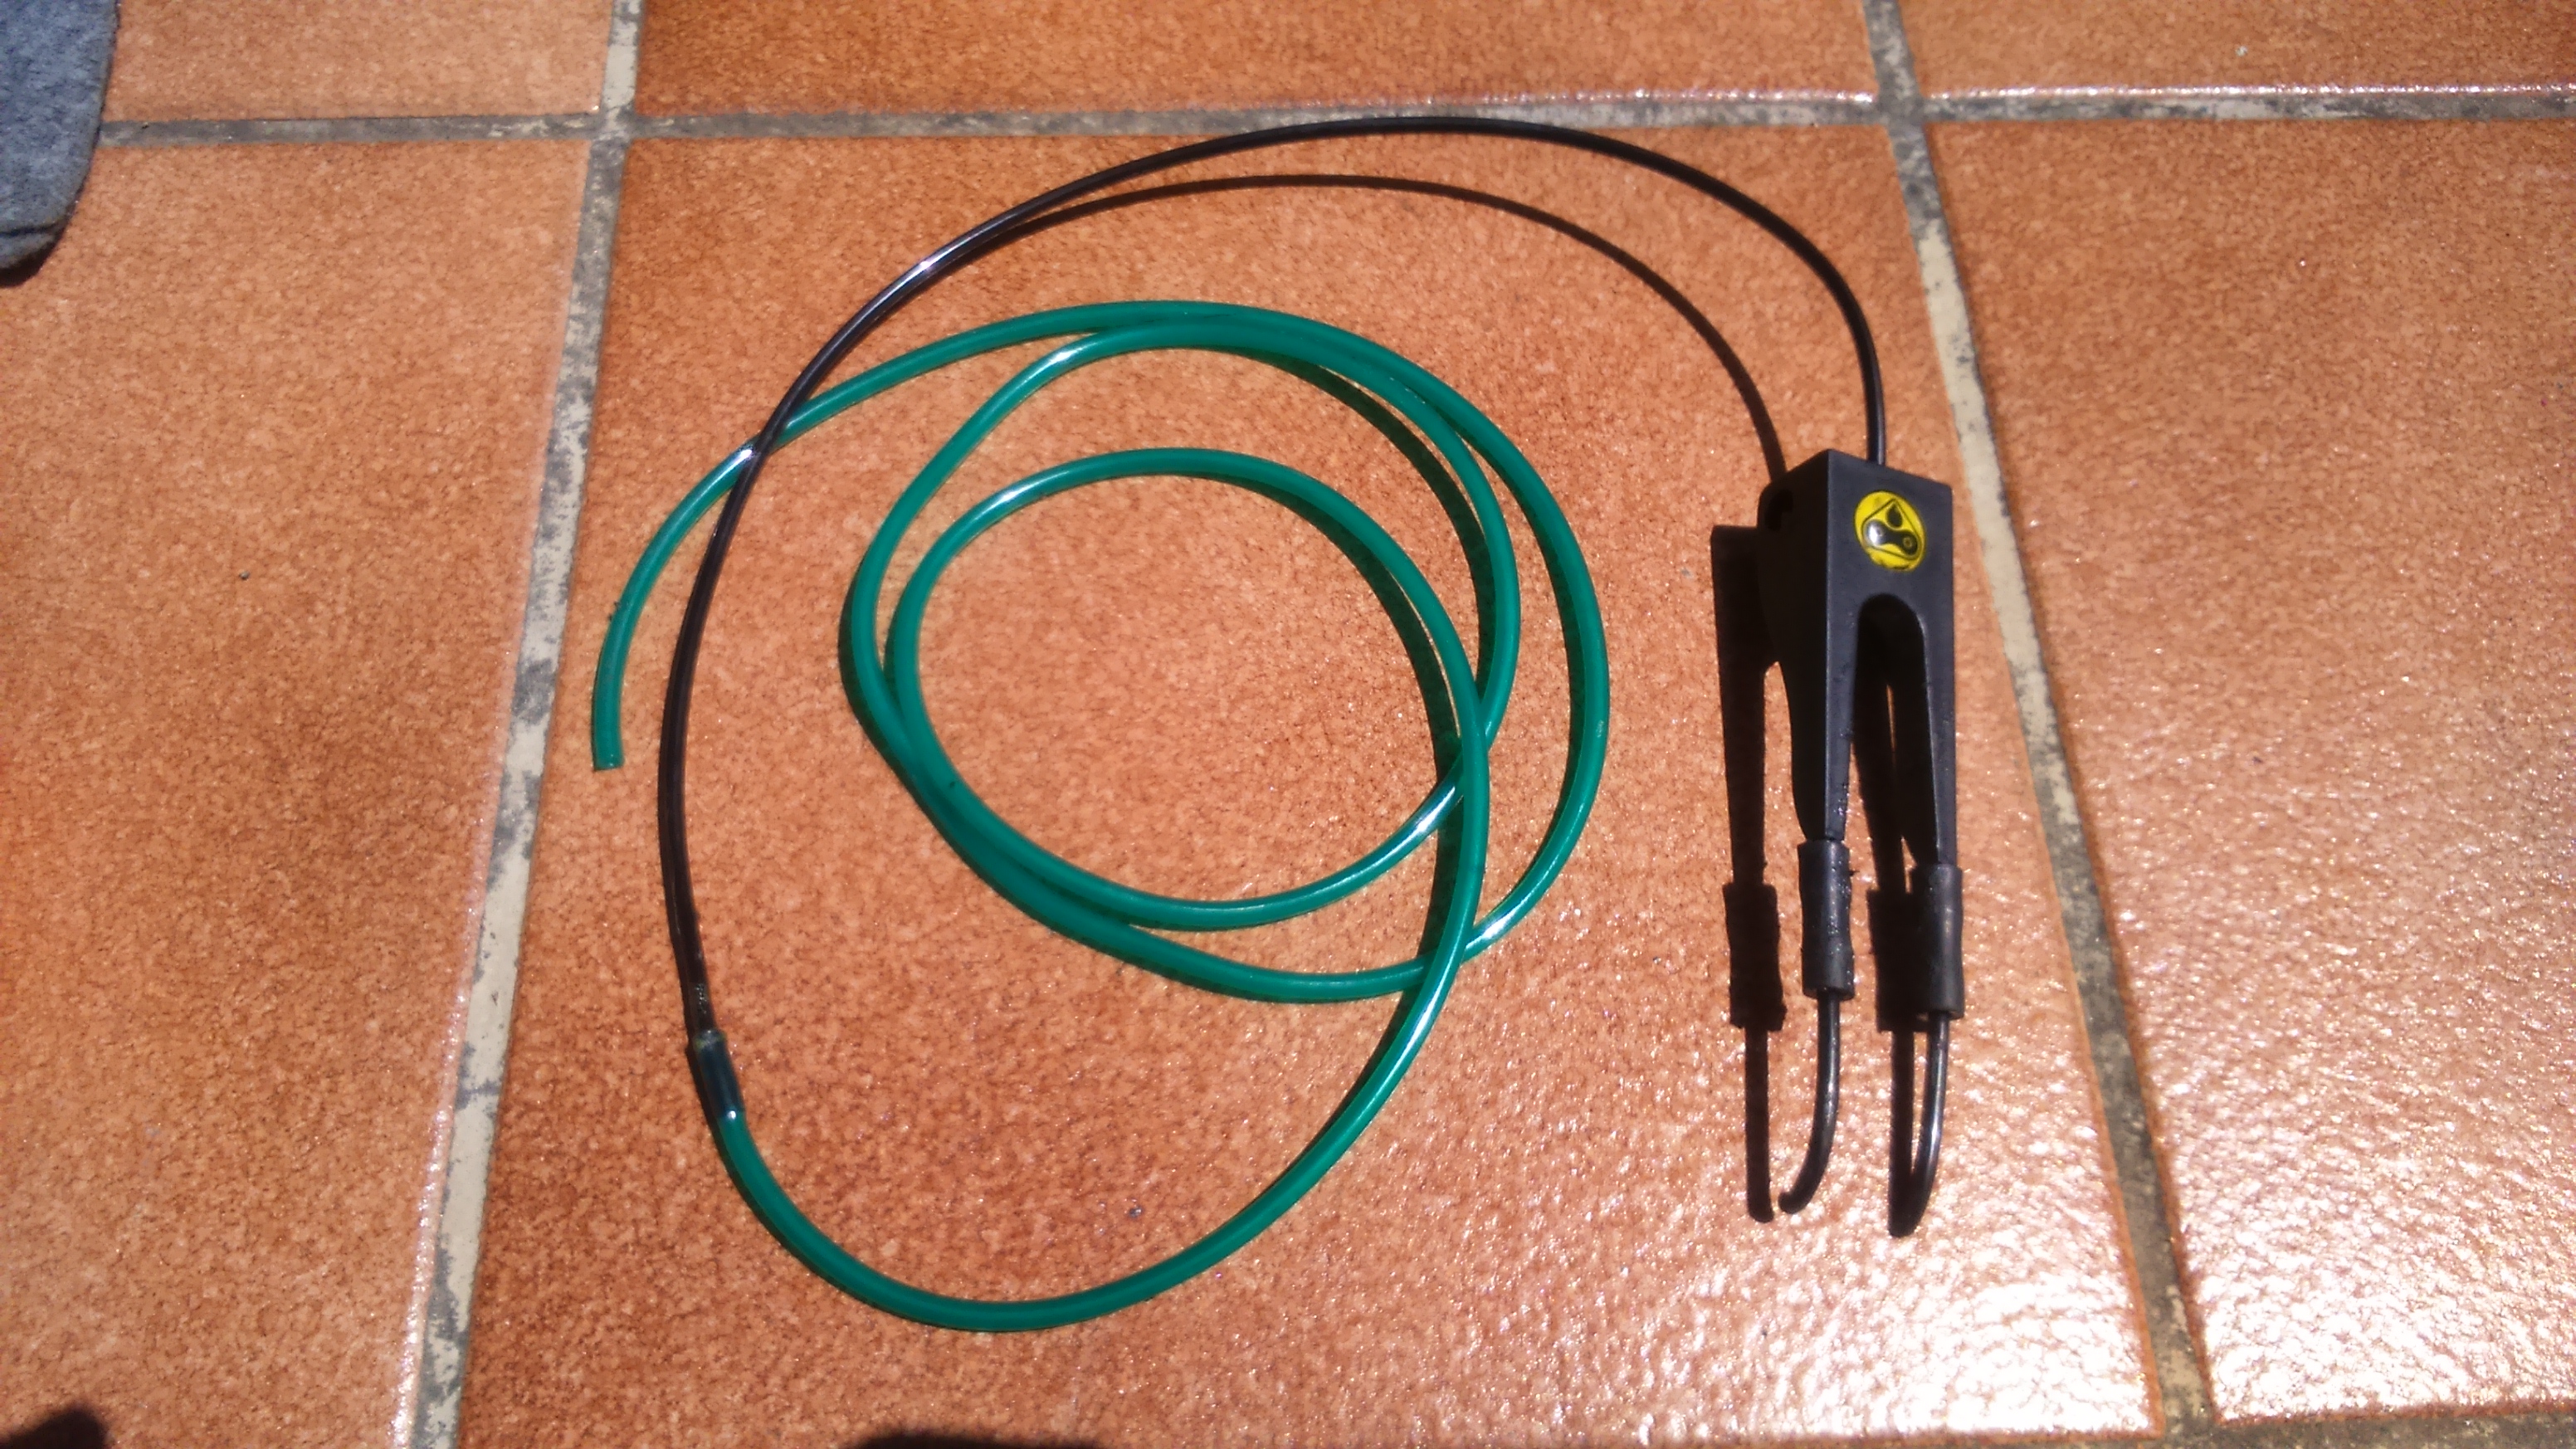
The chosen chain oiler was a PDoiler system, which is cheaper than a Scottoiler electronic system but still provides instant control of the amount of oil delivered to the chain. I was not convinced by the wicker system, though, so I replaced that with a Scottoiler dual injector.
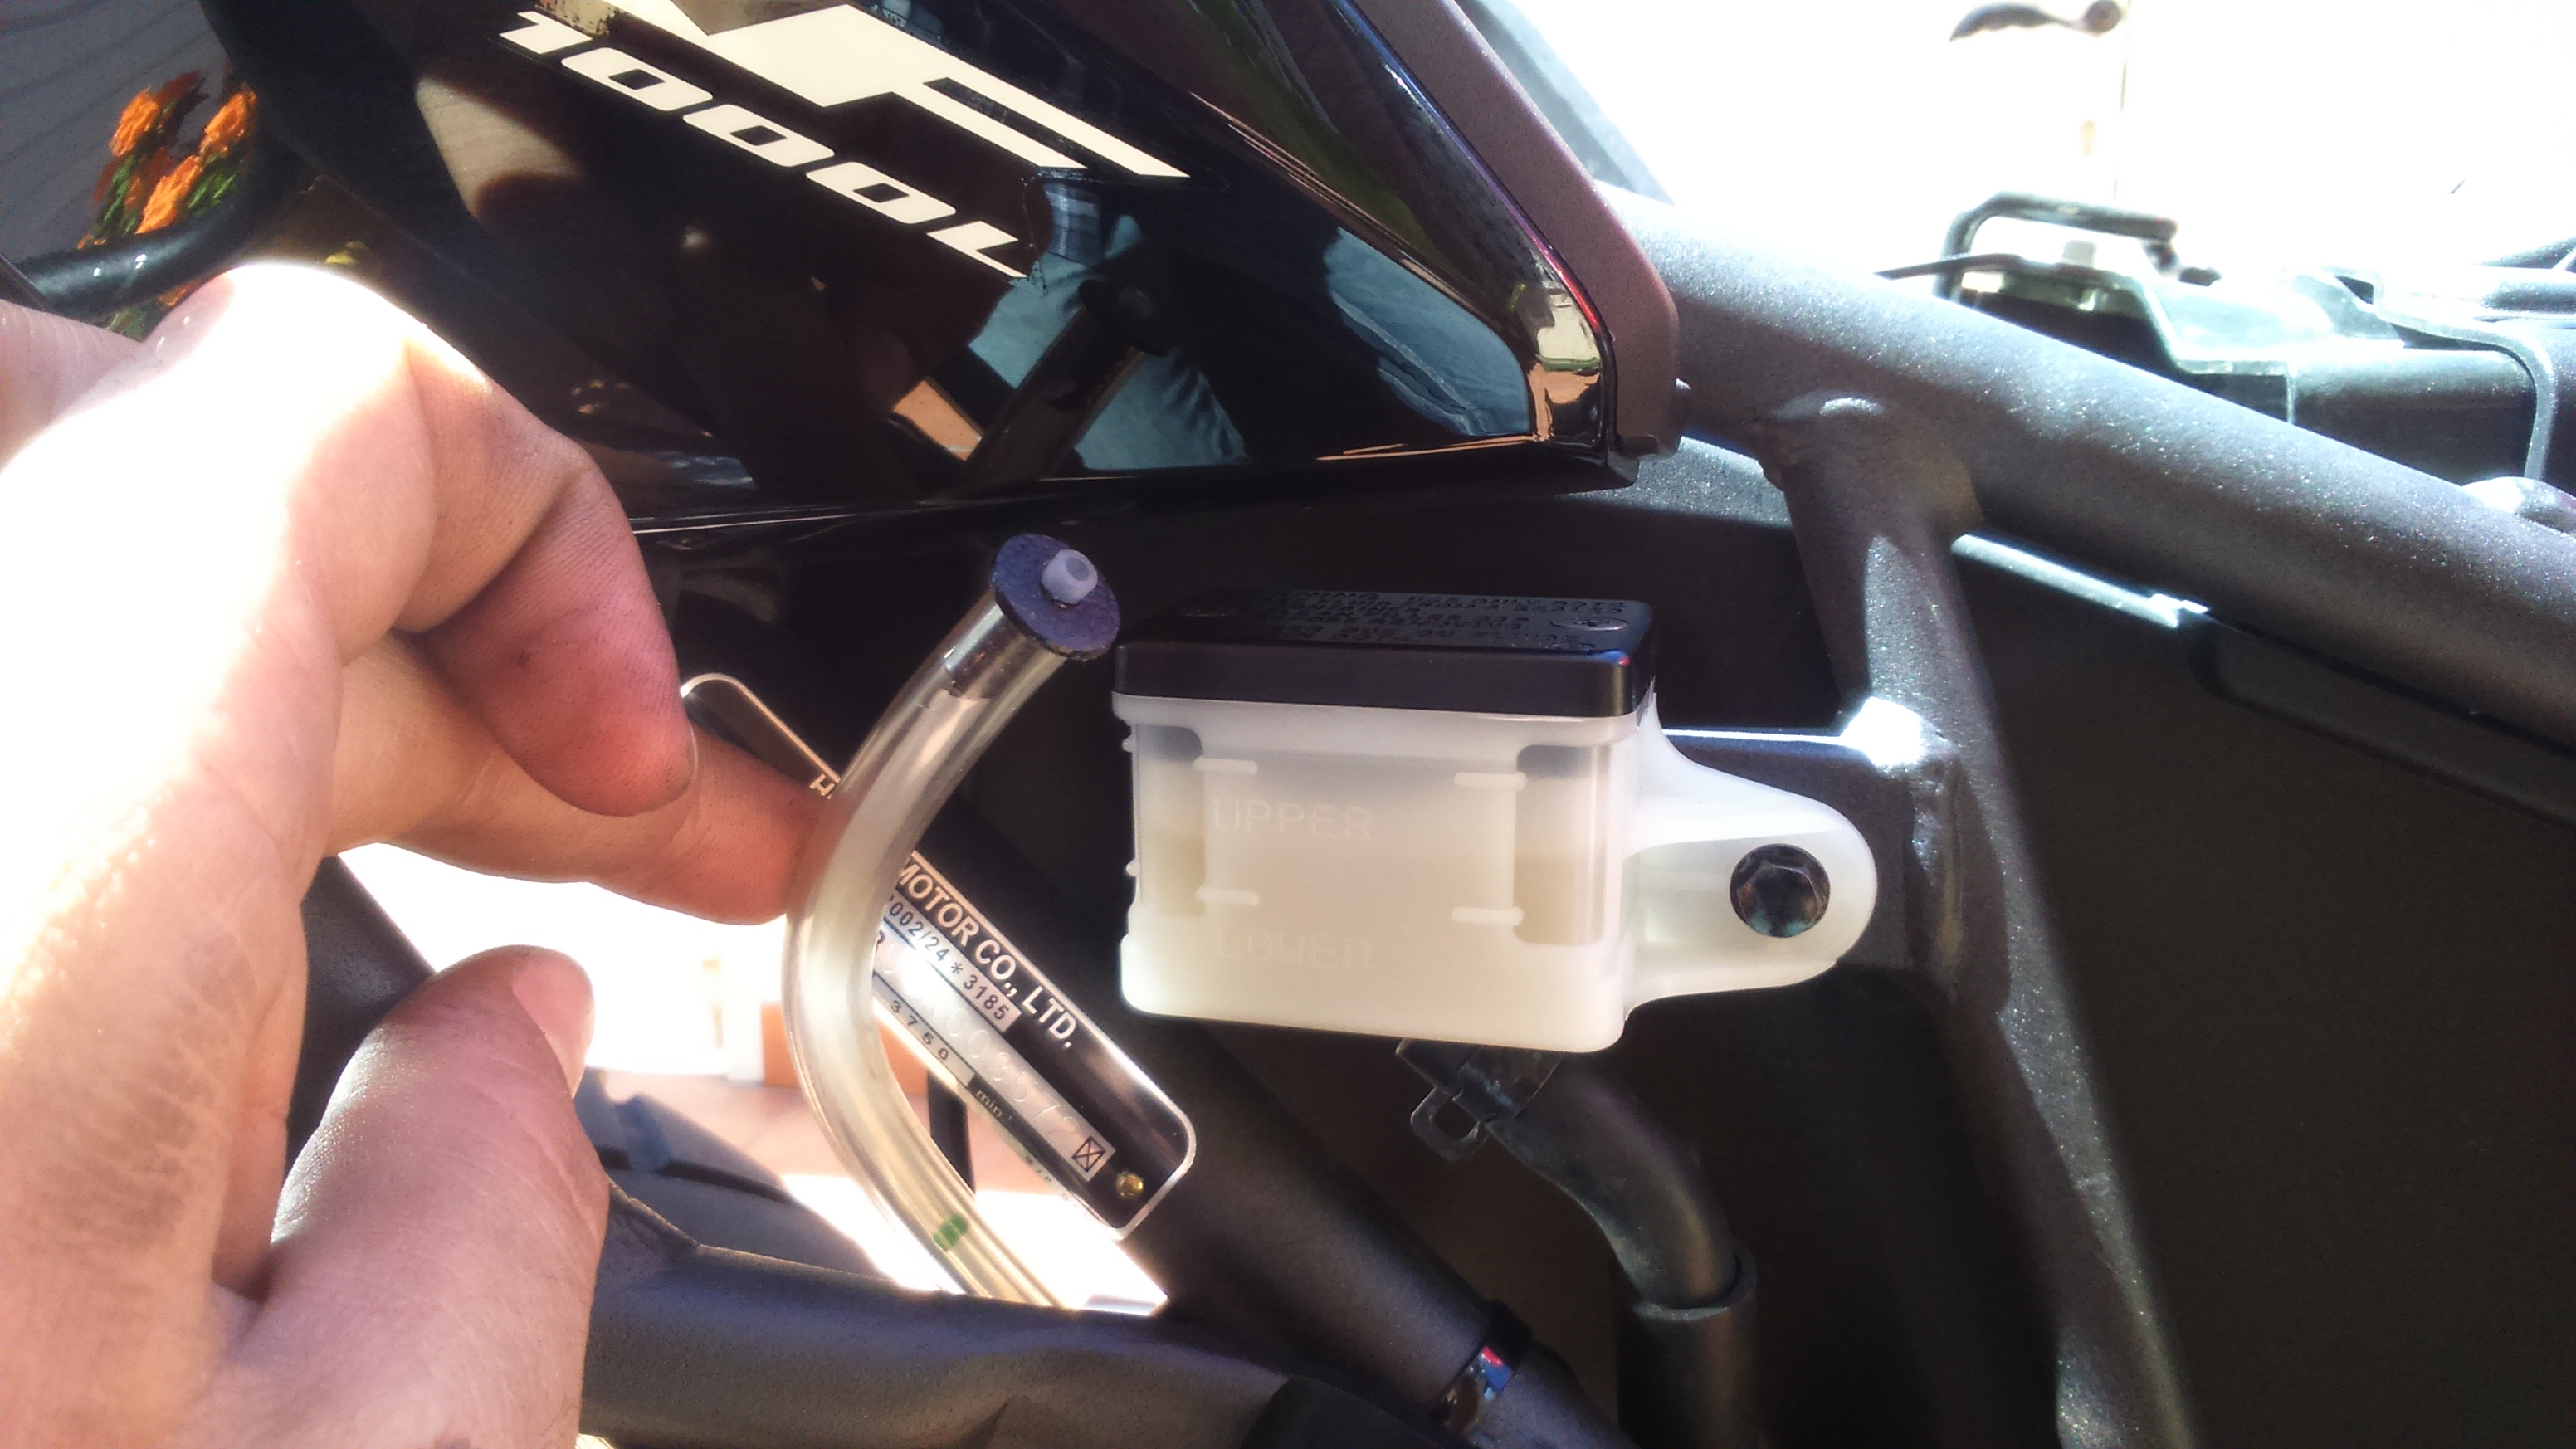
I put the oil reservoir/pump combo on the right side of the subframe, behind the passenger footpeg. It does not stand out and it is the optimal position to route the wire to the fuse box and the oil tube to the swingarm and to the chain.
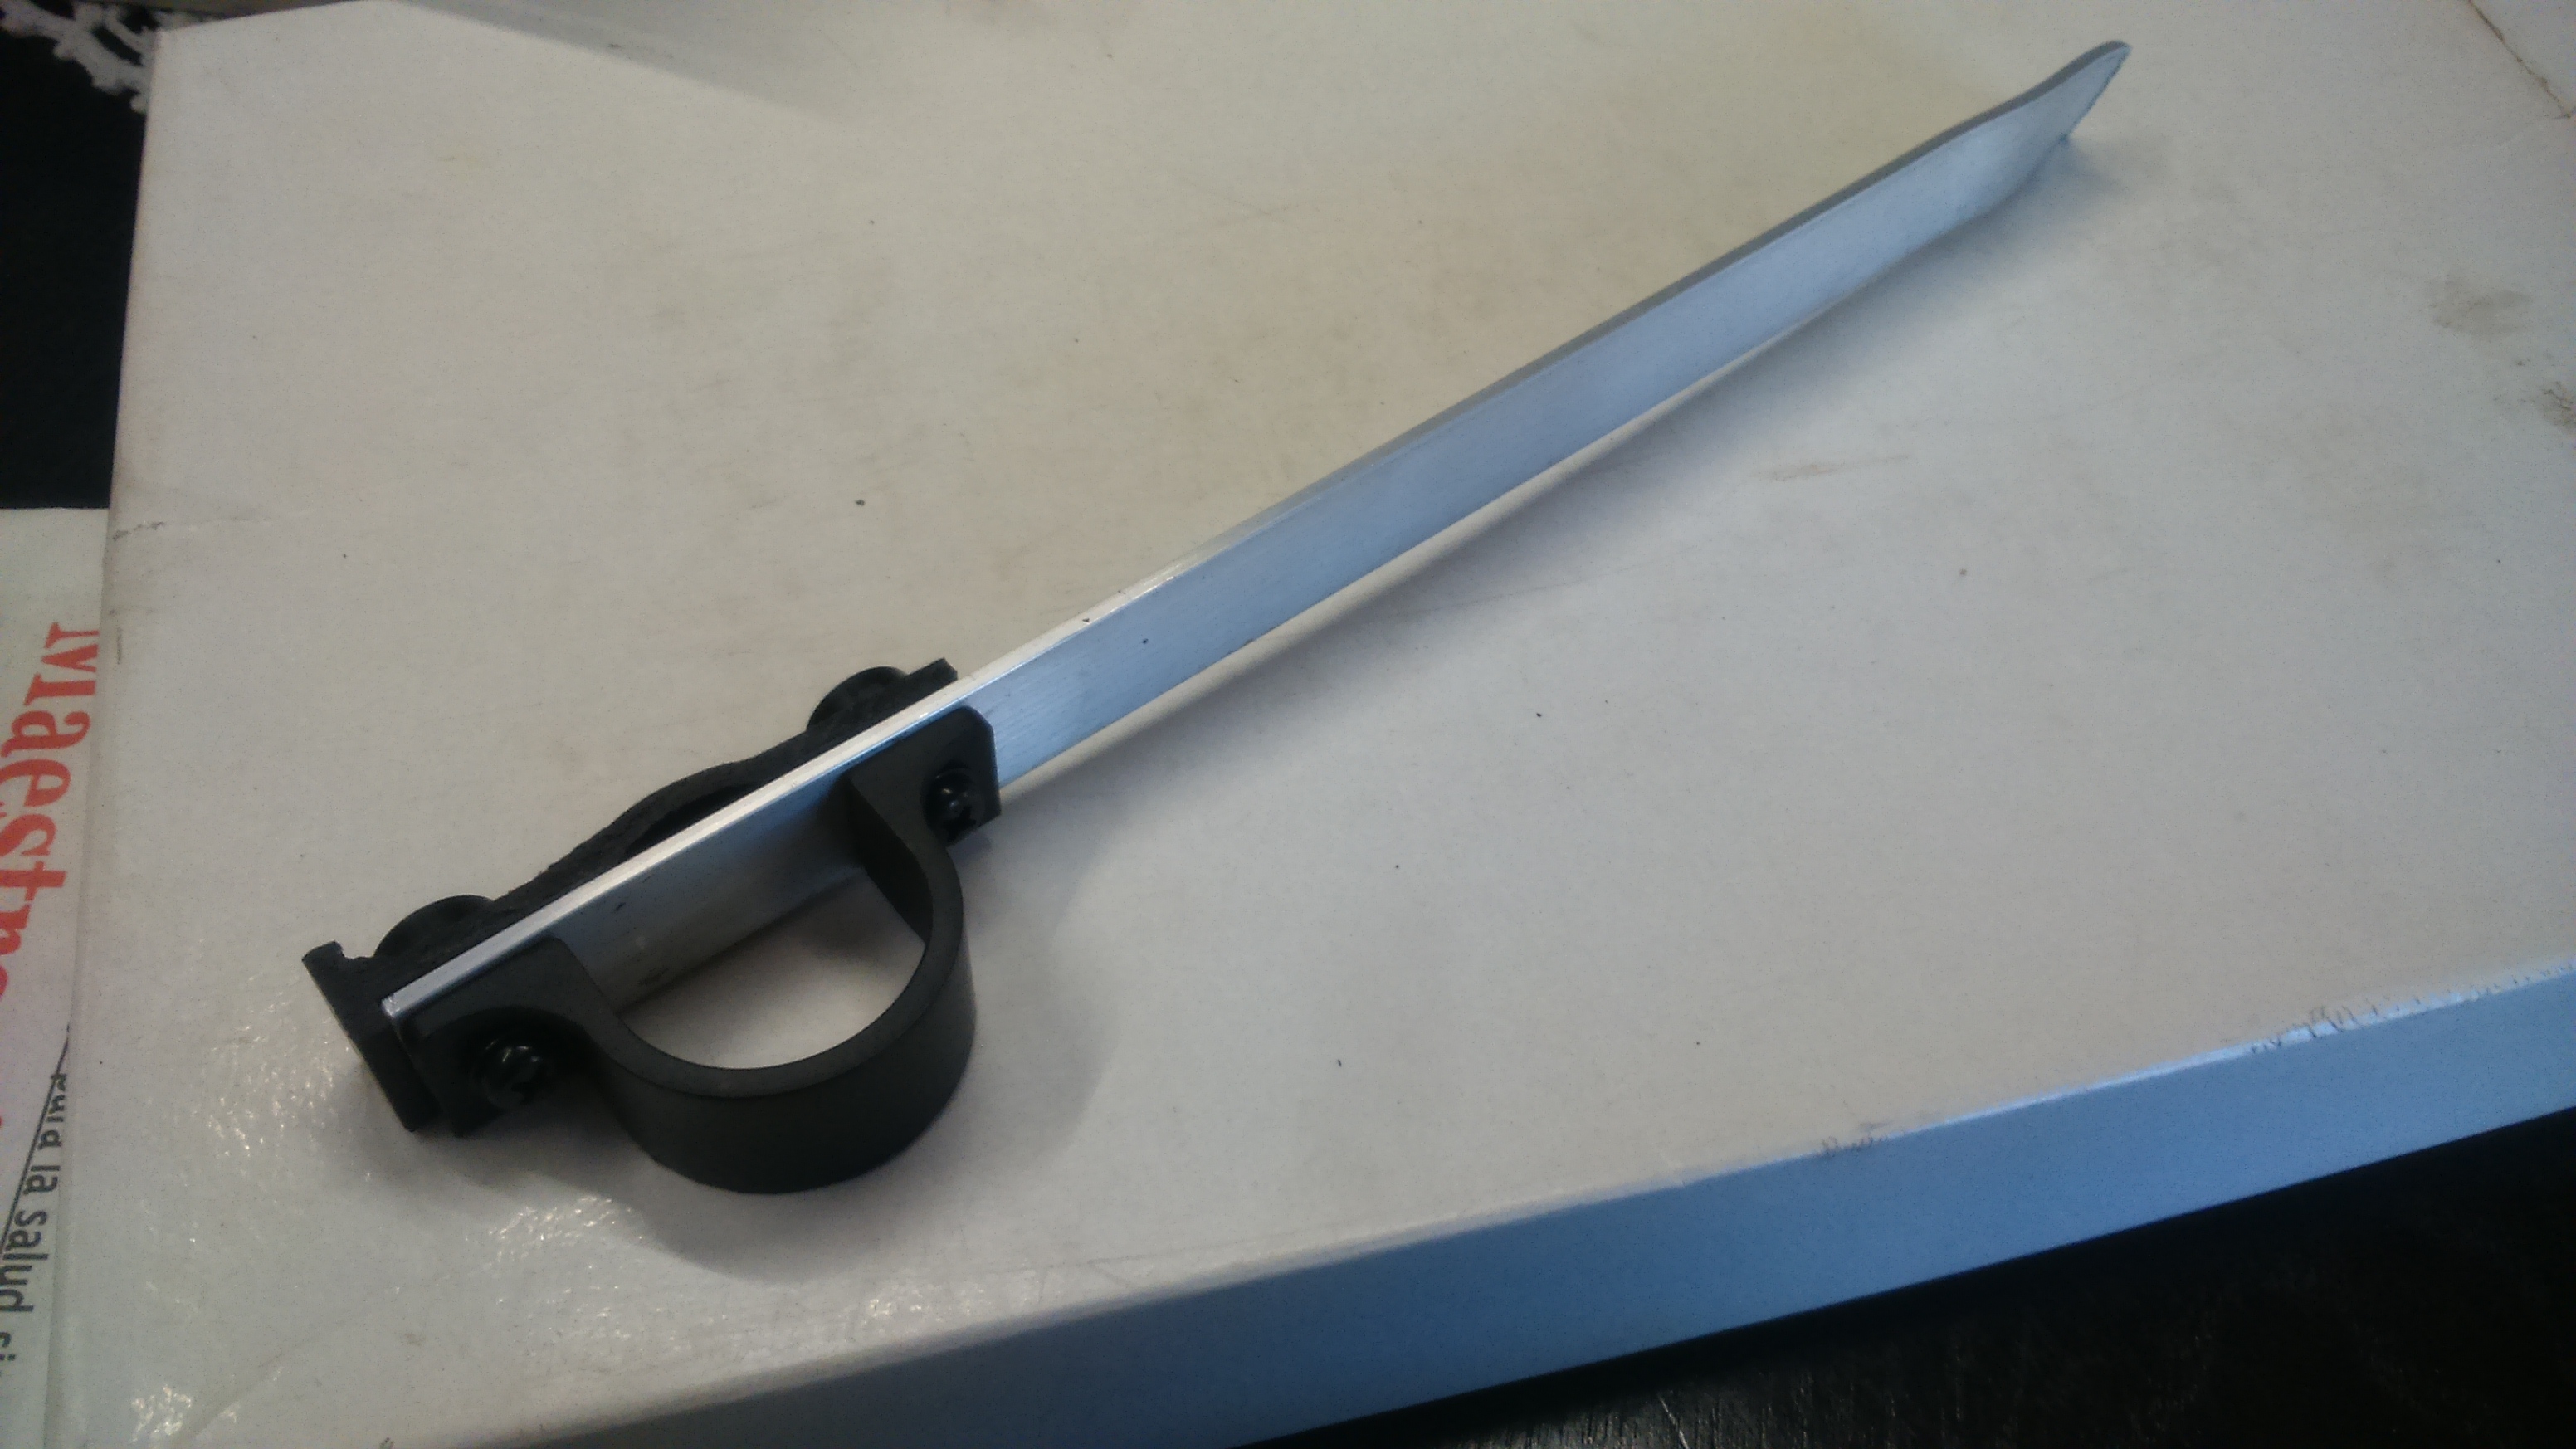
The dual injector is suposed to be mounted on the swingarm with zip ties or with special adhesive tape, but I went for a more elegant solution and bolted it to the chain guide under the swingarm, which is in the perfect position in the AT.
The injector is covered, so it is virtually invisible, and it is more securely mounted. This only requieres measuring the position, removing the chain guide and drilling a hole in it of the same diametre of the bolt included with the injector.
To fit the injector in the correct position you can then use the plastic spacers provided with it or a few washers for more precise adjustment.
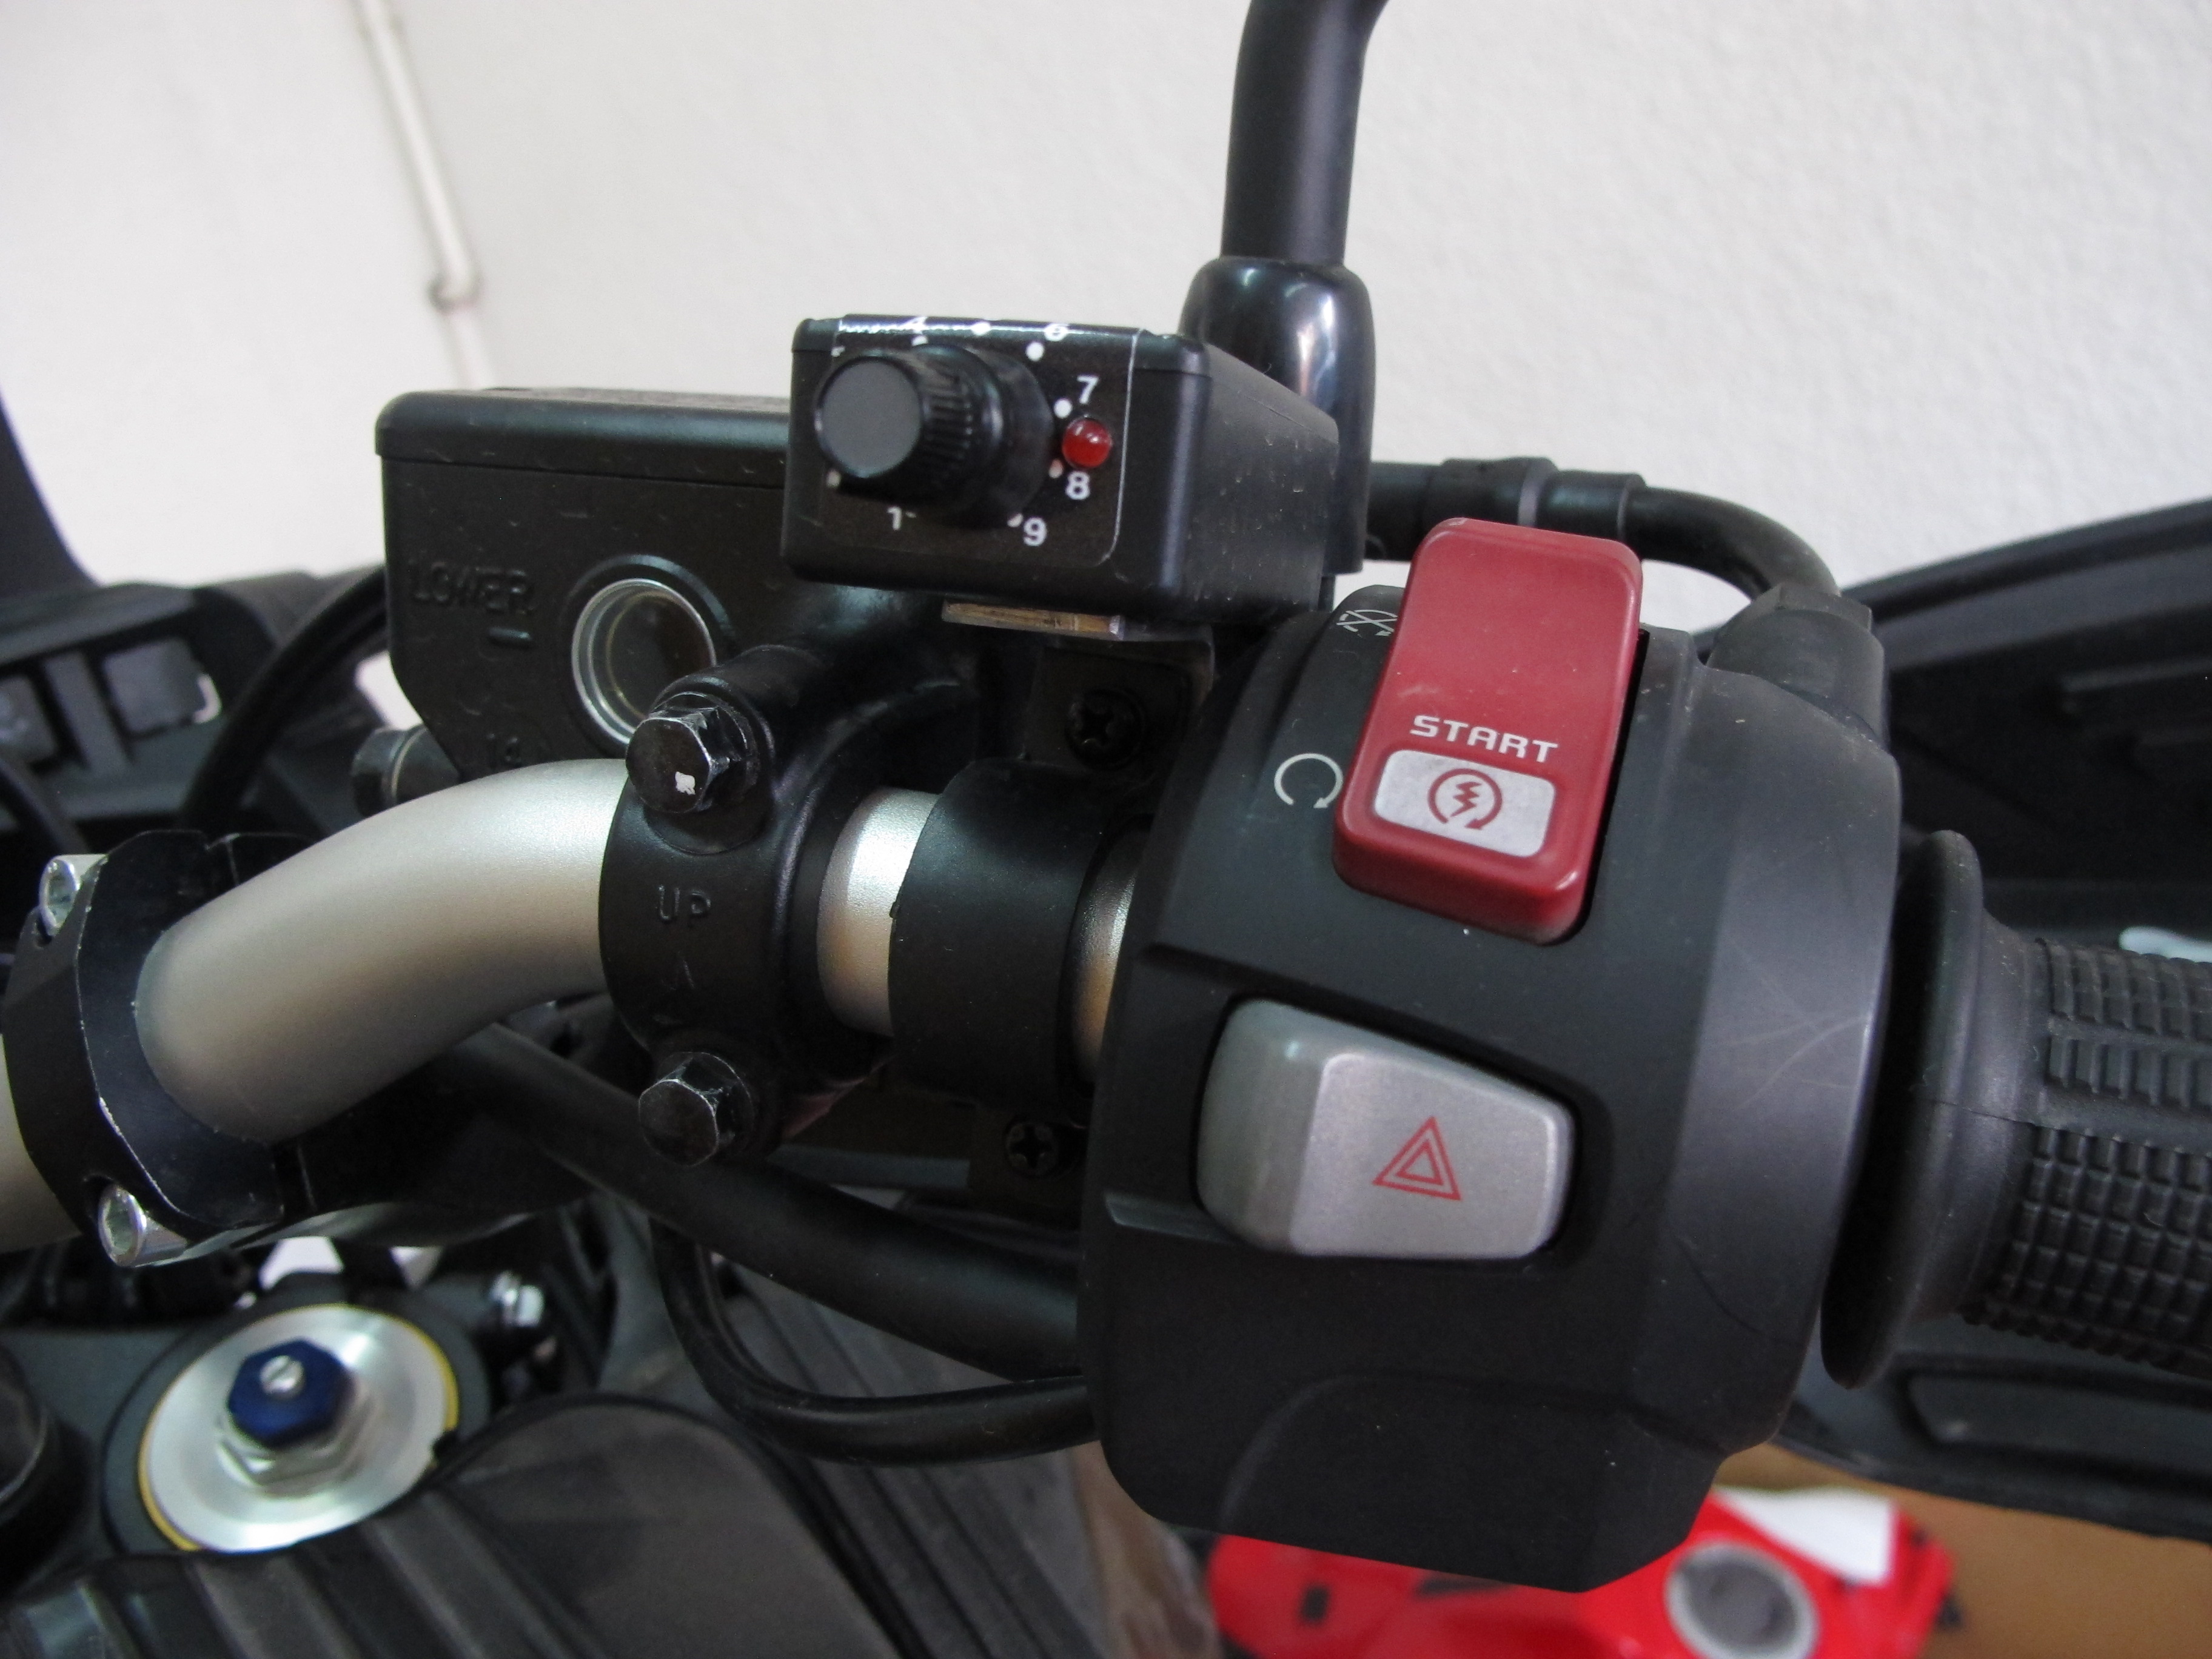
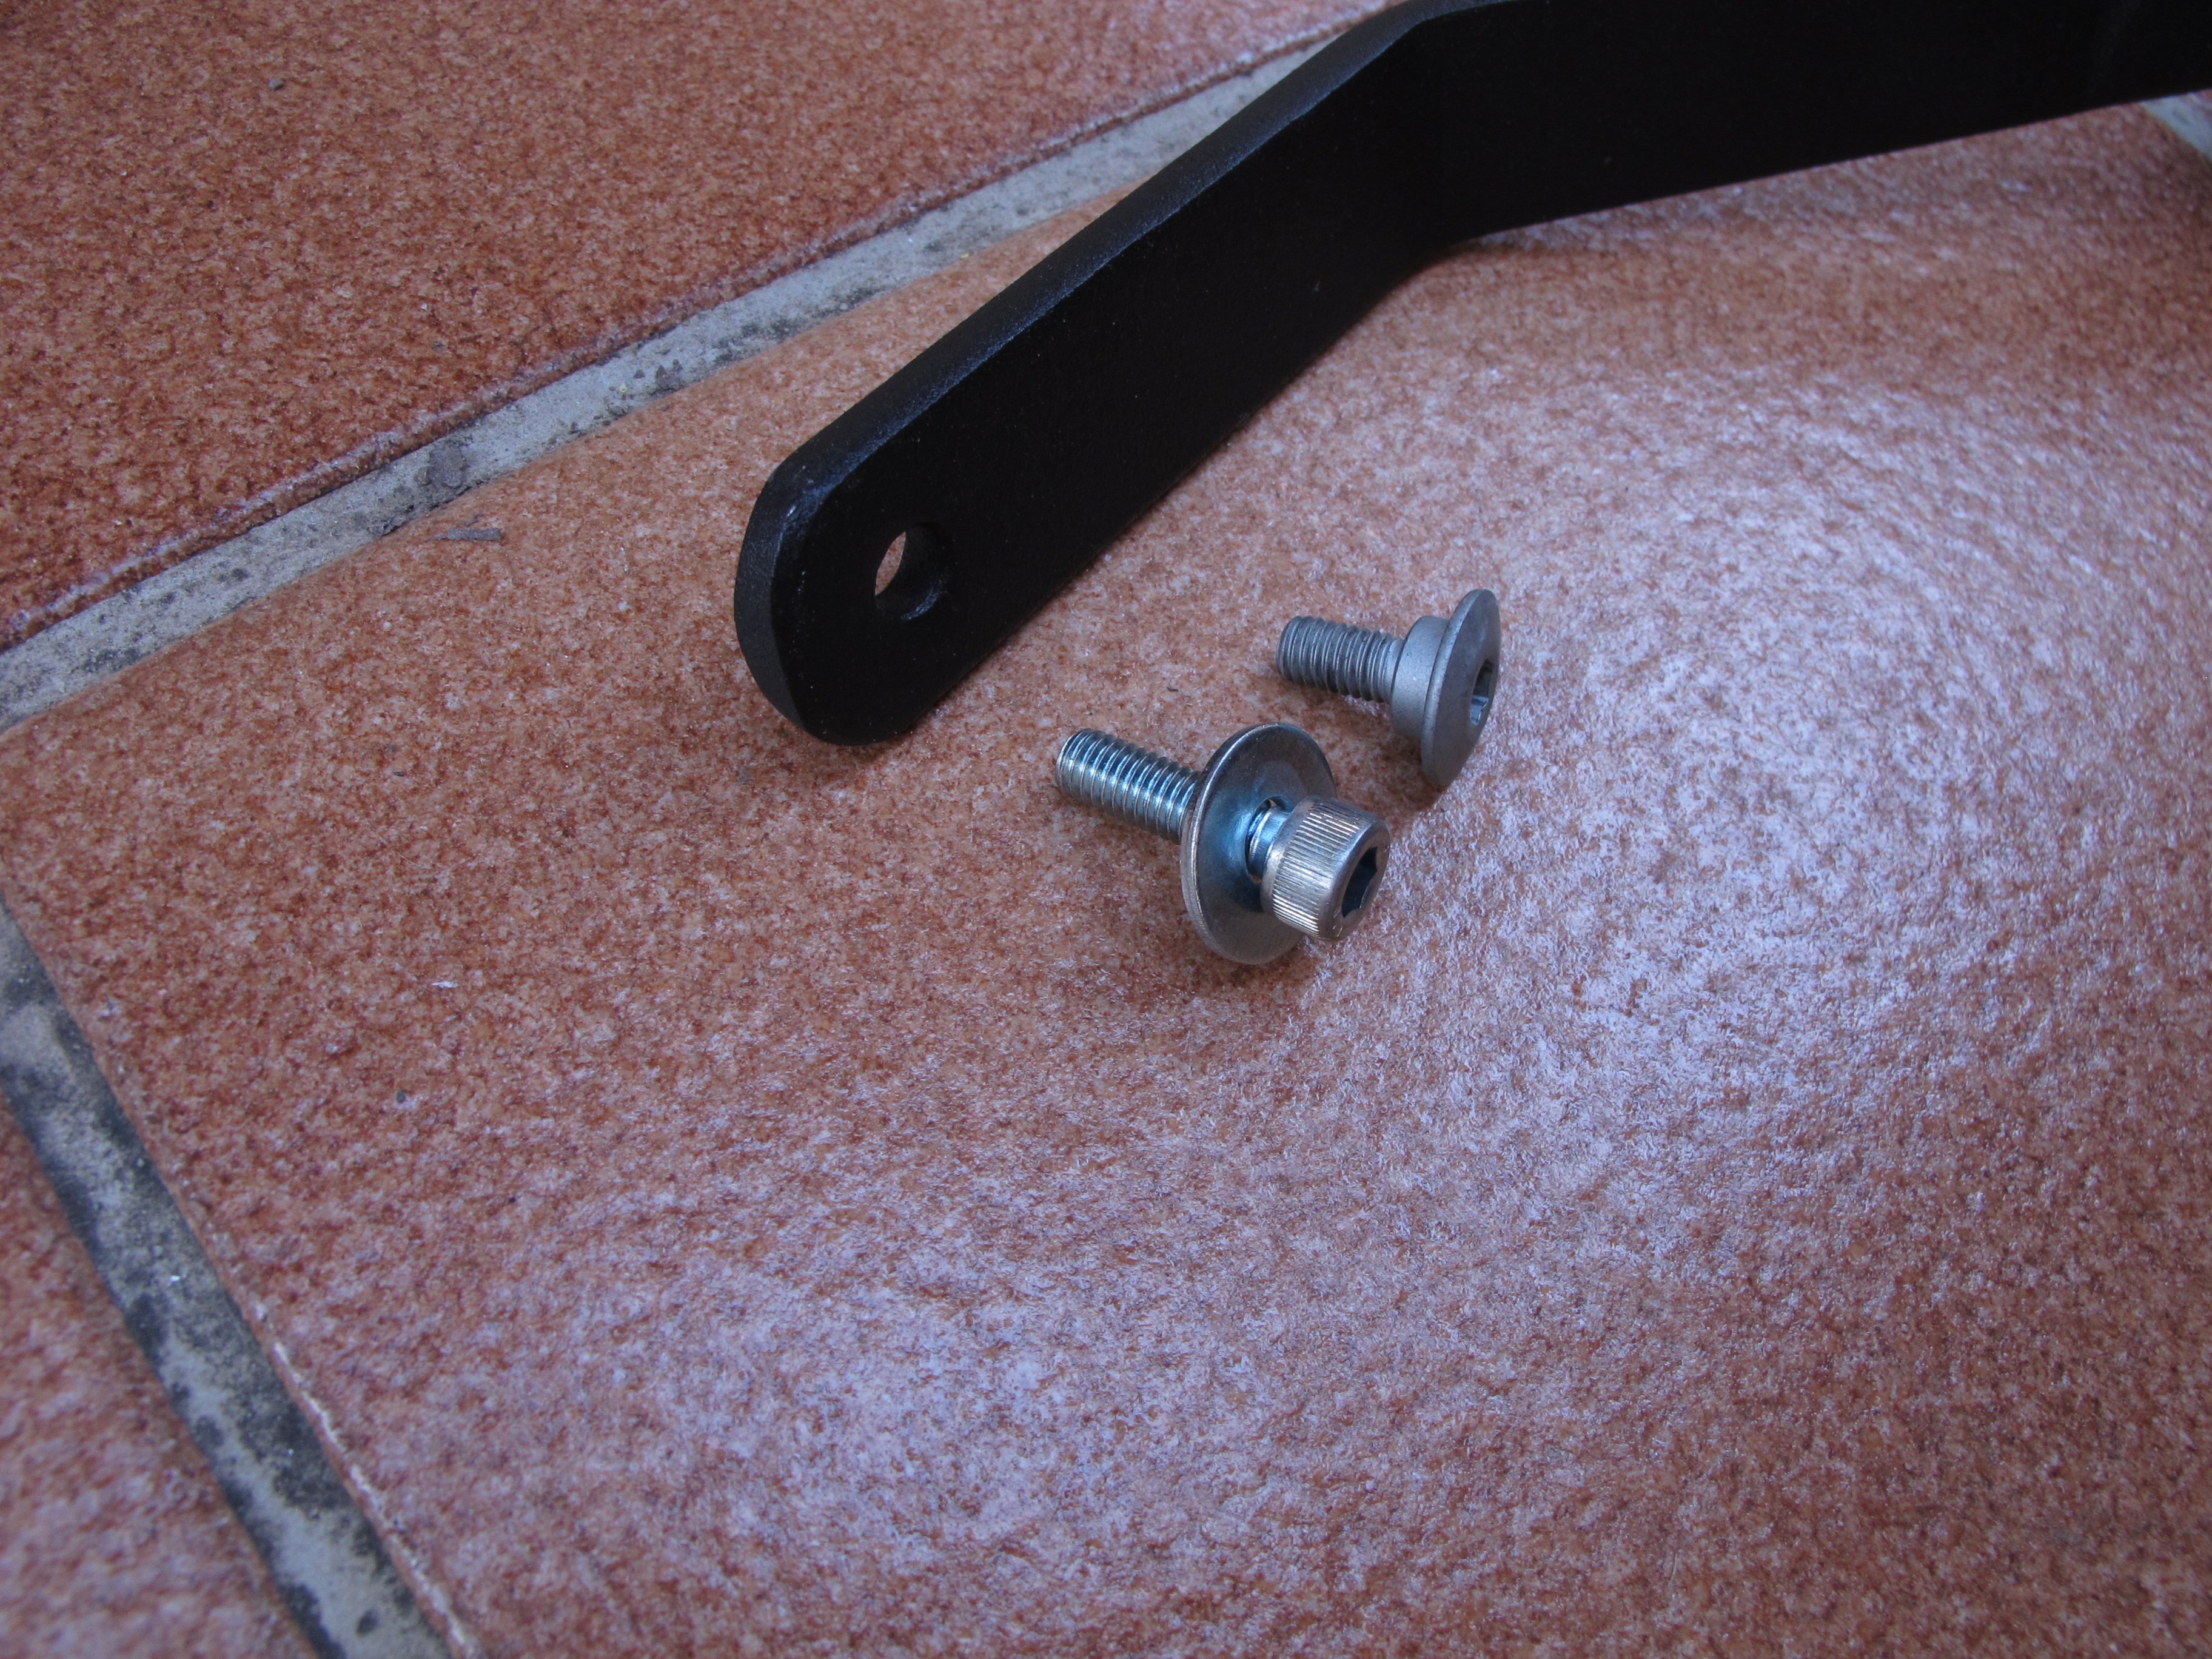
I used the provided adhesive plastic clips to route the oil tube and I fabricated a support to fit the the oiler control knob on the handlebars using the mounting that came with the 12V socket.
Then the day came. Right after lunch I started removing the fairings on the bike. The first time I did that I complained that it took too long, but as I learnt this second time, if you have the right tools and know what you are doing, you can remove everything reasonably fast. One thing I was worried about were the crash bars. I did not know whether it would be possible to remove the fairings with them on, as it was on the V-Strom.
It is not. At least with the Holan crash bars. The good news is that you don’t really need to remove them – if you loosen the bottom mounting point and remove the two bolts under the headlight, the whole assembly pivots forward and out of the way. I assume that with the PRO model four more bolts need to be removed from the radiatiors mounting points.
Removing the tank is also a fairly straightforward process – there is only one bolt to be undone (under the seat), even though you need to remove the seat lock assembly to access it, and you pull it up and back to detach it from the front mounting points, which are two rubber pegs. With the help of a friend who lifts the tank a bit, unplug the fuel line, two electrical connectors and the rubber tubes for the breathing and the overflow and you are done. It is much easier if the tank is empty or close to it, as it is much lighter.
I installed an aftermarket waterproof 12V socket which fit perfectly into the hole on the dashboard.
The heated grips proved to be a bit trickier. It took some swearing and sweating to pull the OEM grips off the handlebars, and while the heated left one slid in without problems (I had to put a couple of drops of glue to stop it form rotating afterwards), the right one refused to slid more than halfway in. In the end we used a big screw clamp to push it in. They do not have a separate control unit, it is integrated in the left grip, like the Honda OEM ones. This looks great, but I found that I kept turning them on accidentally every time I used the indicators, so I had to rotate it down a bit to make sure the button is out of the way.
The oiler control unit went on the right handlebar and the fog lamp switches on the left one, in a position I can easily reach with my thumb. I mounted them on a PMR bar switch that replaces the clutch clamp. It looks great, but the bolts did not align exactly with the holes in the clamps, we had to file them off a bit.
After fitting the fog lamps to the crash bars – very easy on the Holan ones, as they include two mounting points – all that was left was route all the wires along existing ones, secure them with zip ties and plug all the connectors. I strongly recommend fitting a fuse box on this bike, as the battery is difficult to access and it simplifies electrical work considerably.
We checked that everything worked and we put the bike back together.
Other last minute additions before the big trip have been a pair of Heidenau K60 tires and two custom made bags for the Holan crash bars to carry a pair of spare tubes and the tools to change them.
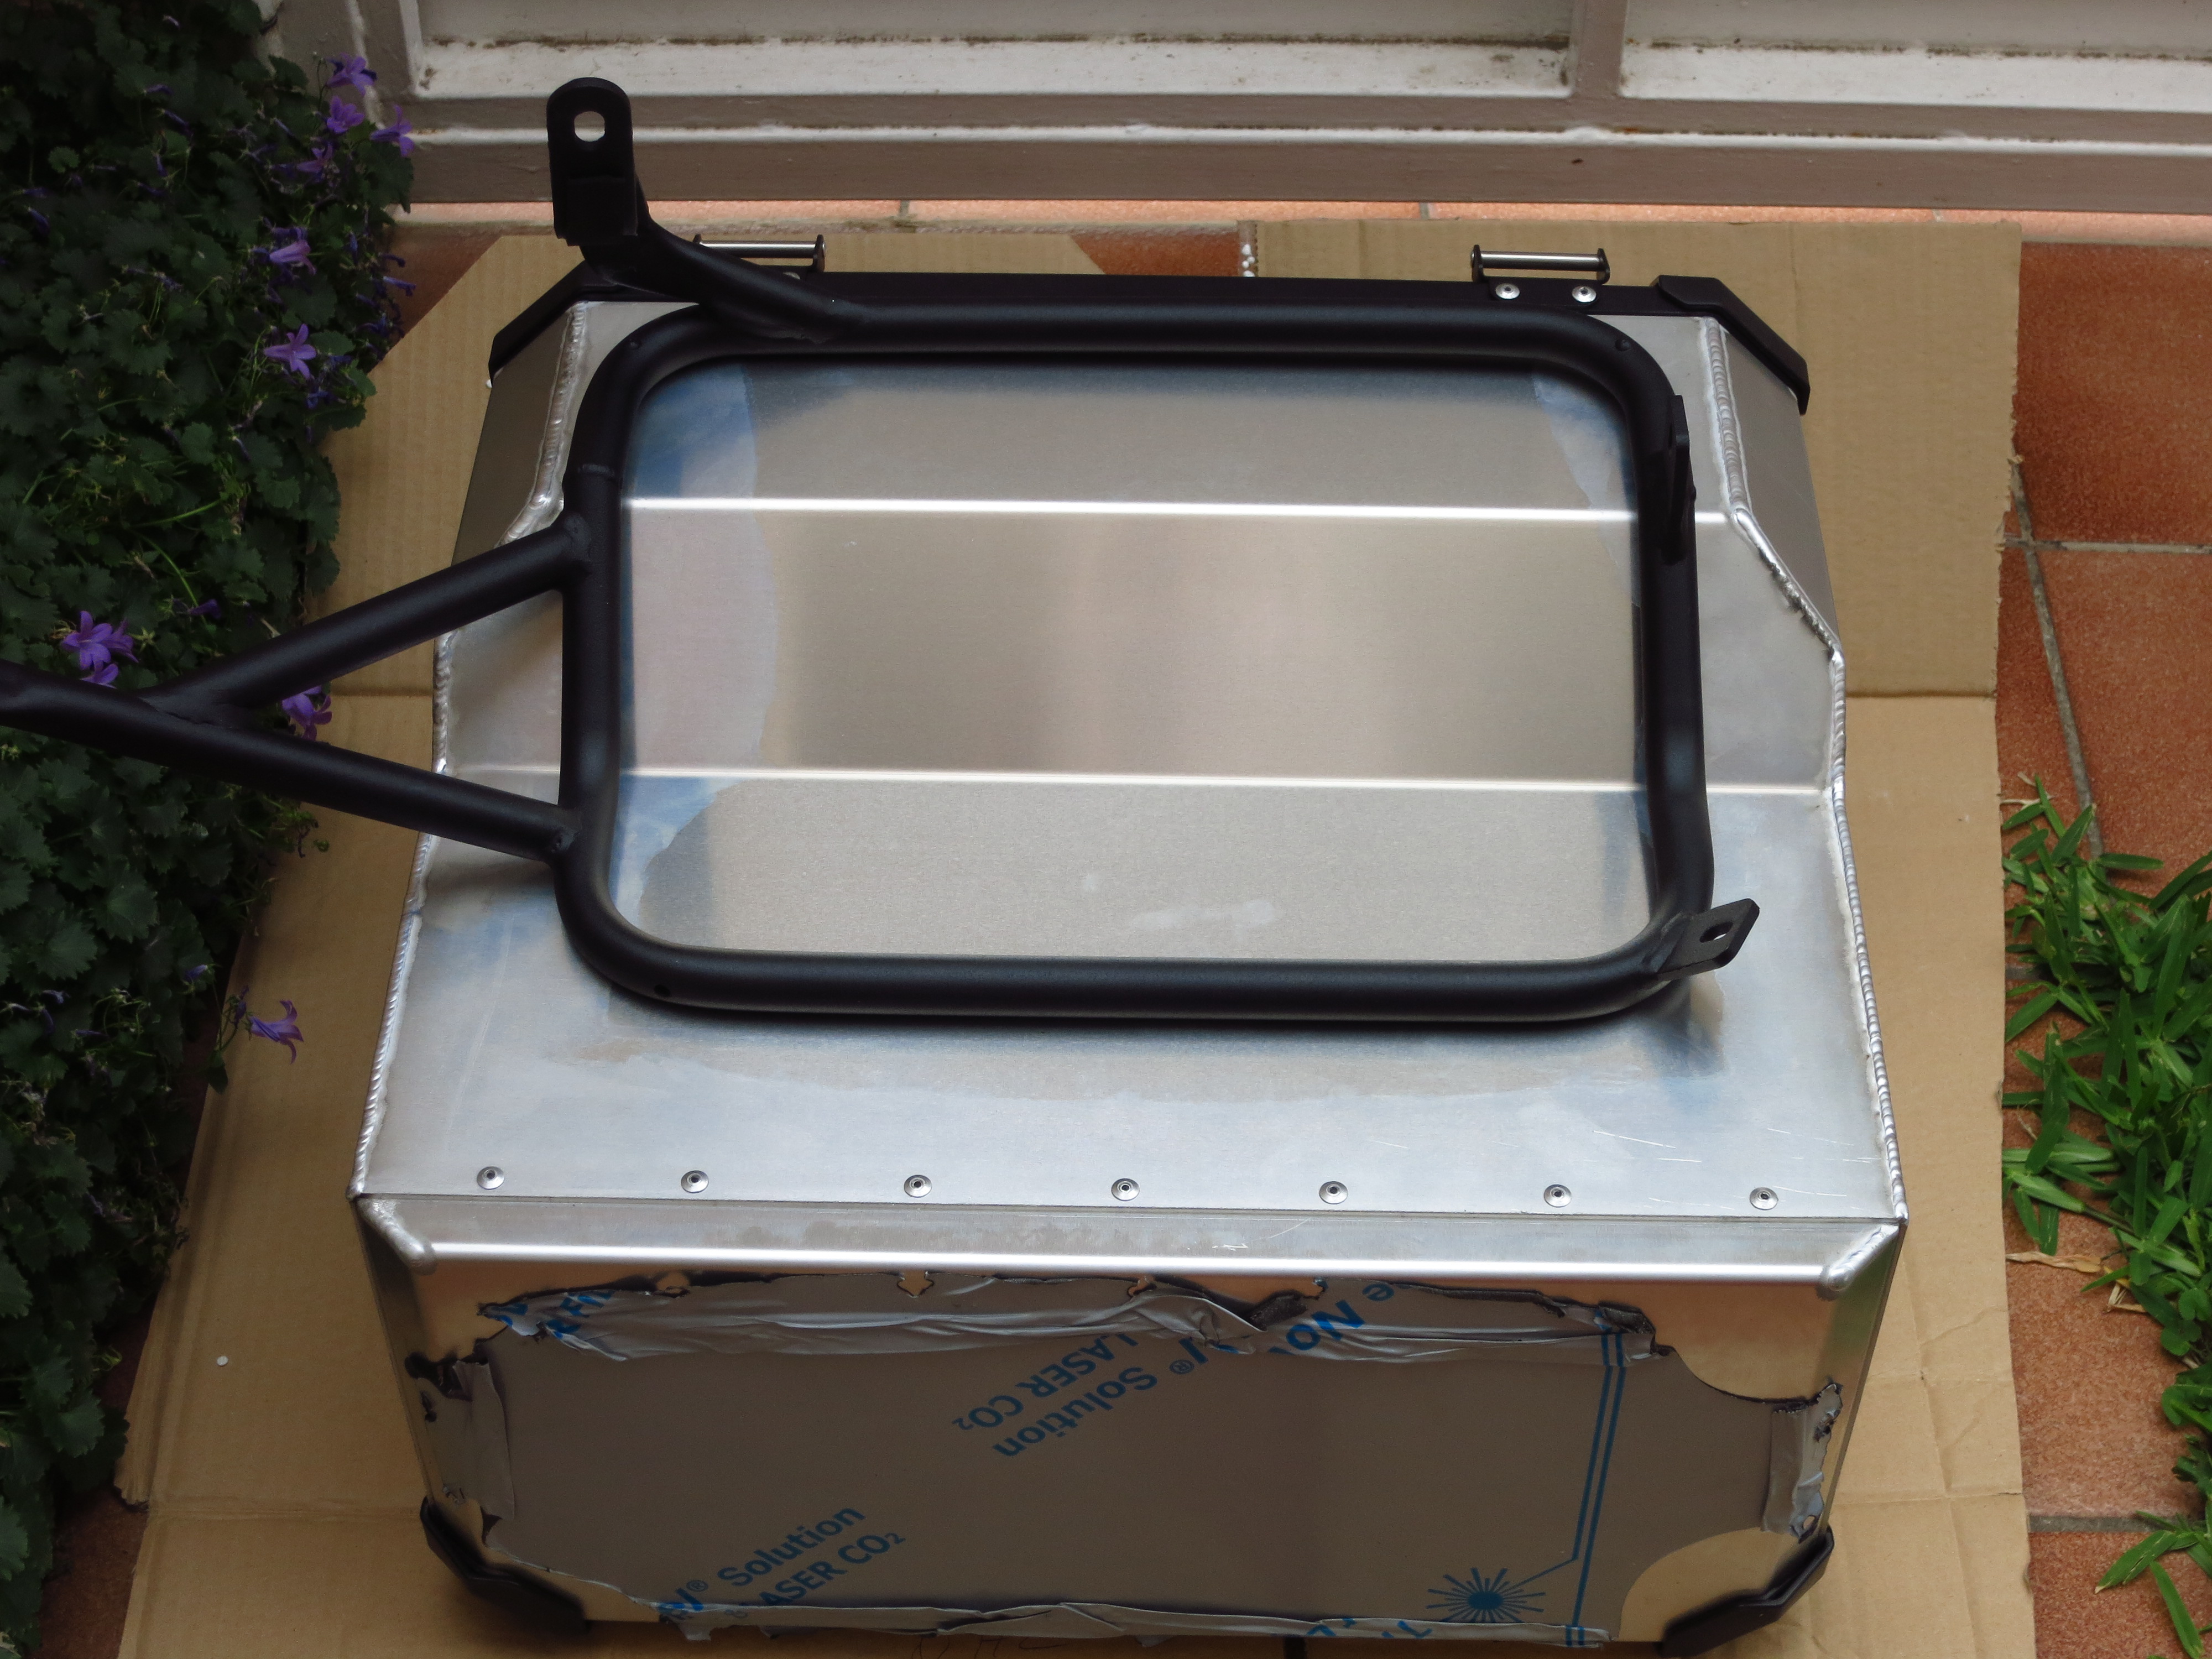
After a long wait (almost two months), I finally got the Holan crash bars for the AT. I have already fitted handguards, so all that remains now before I can offroad with peace of mind is a pair of knobbly tires.
I picked up the bars from the shipping company and as I was taking the tools out to the front yard I was readying my mind for whatever challenges Holan was going to throw at me this time – missing bolts, nuts or washers? misaligned mountings? – both from personal experience with the panniers and from what I usually read on forums, I was sure something was not going to go as planned. And I wasn’t wrong.
The surprise came as soon as I unpacked the upper crash bars. Holan makes two models, the ‘standard’ one and the ‘Pro’ one. The main difference, other than a slight difference in shape and the position of the bar that crosses under the headlight, is that the ‘Pro’ one has two additional mounting points that fit in the radiator mounts of the motorbike. Whether you want them or not, if you are buying them through the Spanish distributor, these are the only available option, but surprise motherf***er! Mine did not have the extra mounting points. They sure were shaped like the ‘Pro’ ones, but that bit was missing.
I had chosen Holan because I liked the fact that they covered as much of the fairing as the products from Honda, Touratech and Hepco & Becker for considerably less money, but also because they already included mounting points for the fog lamps. As for how sturdy they are, only time and crashes will tell. None of the alternatives (except for the Motortek ones) have the mounting points to the radiators, and having waited two months, I was not very keen on sending them back and face another two months wait, particularly when my holidays are coming up and I need the bike equipped for the trip, so I decided to keep them and ask for the difference to be reimbursed (the ‘Pro’ ones are 25€ more expensive). Time to fit them and see if there were other ‘surprises’ in store (other than the known fact that Holan does not include instructions).
Instructions
The good news about both the upper and lower Holan crash bars is that they do not require the exhaust manifold to be removed, as they do not attach to the upper bolt in the engine mount, making things a lot easier.
I decided to start with the engine crash bars, as they only have two mounting points each and the process is very straightforward. At the back both use the mounting point for the piece of plastic that keeps your boots from scratching against the frame. Remove the Allen bolt and pull the plastic out on both sides of the bike.
Holan provides two longer Allen bolts with a washer to replace the OEM ones. (I like the fact that they seem to be of considerably better quality). Nothing missing so far.
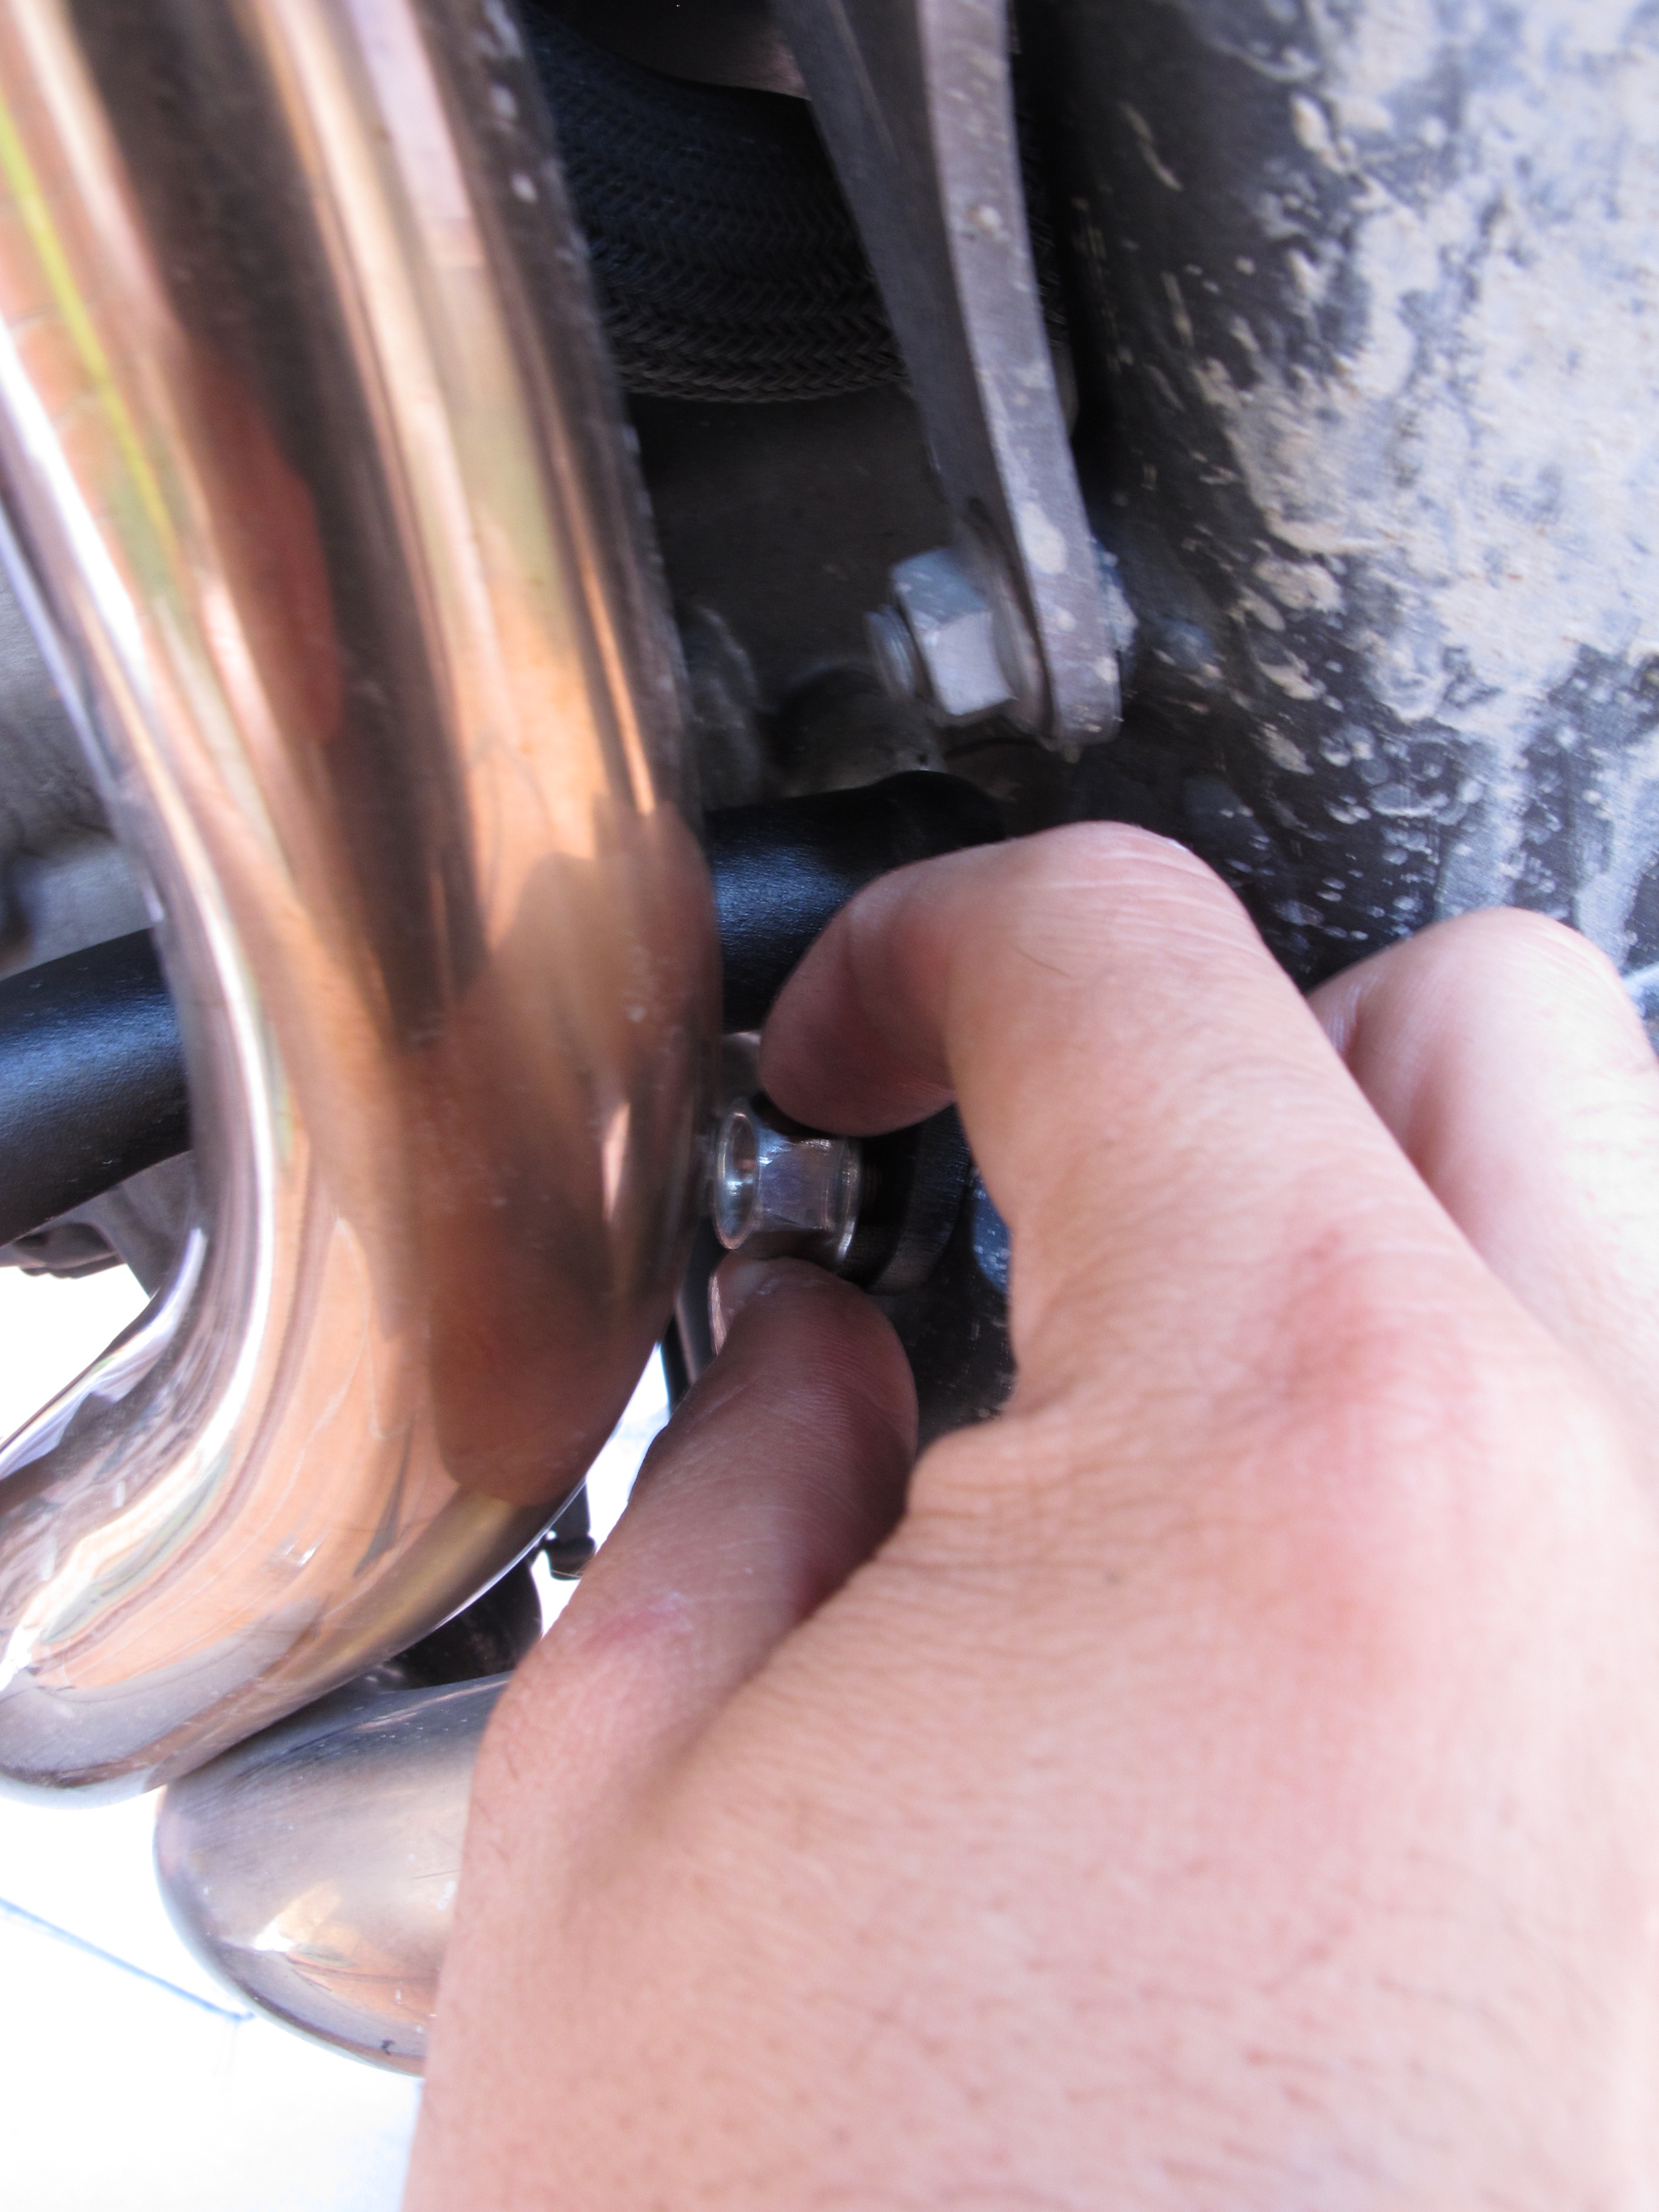
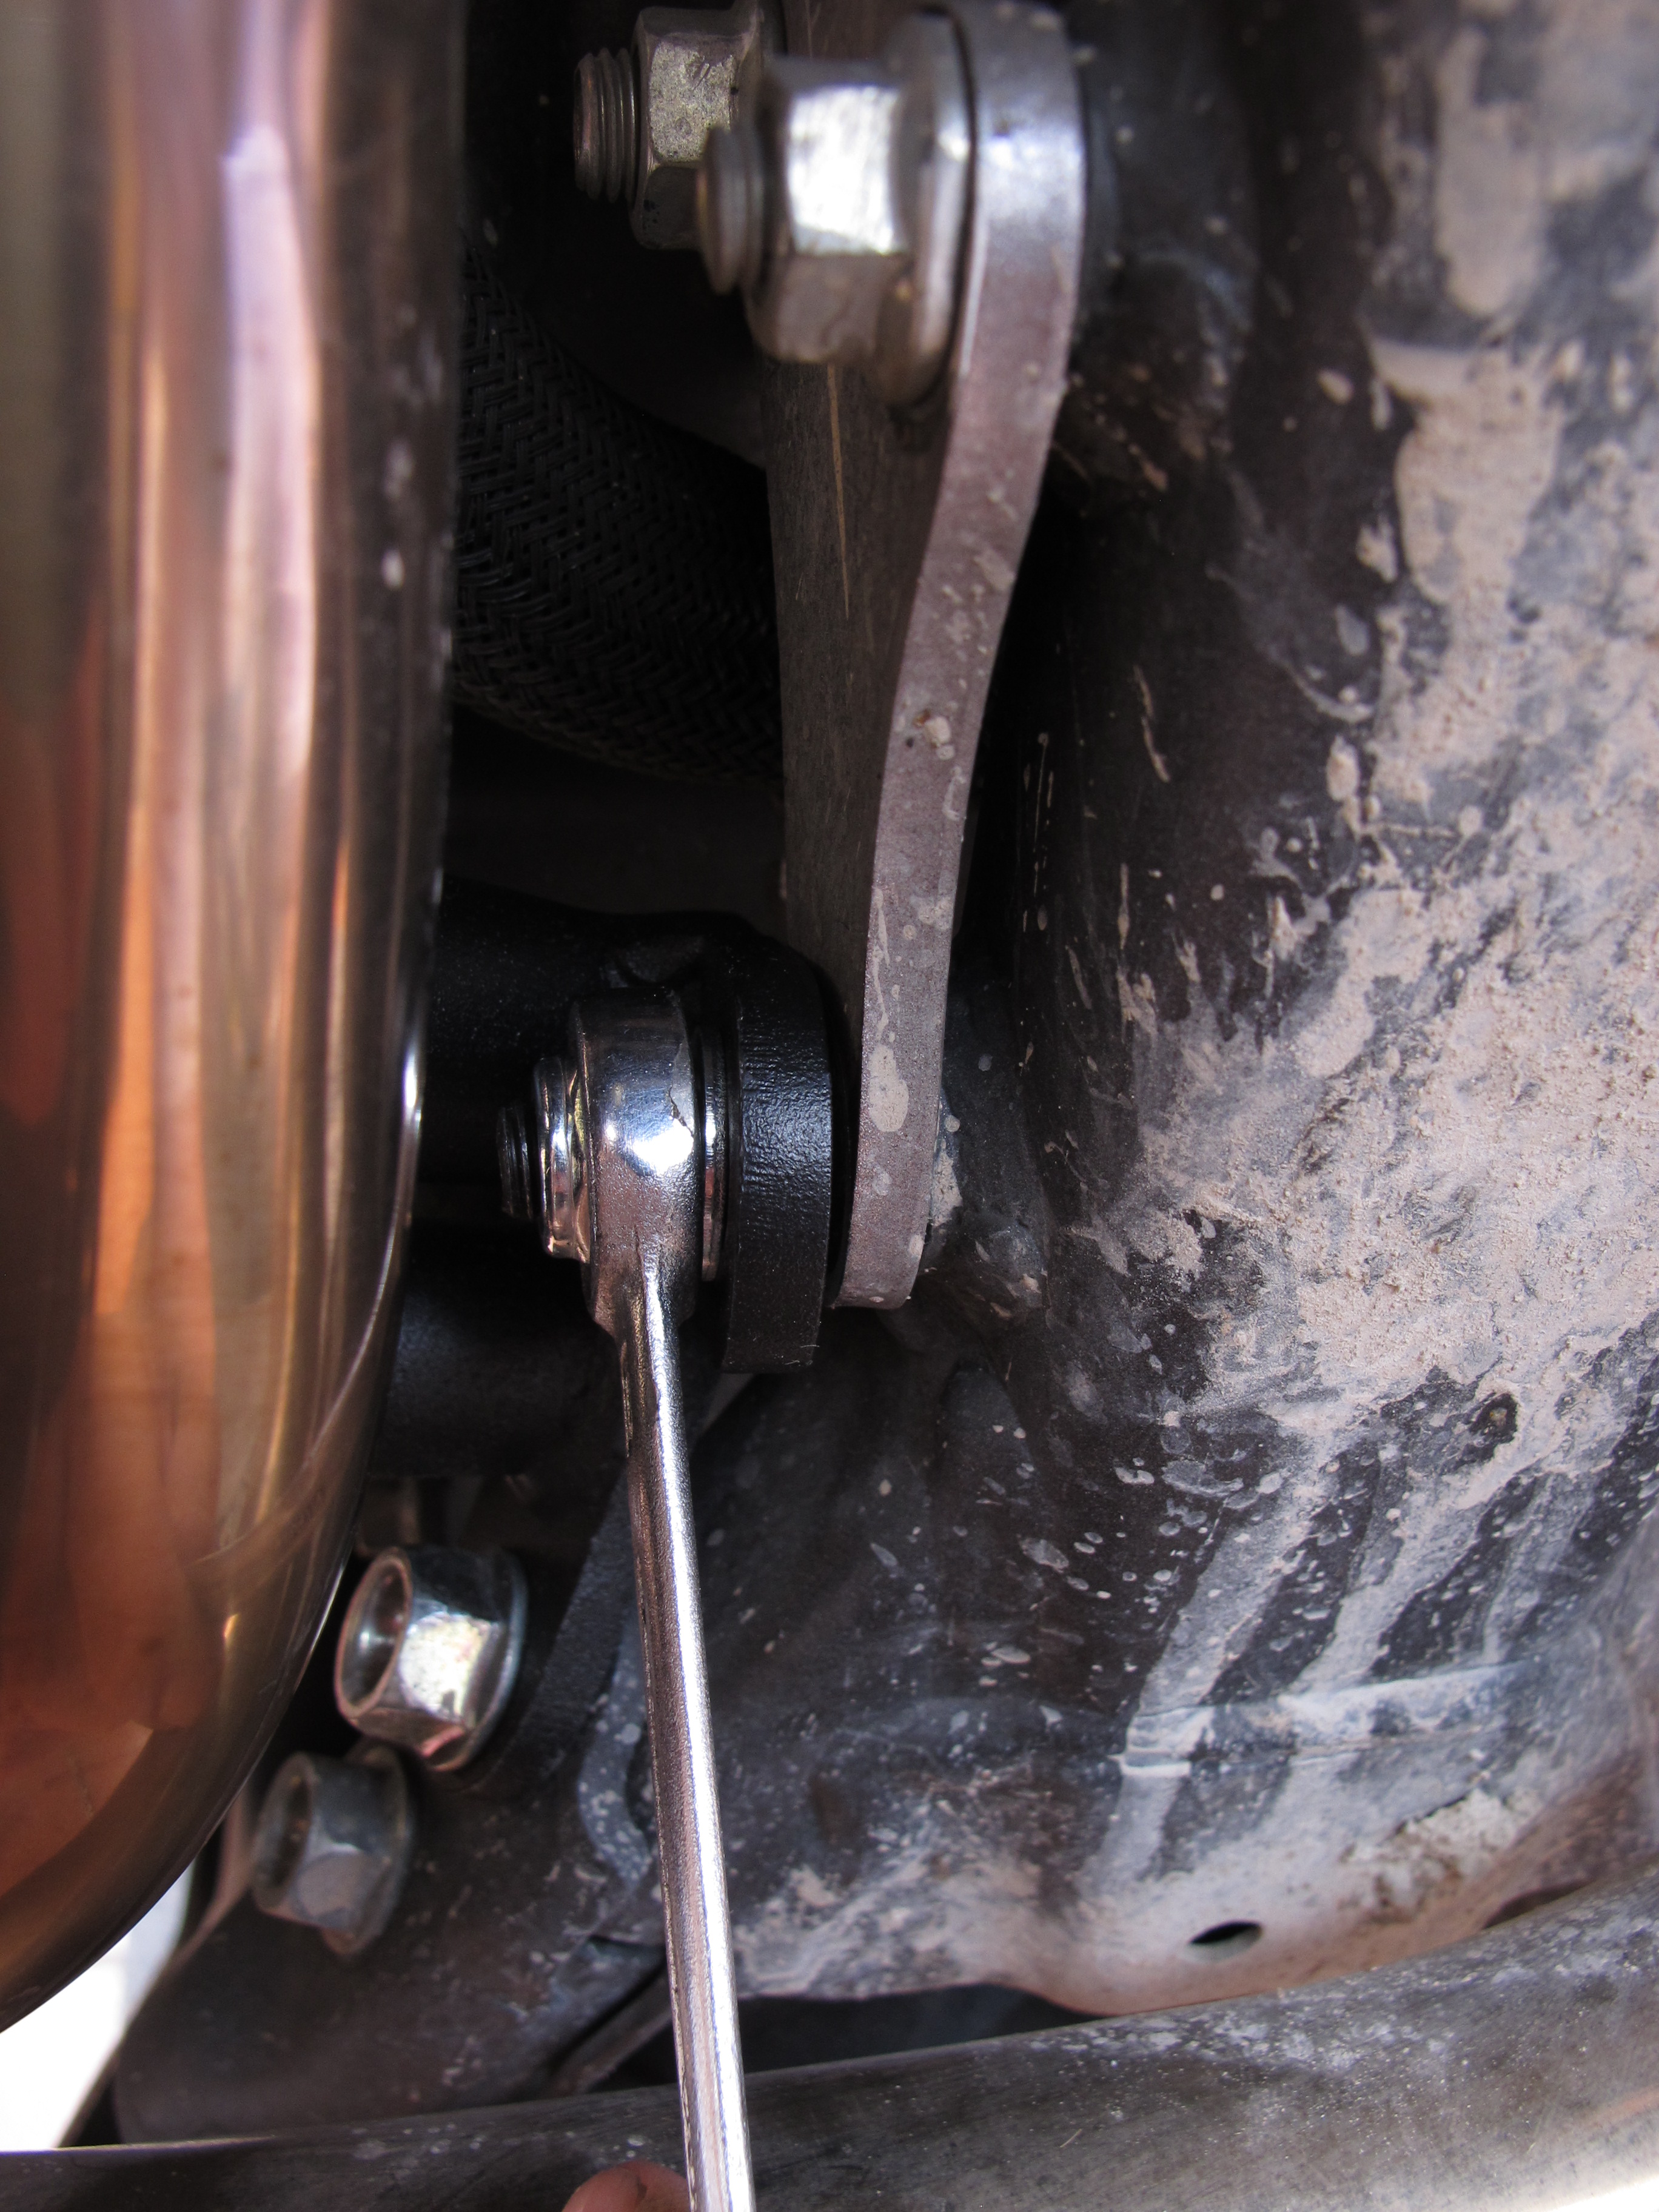
At the front, the right one uses one of the bolts that connect the cradle frame coming from the bottom of the engine to the vertical beam between the radiators.
The OEM bolt is long enough, so no replacement bolt is provided. It is a bit tricky to remove with your fingers and to put back in place with the crash bar, but both to loosen it first and then to tighten it again there is enough space to work with a spanner without any problems.
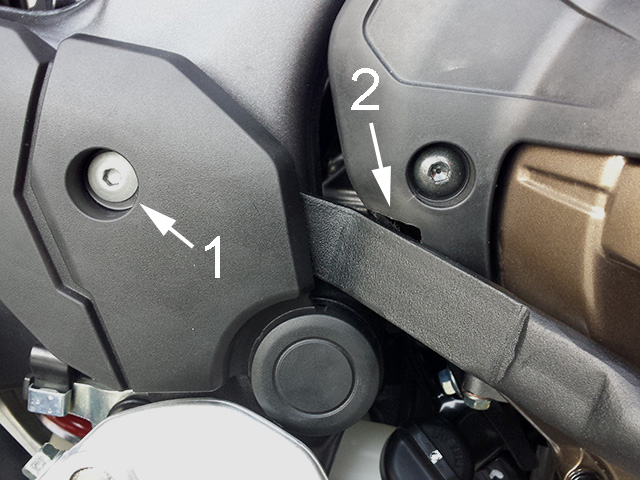
There have been reports of problems with the plate at the back end of the right engine crash bar touching and bending a bit the plastic that protects the clutch housing. Some people have just left it that way, others have filed off a bit of plastic (number 2 on this picture, which is from a DCT model). I had no such problems.
The left crash bar mounts on the lower bolt of the front engine mount, and this is shared with the upper left crash bar, so you need to fit both at the same time.
At this point, the easiest way to proceed is to line up both upper crash bars, insert all bolts, nuts, spacers, and washers without tightening them and then tighten them one by one. It is much, much easier if you have a friend to help you hold the bars while putting everything in place.
Here was where I had the second and only other problem. The upper and lower crash bars are sold as separate products; you can buy and fit one or the other independently or both at the same time. The thing is, Holan does not make any special provisions for those who are going to fit both, which means that when it comes to the lower bolt on the front engine mount, they provide a longer bolt with the lower crash bars to accommodate the flange at the front of the bar, and another bolt of the exact same length with the upper crash bars to accommodate the flange at the bottom of those bars. See where this is going? When you put both flanges together in the same point, neither of the bolts provided separately is long enough.
I had to leave things half mounted and go try to find the right bolt. More than an hour and three specialised shops later, I got one.
At the top, the two halves of the upper crash bars are held together with two Allen bolts which are colour silver and stand out quite a lot against the black bar. It might be a good idea to either paint them or replace them with black ones.
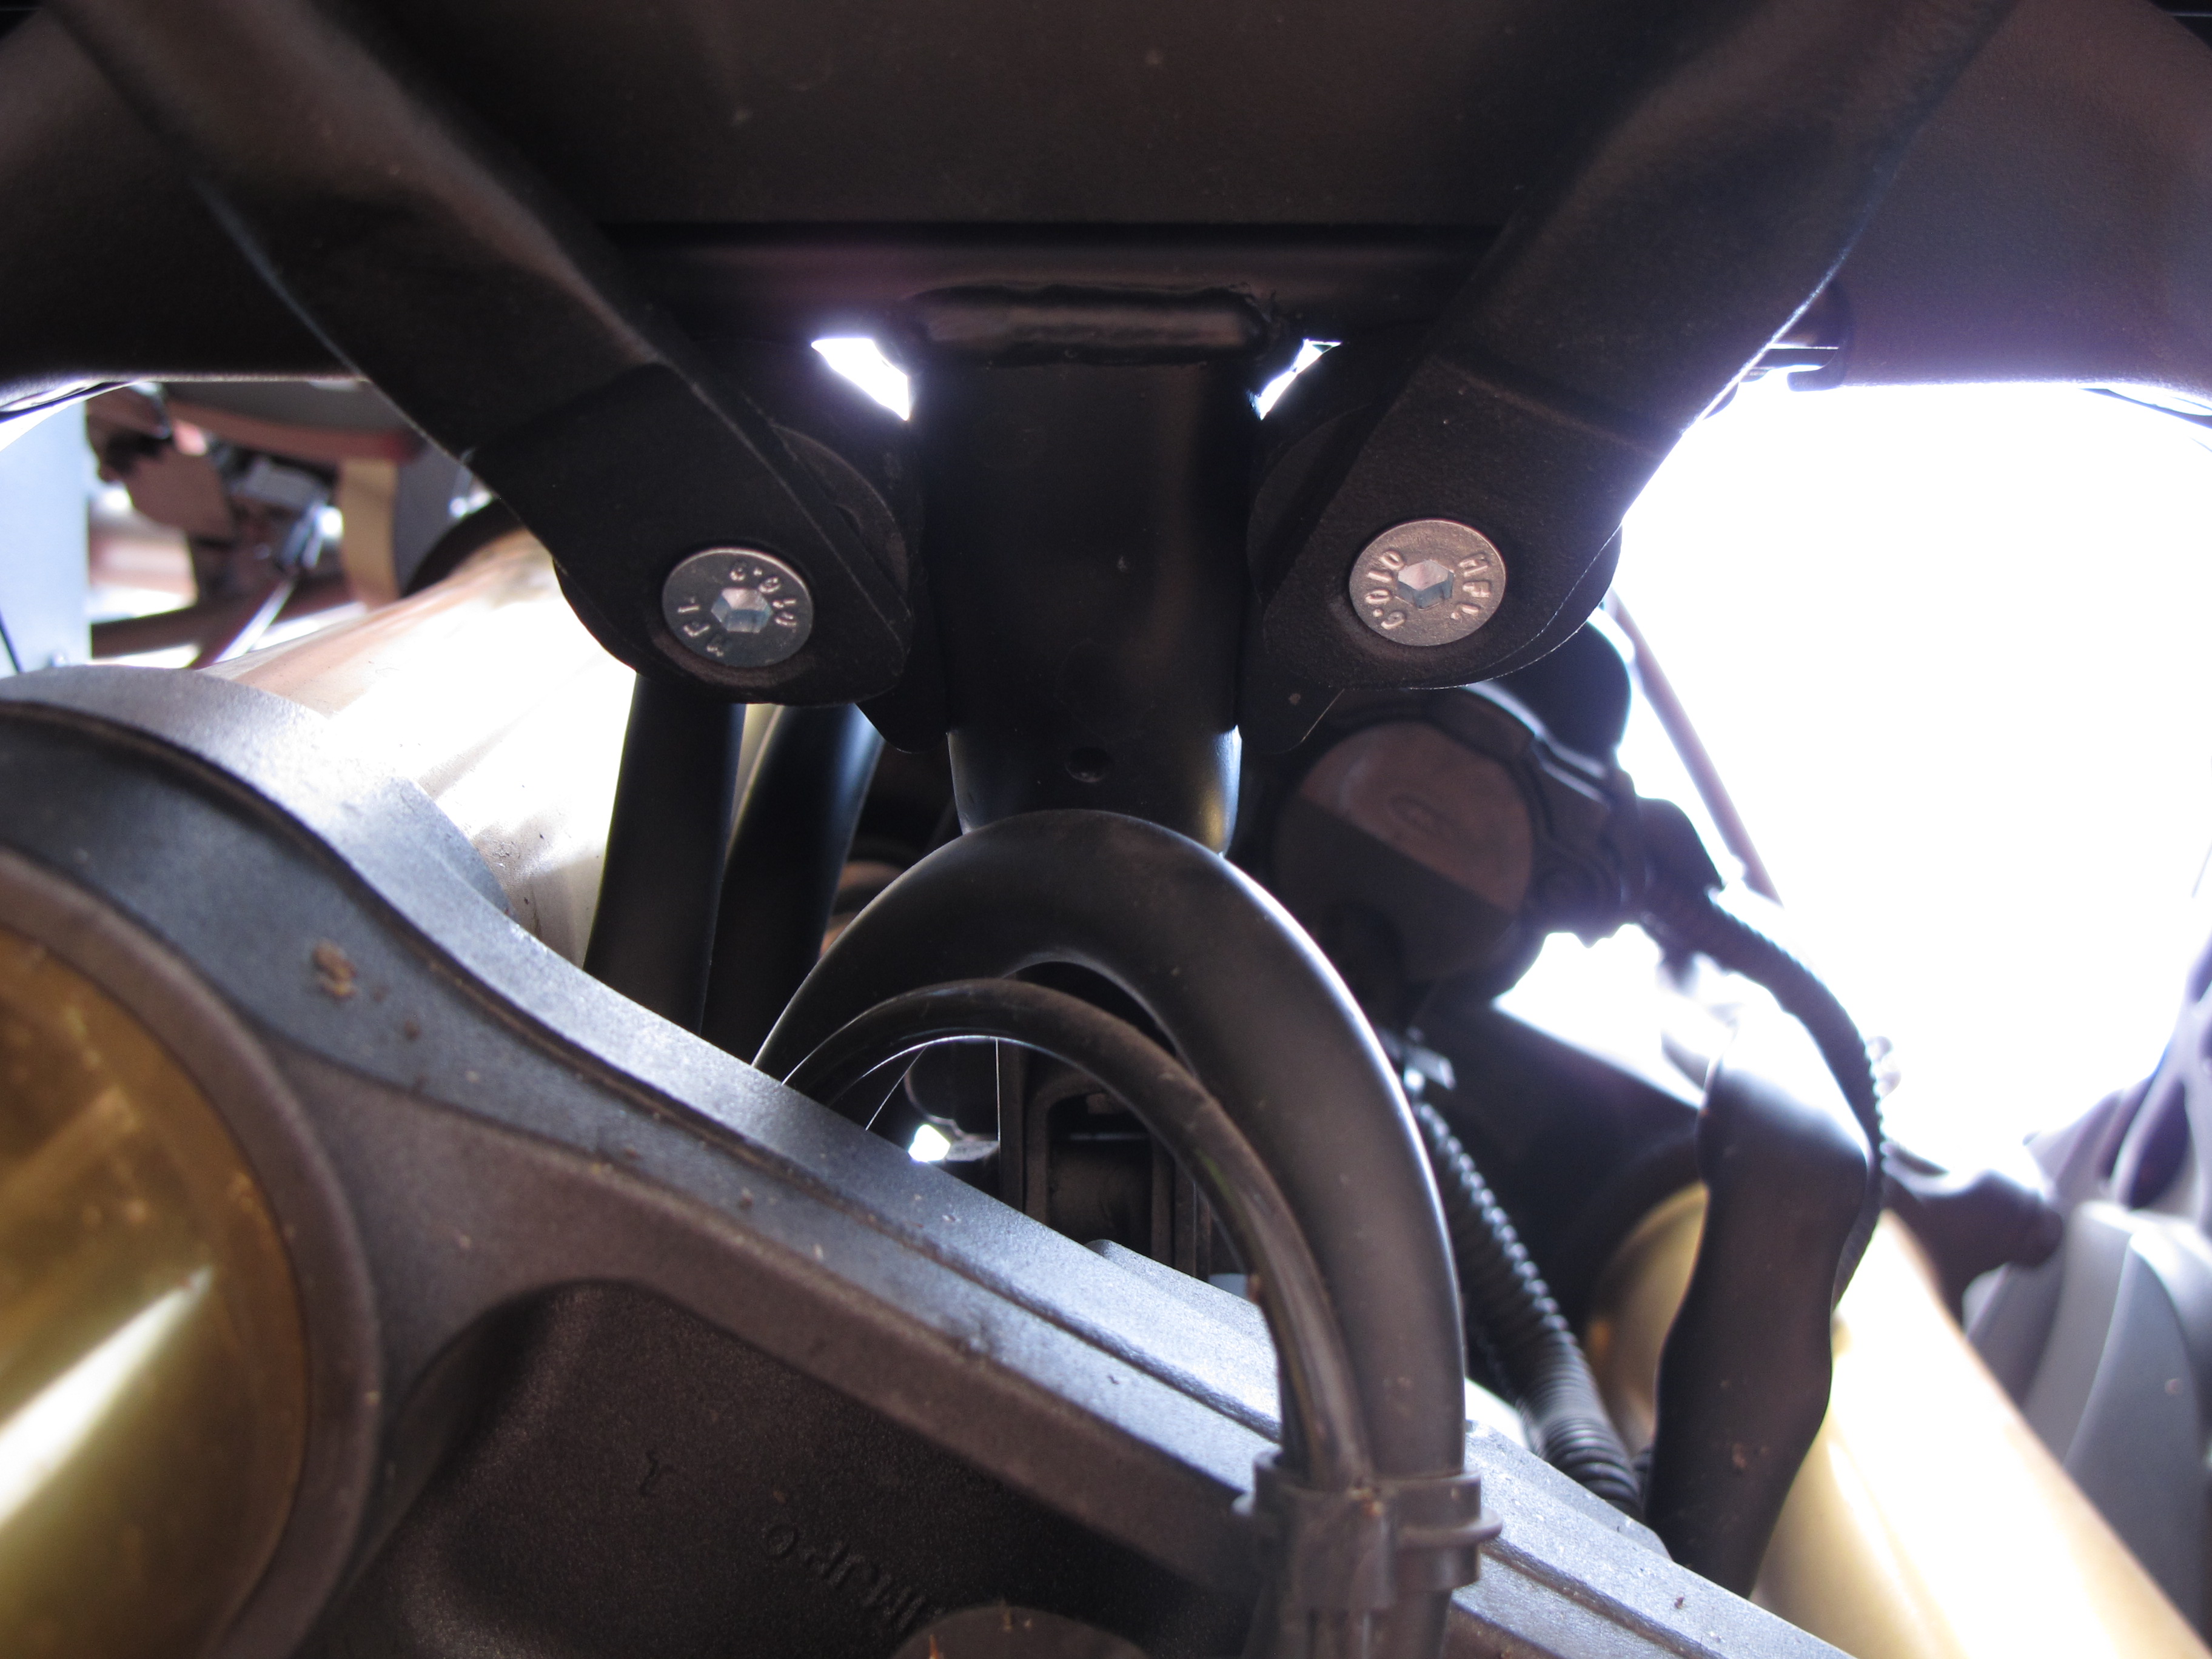
The other mounting point for the upper crash bars (unless they are the ‘Pro’ ones) is under the headlight. Two plastic spacers and two bolts and nuts are provided. In my case, everything lined up without any problems and did not have to modify or bend anything.
Now we only have to wait and see how they fare when I start dropping the bike.
If you are only looking for instructions on how to install the pannier system on your bike, scroll down until you find the INSTRUCTIONS section. If you are bored at the office and fancy reading the whole story, read on.
This Polish pannier system costs about 200€ less than the equivalent offering from Touratech and includes a right pannier with an exhaust cut, something that the German manufacturer seems to refuse to make for any bike other than BMWs. They are mostly (more on that later) a match for the German quality, so taking into account the added benefit of the exhaust cut, where does the difference in price come from?
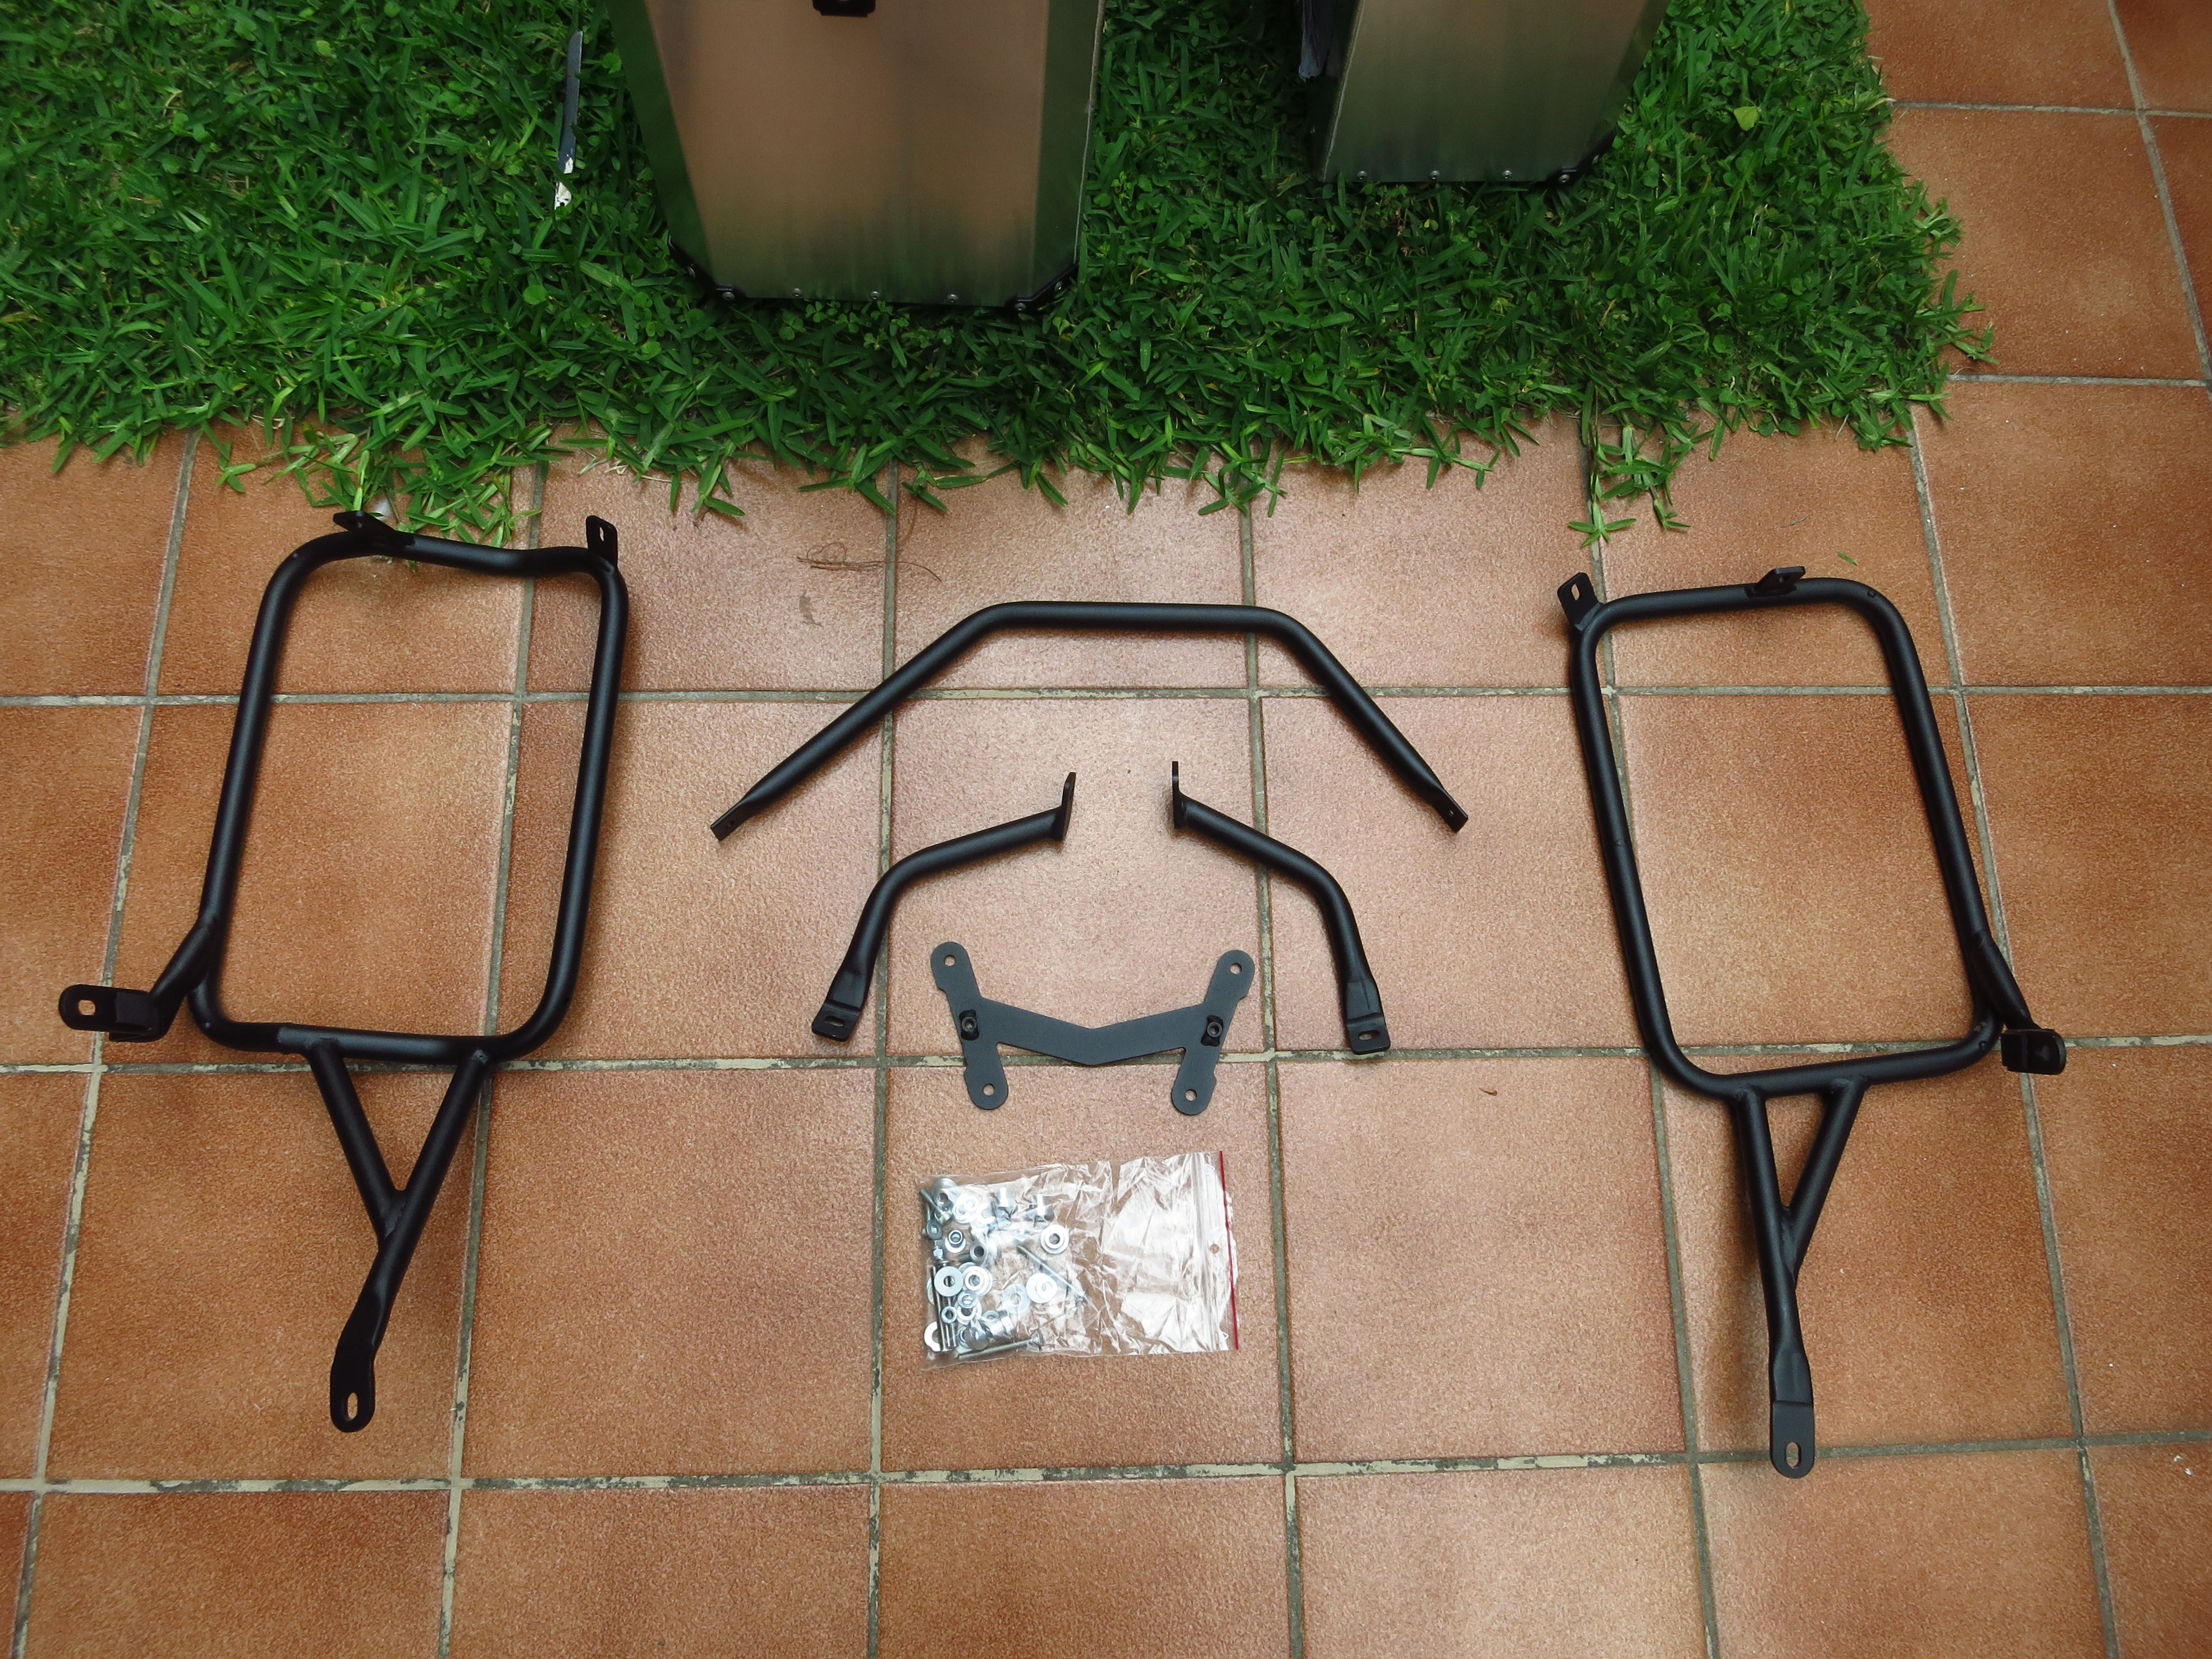
Instructions, apparently. The Poles do not include a single piece of instructions for their products. You get the panniers, the support hoops, a few metal tubes bent in different shapes and a bag of bolts, nuts, washers and spacers and are left to do your best to guess how it all fits together onto your bike. Not that Holan is trying to save the Amazon by eliminating the need for printed instructions, mind you, there is not even a PDF on their website. Really Holan? Really? Is it that hard?
Better be a Meccano fan, then.
Holan panniers usually come with the mounting points already fitted at no extra cost, which is another advantage over Touratech, but in my case I got a pair that the Spanish dealer had in stock to avoid the long wait for the panniers to be shipped from Poland, and I was aware that I would have to fit the mountings myself. That was not a problem, though, as I had experience on my old Touratech panniers, the only drawback was that it is a time consuming process.
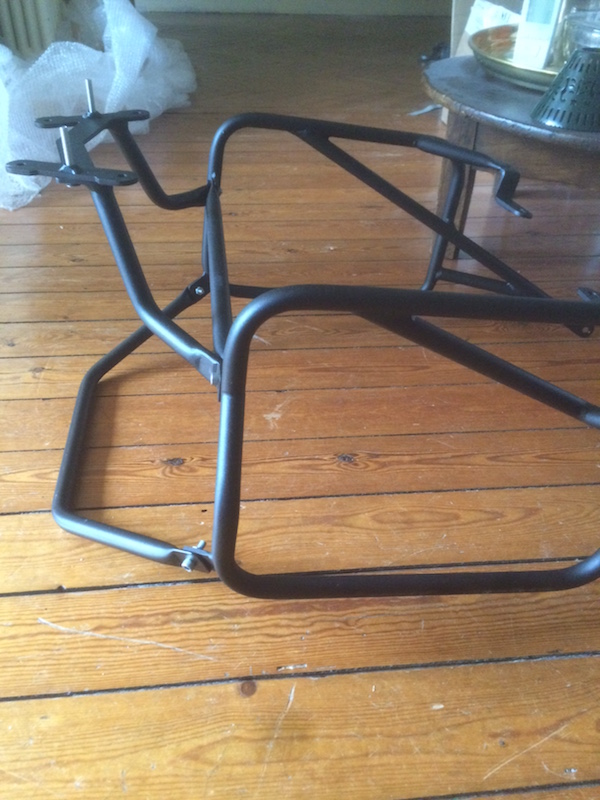
The first racks that Holan made did not have any mounting points to the back of the subframe to avoid the need to drill through the fender, but they flexed too much and the design was modified to include an extra mounting point. This single picture of the new rack had made its way to the web, but that was all the information I had:
I assumed that it would require the same process as the Touratech, GIVI and Globescout systems, drilling a couple of holes through the rear fender to attach it to the end of the subframe. Two things did not look quite right, though.
First, looking at the picture above, those two bolts seemed to be too far back to fit through the fender at the end of the subframe, they were more like under the rear light or license plate.
Second, with the bits and pieces already scattered in front of me, the H-shaped plate where those bolts mount was too wide and too flat to fit under the fender, which has a pronounced inverted U shape. Maybe it fit on the other side of it, under the seat?
I decided to loosely mount the hoops on the attachment points on the passenger footpegs and the front of the subframe to try to figure out how the new parts fit together, and after a few minutes of fiddling it dawned on me. They attach under the rear luggage rack, not the subframe! So the good news is, the Holan system still requires no drilling.
From that moment on, it was only a matter of figuring out where all the bolts, nuts, washers and spacers went. Here is how to fit it:
INSTRUCTIONS
Remove the seat. It is not necessary to remove the pillion seat, although it is advisable to avoid getting it dirty by accident, particularly if you have the red one.
Remove the two bolts that hold the luggage rack and passenger handles to the subframe that are closer to the front of the bike. The Holan rack attaches directly to these points, a solution which I prefer to them hanging from the existing points for the OEM luggage.
Remove the passenger footpegs. You will need to completely remove them, as one bolt will hold the rack mounting point and the other requires a spacer.
If you have a top case or luggage rack, you will also need to remove it (not my case yet).
Important! If your panniers come with the mounting system already fitted, you can start installing the rack on the bike now. If you need to drill the holes to mount them, do not mount it on the bike yet, you need the hoops to take measurements to mark the drilling points on the panniers. I explain this process further below, so read that now if you need to, then come back here once your mounting system is fitted to the panniers and you are ready to fit the rack on the bike.
The easiest way to make sure that everything lines up as it should before you start tightening bolts is to mount all the parts onto the bike and fit all the bolts and nuts loosely, then start progressively tightening them. More often than not, something will not line up and it will require pulling, pushing or bending.
In my case, and at least one other member of the Spanish forum, the mounting point to the subframe for the exhaust side hoop required extreme force to line up with the hole. Not wanting the bolt’s thread to get damaged later, I put it on a bench vise and bent the mounting point slightly backwards with a precision correction tool (also known as ‘hammer’). After that everthing fit without any problems.
The lower mounting point attaches to the upper bolt of the passenger footpeg. Because this will cause the footpeg to be slightly further outwards than before, you need to use the provided spacers in the lower bolt. Don’t remove the washers that come with the footpegs.
At the back, mount the lower bracing bar that connects the bottom of the hoops together with a washer on both sides of the bolt. The side with the more open angle is the exhaust side.
To fit the extra mounting point under the luggage rack you need to use the eight special spacers. Put four on the holes on the luggage rack from the top (narrow side down) and drop the long Allen bolts with the rounded head into them.
Now comes the tricky part – you need to fit the other four washers (wide side up) up the bolts, fit the H plate without them falling (and with the welded threads facing up) and start screwing the self locking nuts. Do not tighten them completely.
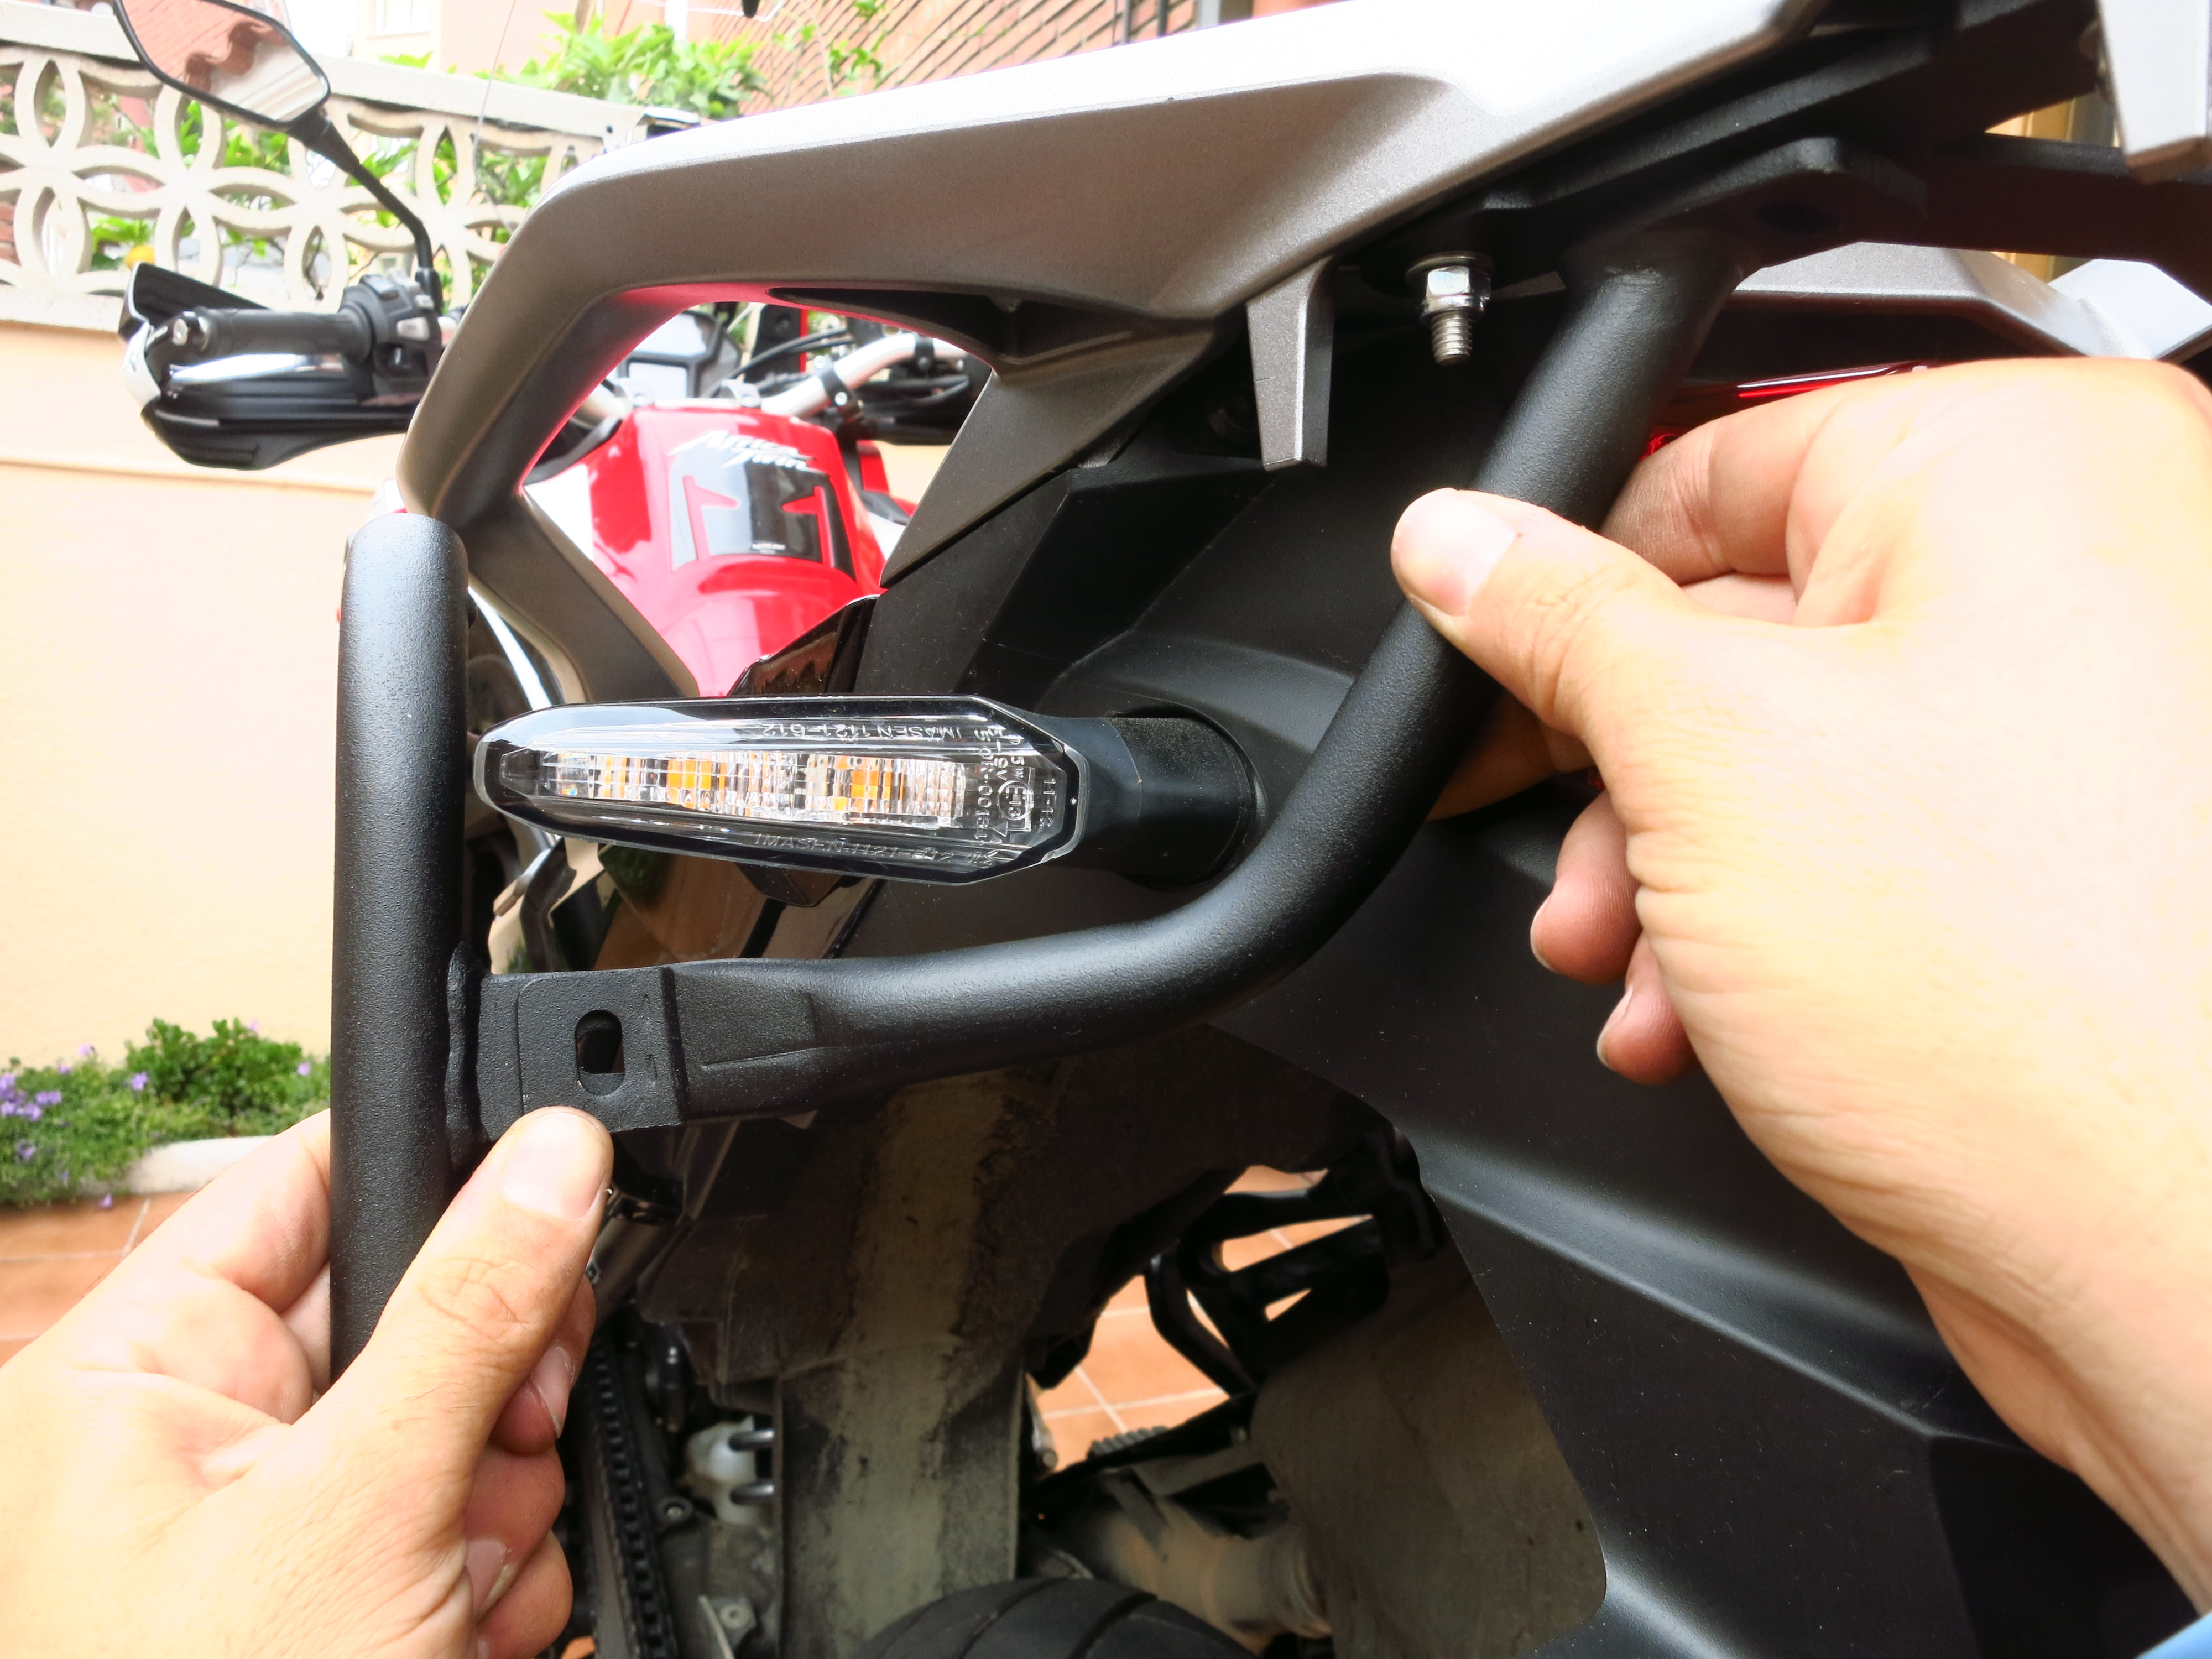
To finish, attach the L shaped mountings from the top of the hops to the H plate under the luggage rack.
They fit with the angle facing to the ground so that they clear the indicators. In my case, Holan had not included the two bolts needed to fit them to the H plate, so I had to find a pair from my personal stock.
The only thing left to do now is to go around the rack and progressively tighten all the bolts and nuts. All the nuts provided are self locking, but it is always advisable to check everything has settled in properly after a few days riding and to put a drop of thread locking glue in them to make sure that nothing comes loose.
FITTING THE PANNIER MOUNTS
For those of you unlucky enough to get the panniers without their mounts already fitted, here is how to do it.
With the old Touratech Zega panniers, or any others that do not have rounded or cut corners, nor an exhaust cut, it was possible to play a bit with the mounting points to find the best position – a bit further back, or closer to the front, higher or lower… in order to do this properly the best method was to mount the racks on the bike, check exactly where you wanted them (usually with a passenger) and then remove the panniers to use the hoops to mark the exact drilling points with the panniers lying on their side on the floor. In this case there is not much room for lateral movement, and you can’t choose the height as that is determined by the exhaust cut, so you can take all the measurements to drill the holes without the need to mount the rack on the bike before.
Take the pannier with the exhaust cut, lay it on its side, place the hoop on it and measure the distance across to both edges.
There is a bit of room to mount it slightly forward or backward, but not much, and mounting it in the middle means that you minimize the risk of making a mistake then transferring these measurements to the other pannier (see my previous post about that) and that you will be able to swap left and right if in the future you buy a bike with the exhaust on the other side (providing Holan makes a rack for that one, that is).
Then measure the distance from the top of the hoop to the lid. And write all these numbers down.
With the hoop in the exact position you want, place the plastic pucks on their correct position on the inside of the hoop (you will need a friend to hold it down in position for you to make sure it does not move a millimeter, or alternatively, put some weight on it). Take a long thin pencil or even better, a metal punch, and mark the position of holes of the plastic pucks on the pannier.
Remove everything and drill the holes (5mm for the small bolts, 8mm for the big ones).
Clean the metal shavings with a bigger diameter drill and mount everything in the following order: from the inside – the reinforcement plates (small) and the bolts; from the outside – the reinforcement plates (long) the plastic pucks, the metal plates (at the bottom) and the rotating locking plates (at the top). Make sure the 8mm holes at the top are wide enough for the rotating locking plates to turn freely.
In my case, I had to add a spacer for the locking knobs inside the pannier, as they are too close to the head of the small bolt, and no spacers were included in the kit.
The hoops have a small metal bump onto which the rotating locking plate fits to make sure they do not turn as you are tightening them. One of them did not fit (the cut on the plate seemed to be too short) so I had to lengthen the cut a bit.
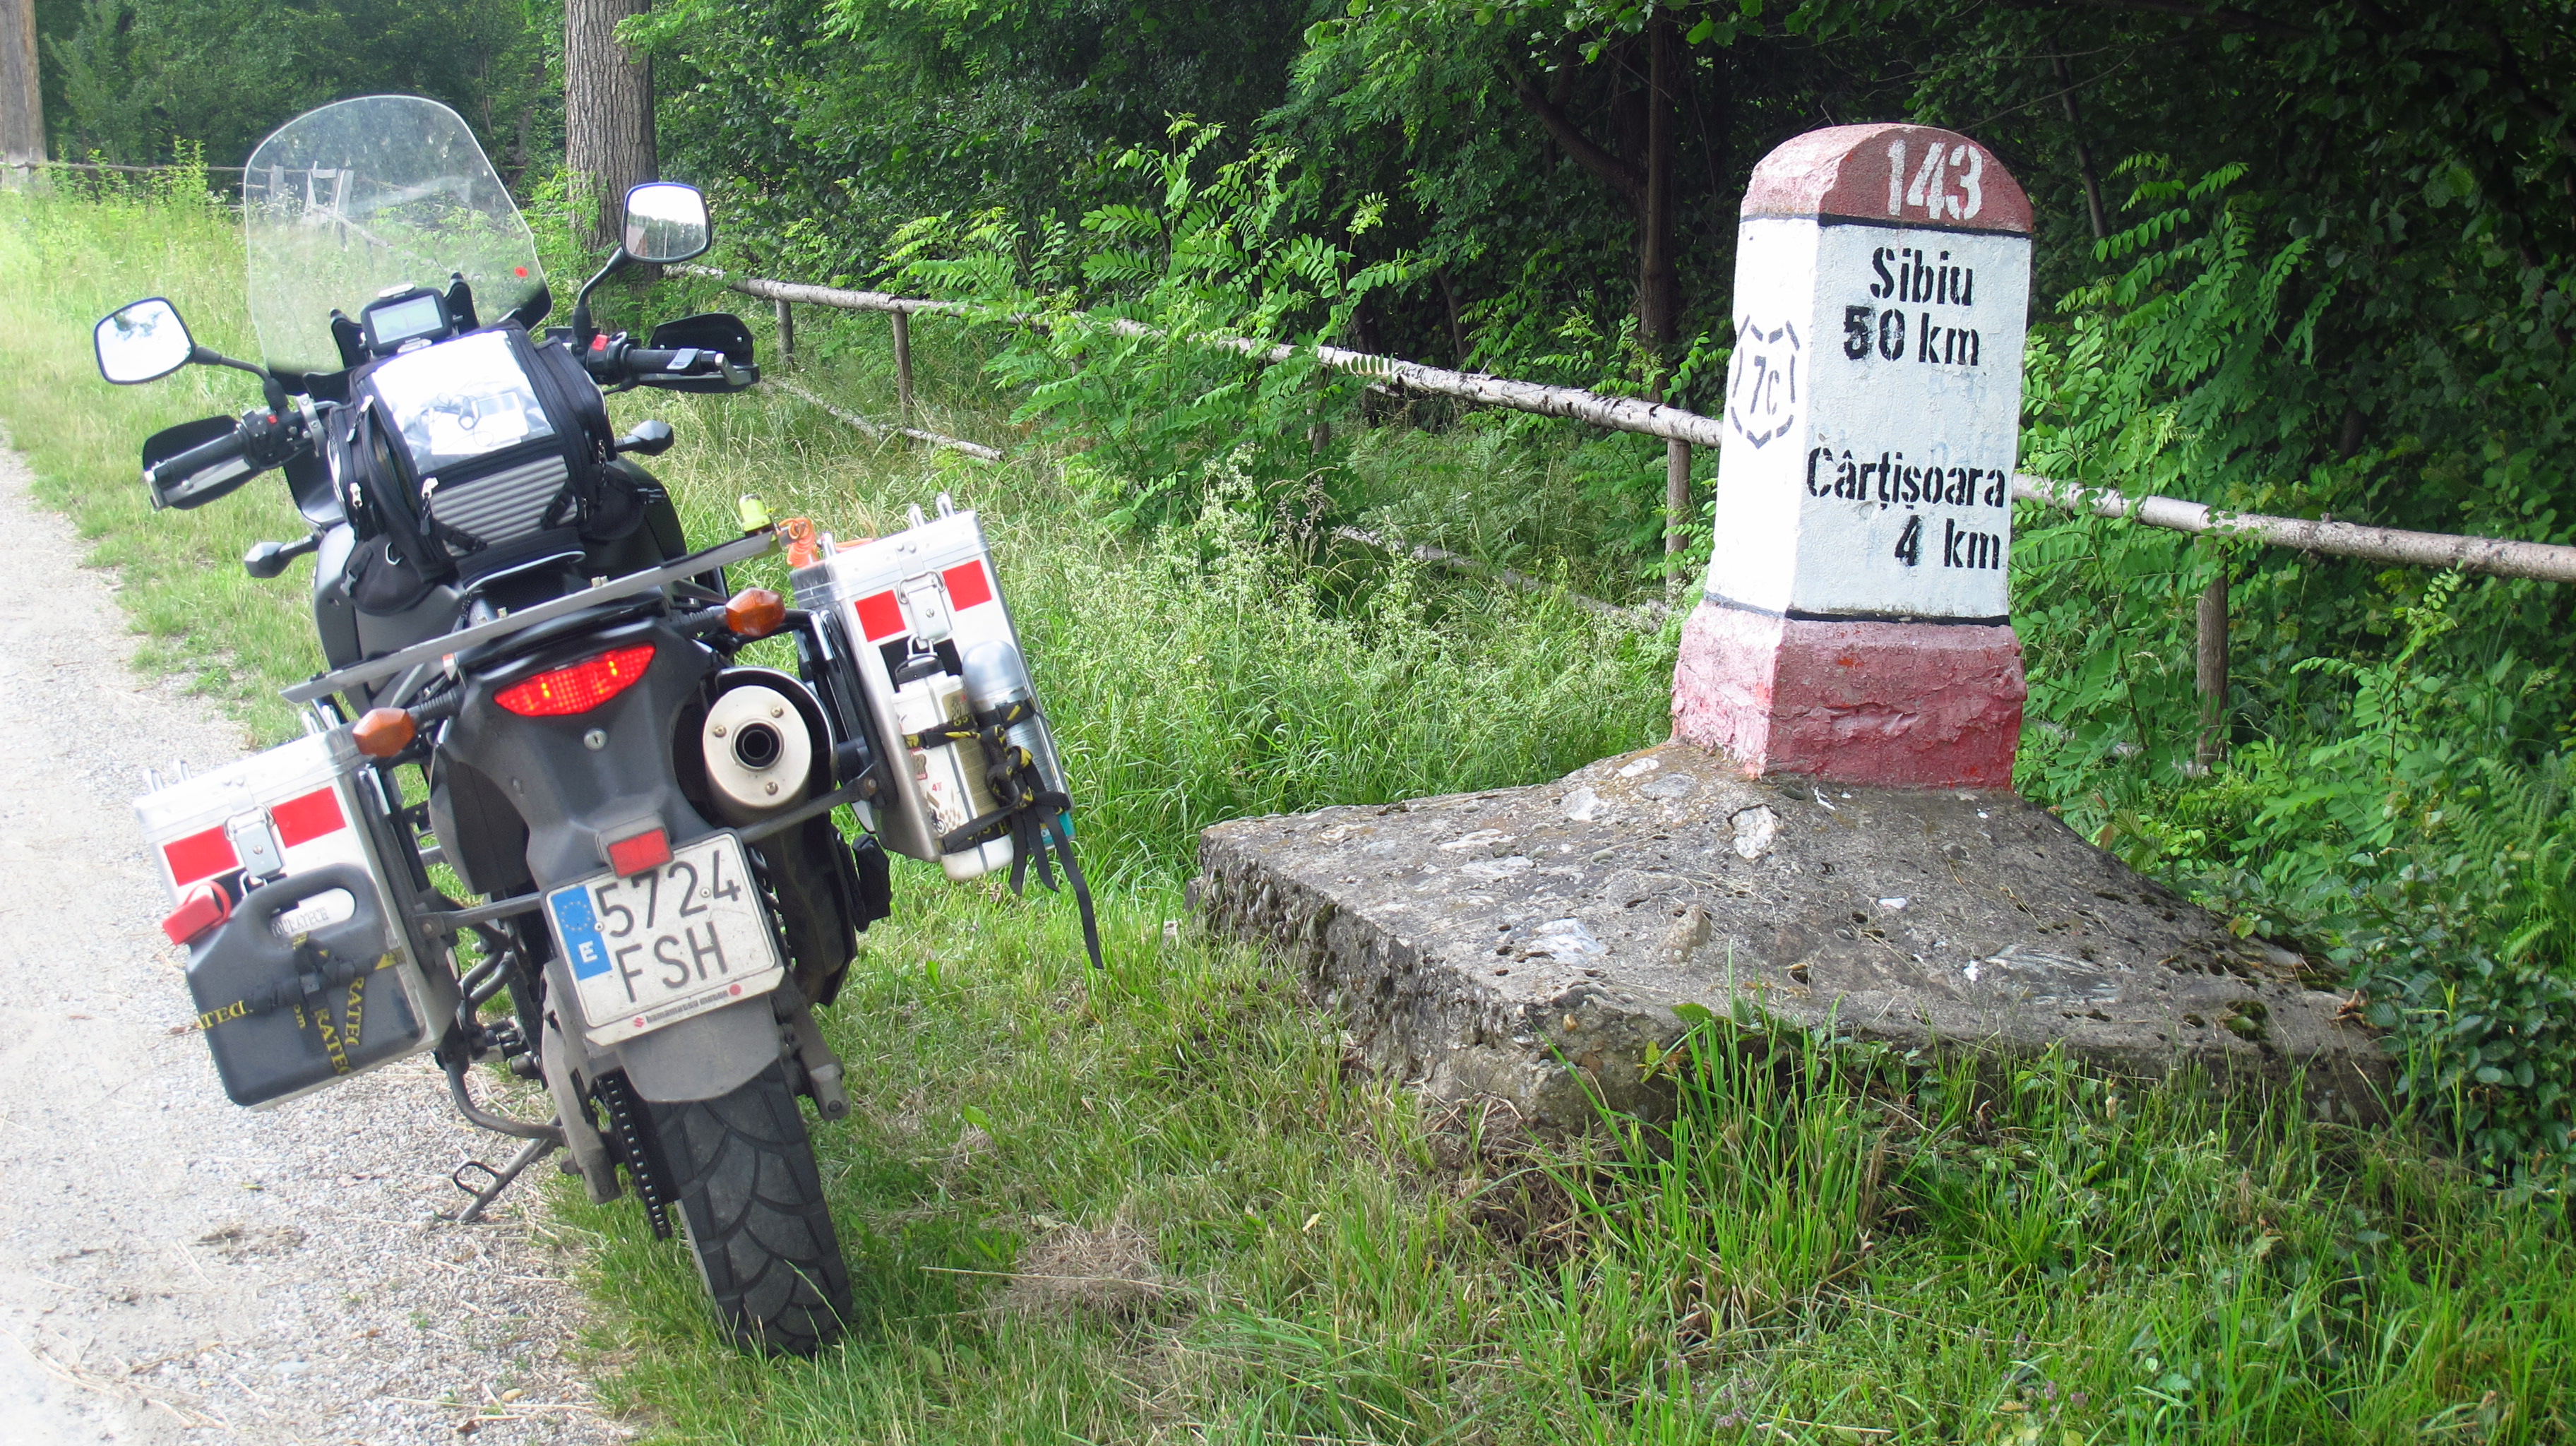
All in all, two bolts and four spacers missing, a mounting point on the rack that required some “aligning”, a cut on a locking plate that needed lengthening and no instructions. If you like DIY, have access to tools and want panniers with an exhaust cut, these are a very good choice. For 200€ more, and if you forego the exhaust cut, the Touratech ones come with instructions. I don’t know about the latest models, but my old Zega ones (first generation) still required drilling (more holes, actually) and the rack also needed bending. No missing bolts or spacers, though. If you want the full GSA look, try Globescout. Instructions, anodized ,no drilling and supposedly excellent quality. They are 300€ more. Oh, and Holan prices include shipping.
Soft luggage or hard luggage? The debate has been going on and on forever, and I am not going to further it here. To cut to the chase – both.
The AT is supposed to be a decent offroad machine, so the choice should have been clear – soft luggage, but I will also use mine as a long distance, 2 up, touring machine with the occasional excursion into unpaved roads, which requires the extra capacity and added security of hard cases. So the decision was made to buy a set of aluminum panniers for the upcoming trip this summer and use my Ortlieb bag for solo excursions into the dirt. If I do another long solo trip I might buy a pair of saddlebags and strap them to the racks of the aluminum panniers.
With that settled, the question was – which ones?
I had a Touratech system on the V-Strom and was very happy with it – those boxes had withstood countless falls and drops and I had always been able to bang them into shape. The V-Strom and the AT have the exhaust on the same side, which means that I could simply buy the rack and keep using the old boxes, but a few things stopped me from doing so.
Firstly, when drilling the holes for the mounting points on the panniers for the old bike I made a measuring mistake that meant that one of them was mounted further back than the other. Not by a big margin, mind you, but it is noticeable and something that still annoys me to this day.
Secondly, having the exhaust on one side only meant that one of the boxes had to be smaller than the other, and the rather fat ass of the V-Strom meant that I had to go for the smallest combo that Touratech sold to keep things as narrow as possible. For the AT I wanted a system with a cut on the exhaust side, GS-style, to maximize luggage space and keep the boxes close to the bike.
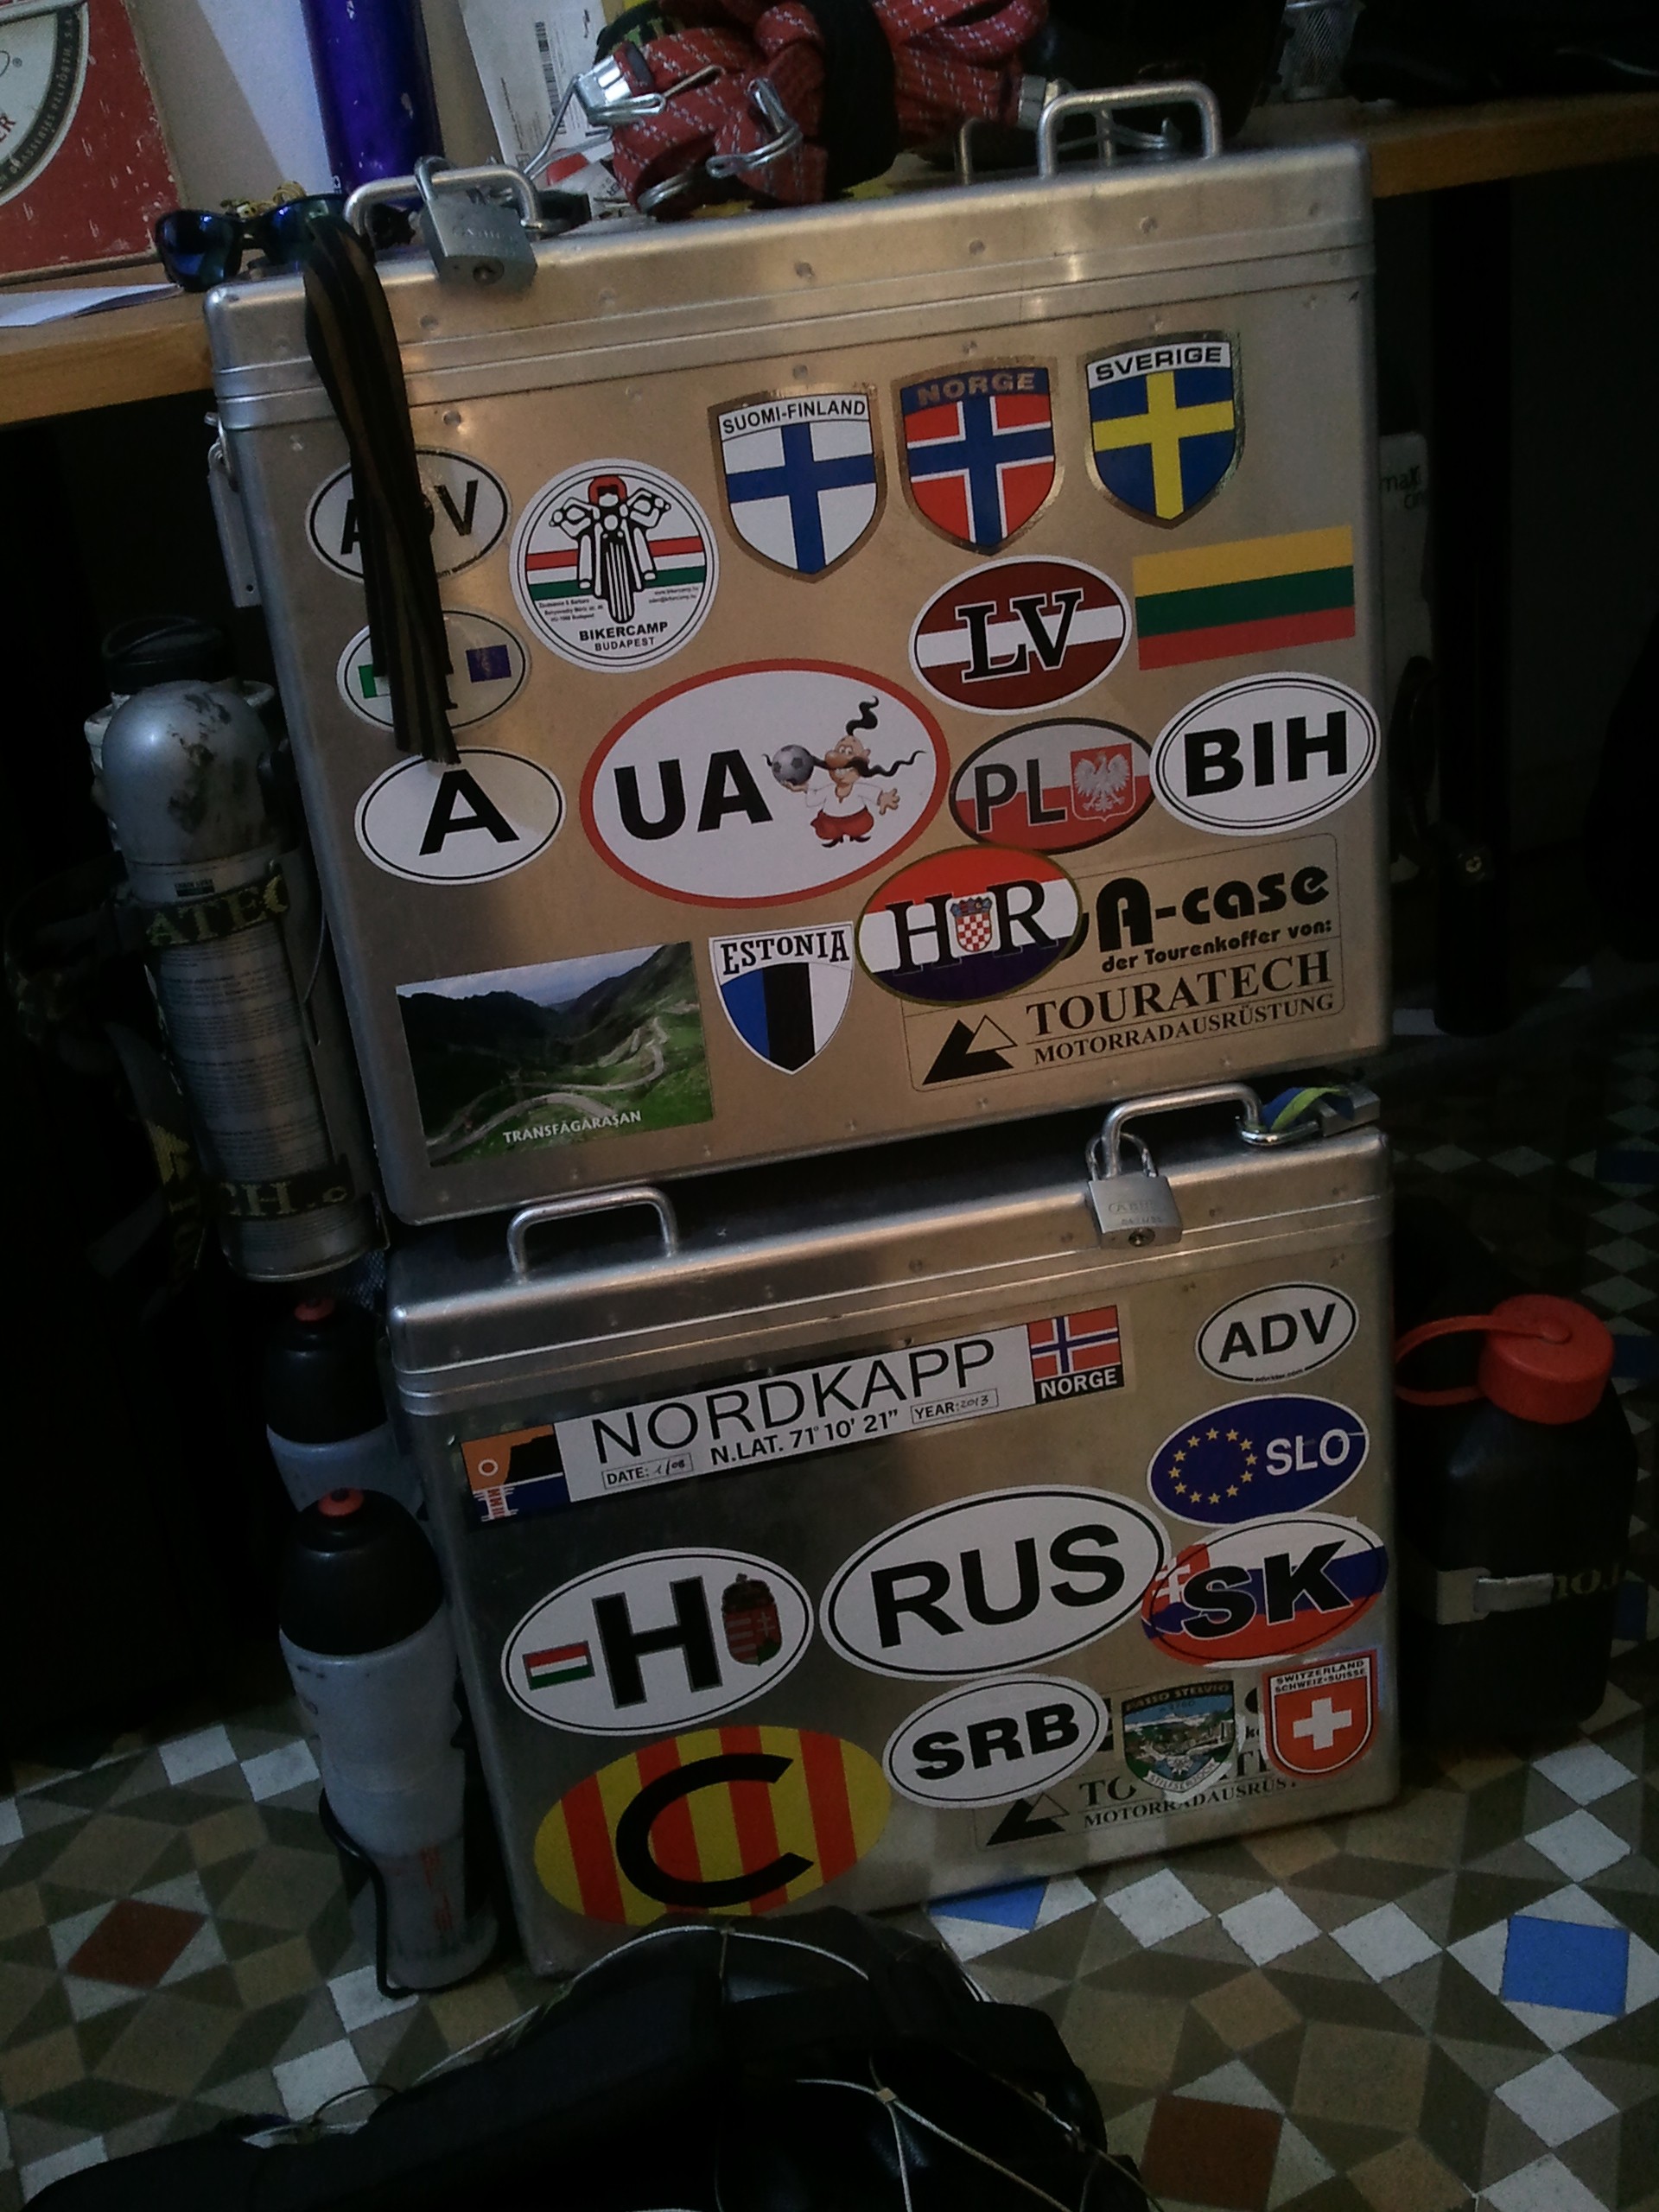
Last but not least, the old boxes had all the ‘medals’ (i.e. country stickers) that the other bike had rightfully earned, and it seemed plain wrong to have them on the new, yet unproven bike. I know this sounds stupid to a lot of people, but I believe that the AT has to earn its wings.
It was time to do some market research, then.
The only two companies I found that manufactured a system with an exhaust side cut were Holan, based in Poland, and Globescout, from Turkey.
Both offer excellent products of the best quality, but I went for Holan because they are a bit cheaper and have a dealer near Barcelona. Unfortunately, things were not going to be so easy.
The moment I got my new bike I ordered a top case from them because I need a minimum of luggage capacity to go to work every day, and I thought I would save the money for the panniers and buy them a month or so before the summer trip. However, it seems that Holan, having been one of the very first companies to put luggage systems for the new AT in the market, have been flooded with orders and have a huge backlog. At the time of writing these lines I still have not received the top case or the crash bars I ordered. This made me fear that the panniers would not make it in time for the summer.
To make things worse, another AT owner and member of the Spanish forum who had placed an order earlier than me received his luggage system and his impressions were not good at all.
The AT is a tricky bike to mount luggage racks on. It is designed for the OEM plastic cases and that’s it, no easily accessible mounting points have been designed for anything else, meaning that luggage manufacturers have had to get creative. It is easy to attach a rack to classic points on the passenger footpegs and the front of the subframe, but not to the back of it. The solution that Touratech and GIVI have found is to drill through the plastic fender to access two mounting points at the end of the subframe and attach the back of the rack there from below.
Holan decided to add a reinforcement bar from the top of the loops to the passenger footpeg and forego the rear mounting points. According to them they had tested the system with the technical department of a Polish university and it worked fine. However, with the system on his bike, the forum member I mentioned above was far from happy. He reported that the setup had a lot of flex, even unloaded, and that he would not dare take his bike offroad for fear of the whole thing coming off the bike.
That was not looking good, so I started looking into the Globescout option. I got on the phone with them and they confirmed that their system also required drilling to access the subframe, which was reassuring, but it was noticeably more expensive than Holan, and if I wanted to have a matching top box I would have to cancel my order and get one from them, which was twice the price of a Holan one.
I was starting to consider forgetting about the exhaust cut and get a GIVI system when I saw a link posted on the forum to a French blog that said that Holan had admitted the design flaw and modified the system with an additional mounting point at the back and posted a picture of the supposedly new system. The people on the forum said that they had got in touch with Holan’s dealer in Spain, but they could not confirm whether or when that modification would be available.
After a lot of unanswered phone calls to Twin Trails, the Spanish dealer, I finally managed to get someone on the phone who told me that the racks were already shipping with the additional mounting point. Not only that, he already had some in stock, and if I wanted the 45L panniers with black lids, he also had a pair. It was the size I wanted and I did not mind the black lids instead of aluminum ones, so I jumped at the chance. A week later, they were delivered to my doorstep.
The lastest addition to the AT is a set of protective stickers to prevent the zippers on my riding jacket and pants from scratching the paint on the fuel tank.
Some people have complained on the Spanish AT forum that the lacquer on the sides of their tanks has started to show some minor damage very quickly, so before mine does too, I ordered this set on Ebay.
They come from Italy, and first impressions on the quality of the product and the service from the vendor were good. They were delivered within a week of ordering and are thick and well-finished.
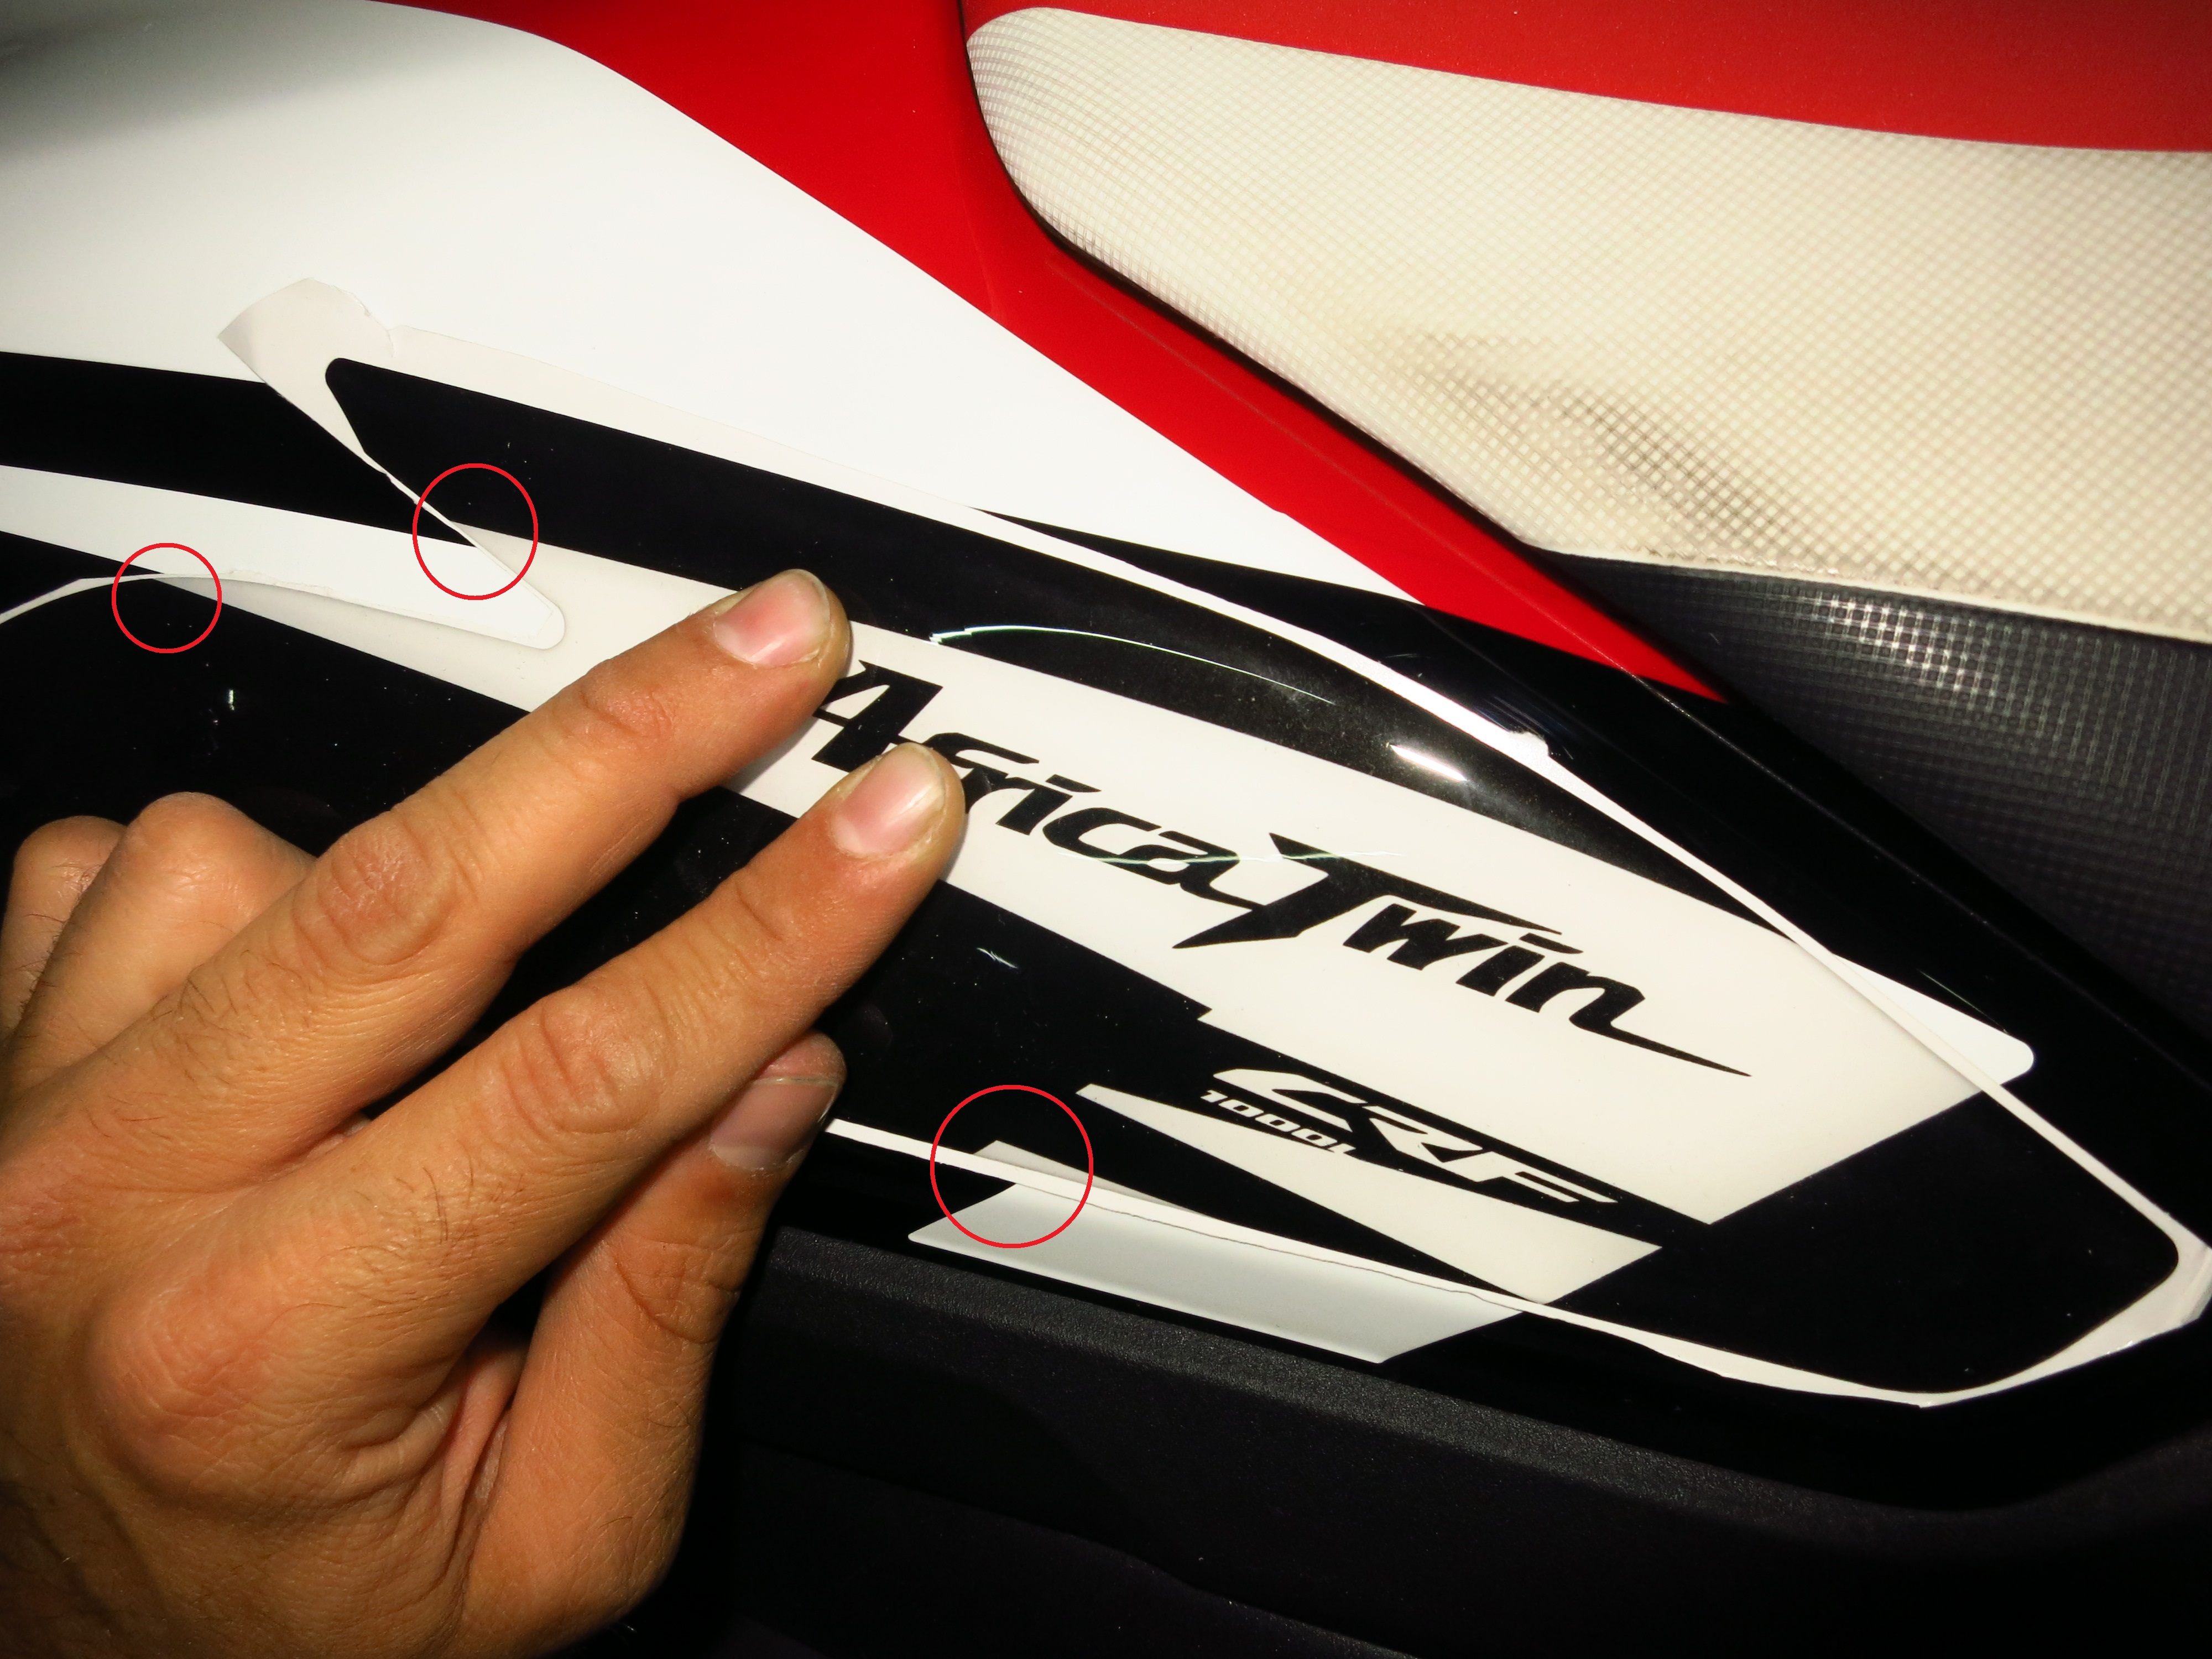
Things did not look so good when it came to putting them on the tank, however. These stickers are designed specifically for the Rally red paint scheme on the AT, the side stickers following the white stripe. When I lined them up against it, I saw that the white stripe on the sticker did not match the one on the bike at several points.
I sent a complaint to the vendor with these pictures attached, and got a reply in less than 24 hours: nothing wrong with the stickers, the white stripe is actually transparent to allow for differences in the paint in different bikes. What I saw white was actually the protective film behind the sticker. Well, that was embarrassing…
Back to the garage to get them on, then.
The tank protector that the previous owner had put on my old V-Strom was about 2cm off to the left, which drove me crazy for the five years I rode the bike, and that was black on black. Determined to do a proper job this time, I watched some tutorials online and followed the recommended method:
Step one: clean the surface with alcohol and let it dry.
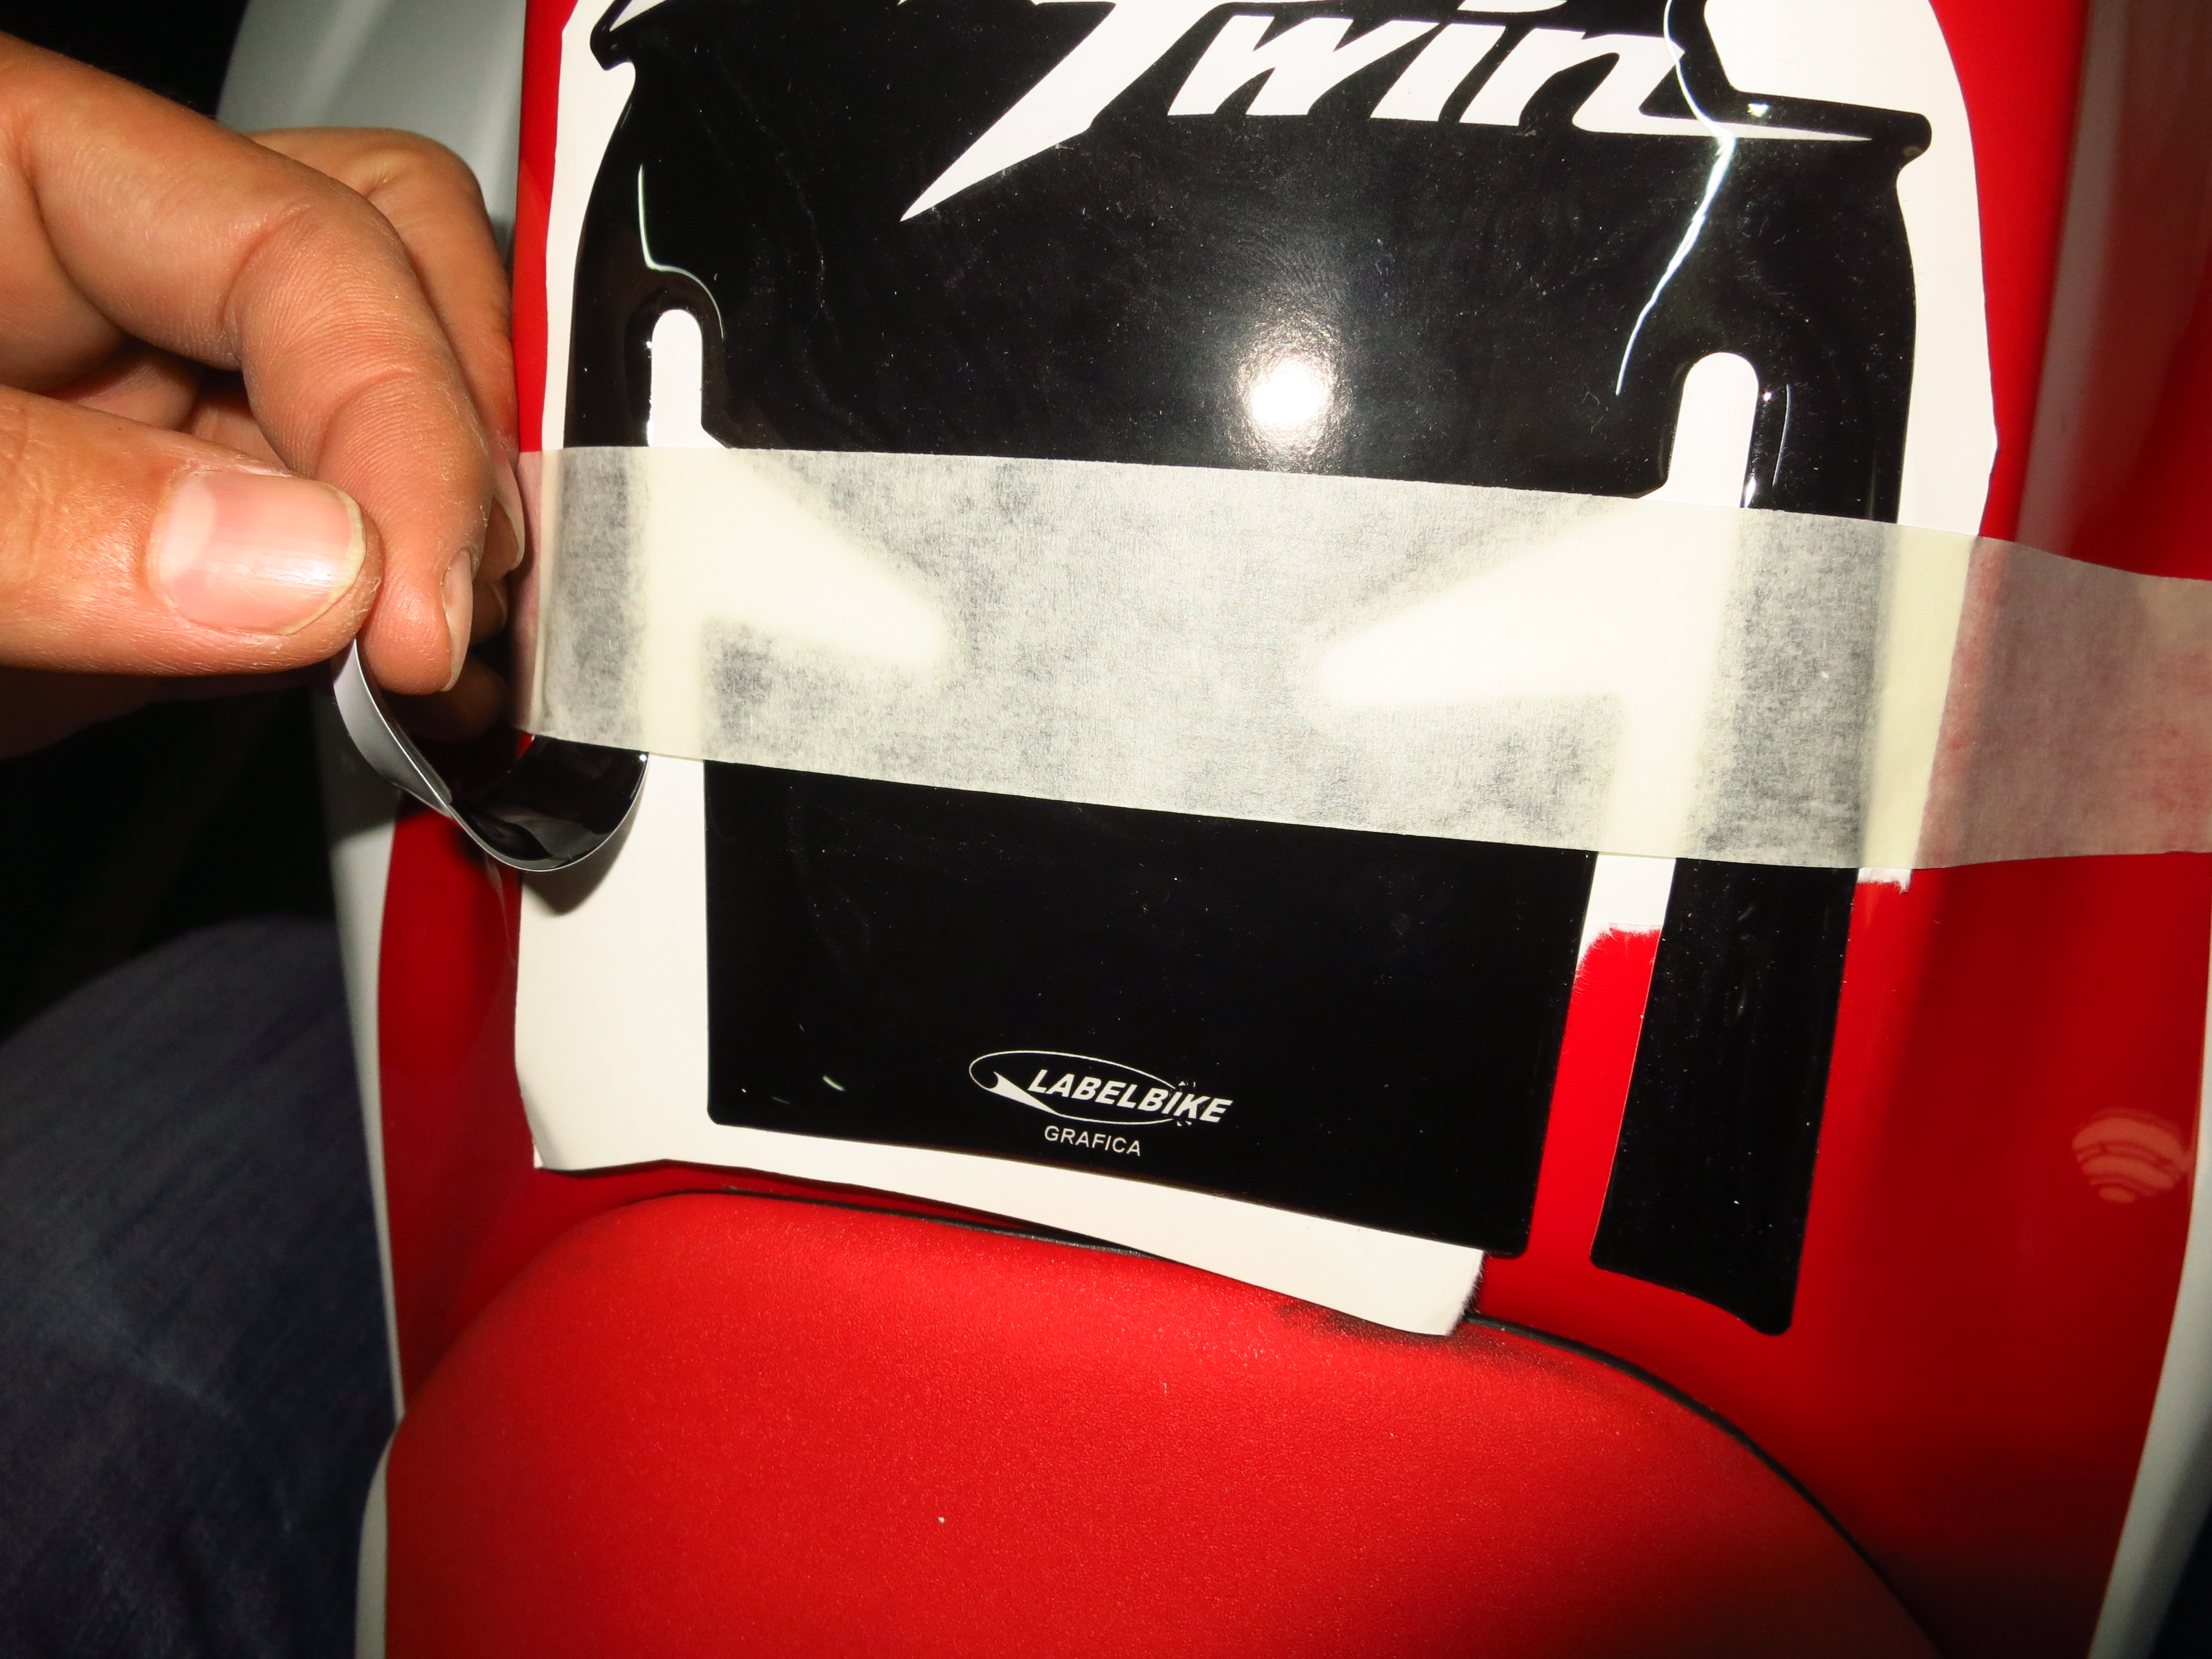
Step two: without removing the white paper at the back of the stickers, put them in the desired position, make sure everything lines up correctly and fix them in place with masking tape.
Step three: lift the sticker on either side of the masking tape, separate it from the white paper and cut the paper away. (Important tip here – you can tear the paper, but if there are transparent areas in the sticker, small shreds of paper might remain stuck to it and be visible, so it is better to cut it clean with a pair of scissors).
Press the sticker against the tank surface from the masking tape outwards, making sure there are no wrinkles or air bubbles. A plastic ice scratcher is a good tool to do that.
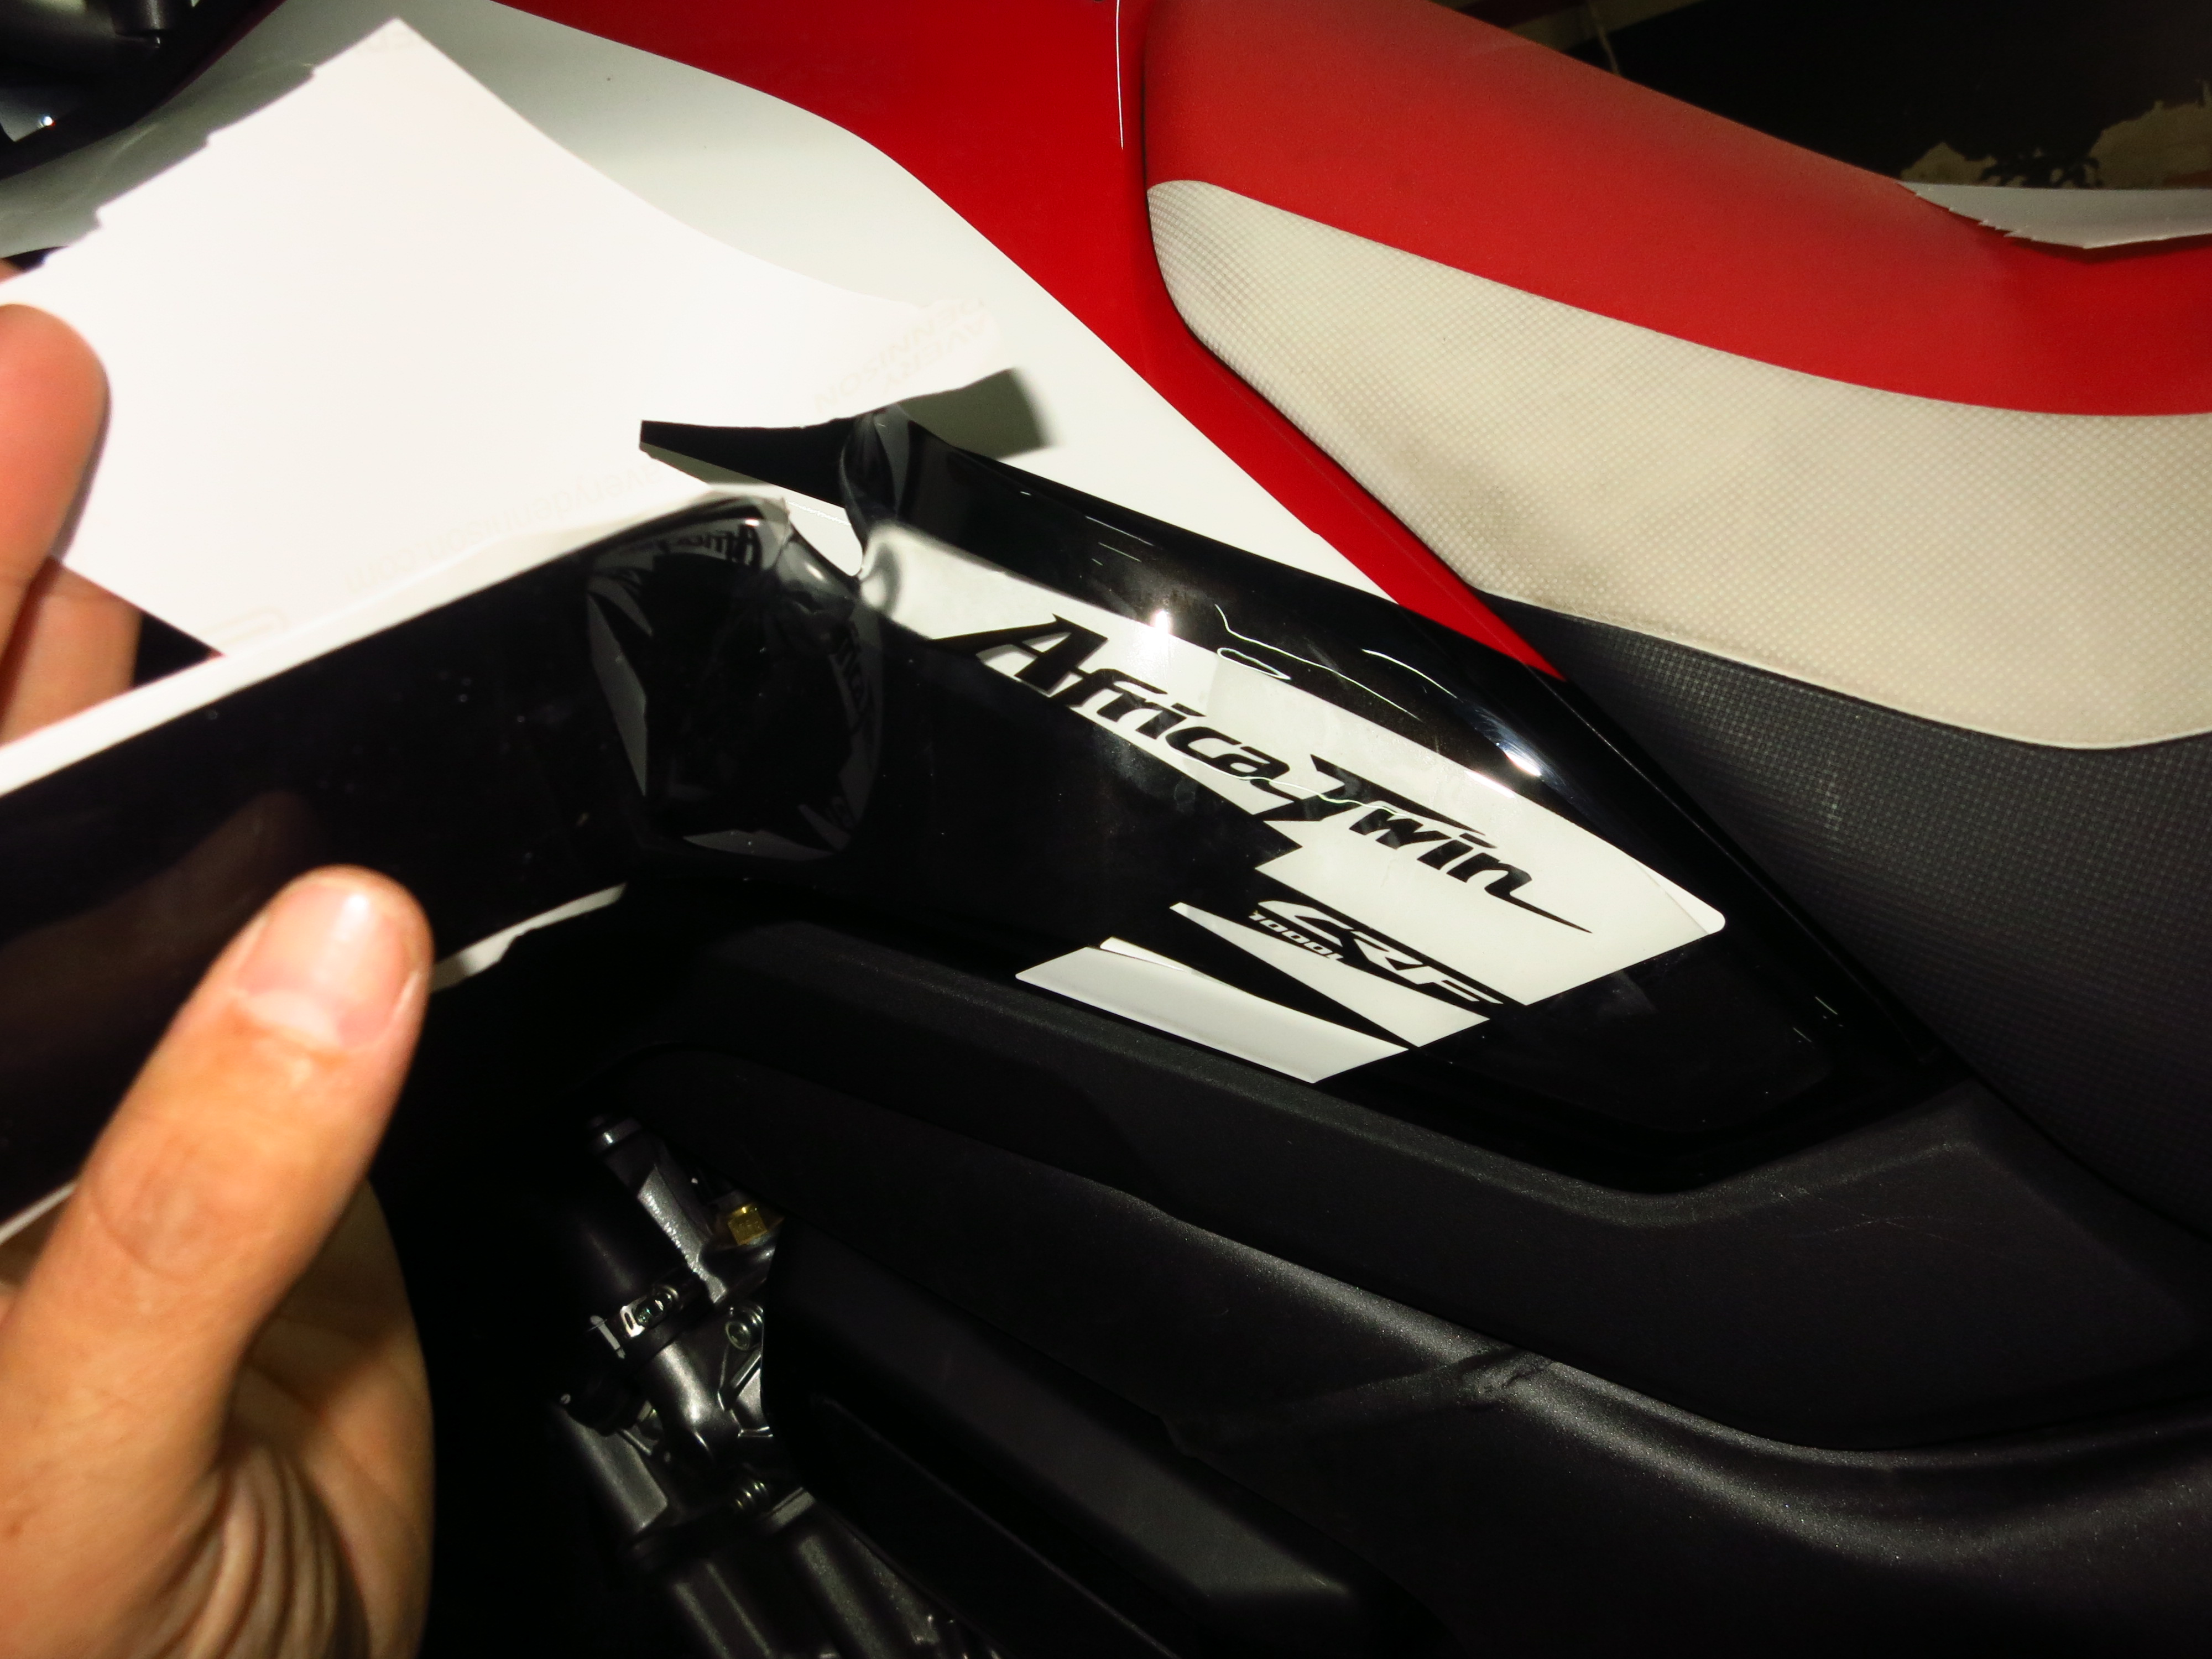
Step four: one third of the sticker securely in place, remove the masking tape, lift the other two thirds and repeat the process.
The result looks great:
The white lines you can see are reflections from the fluorescent tubes on the ceiling.
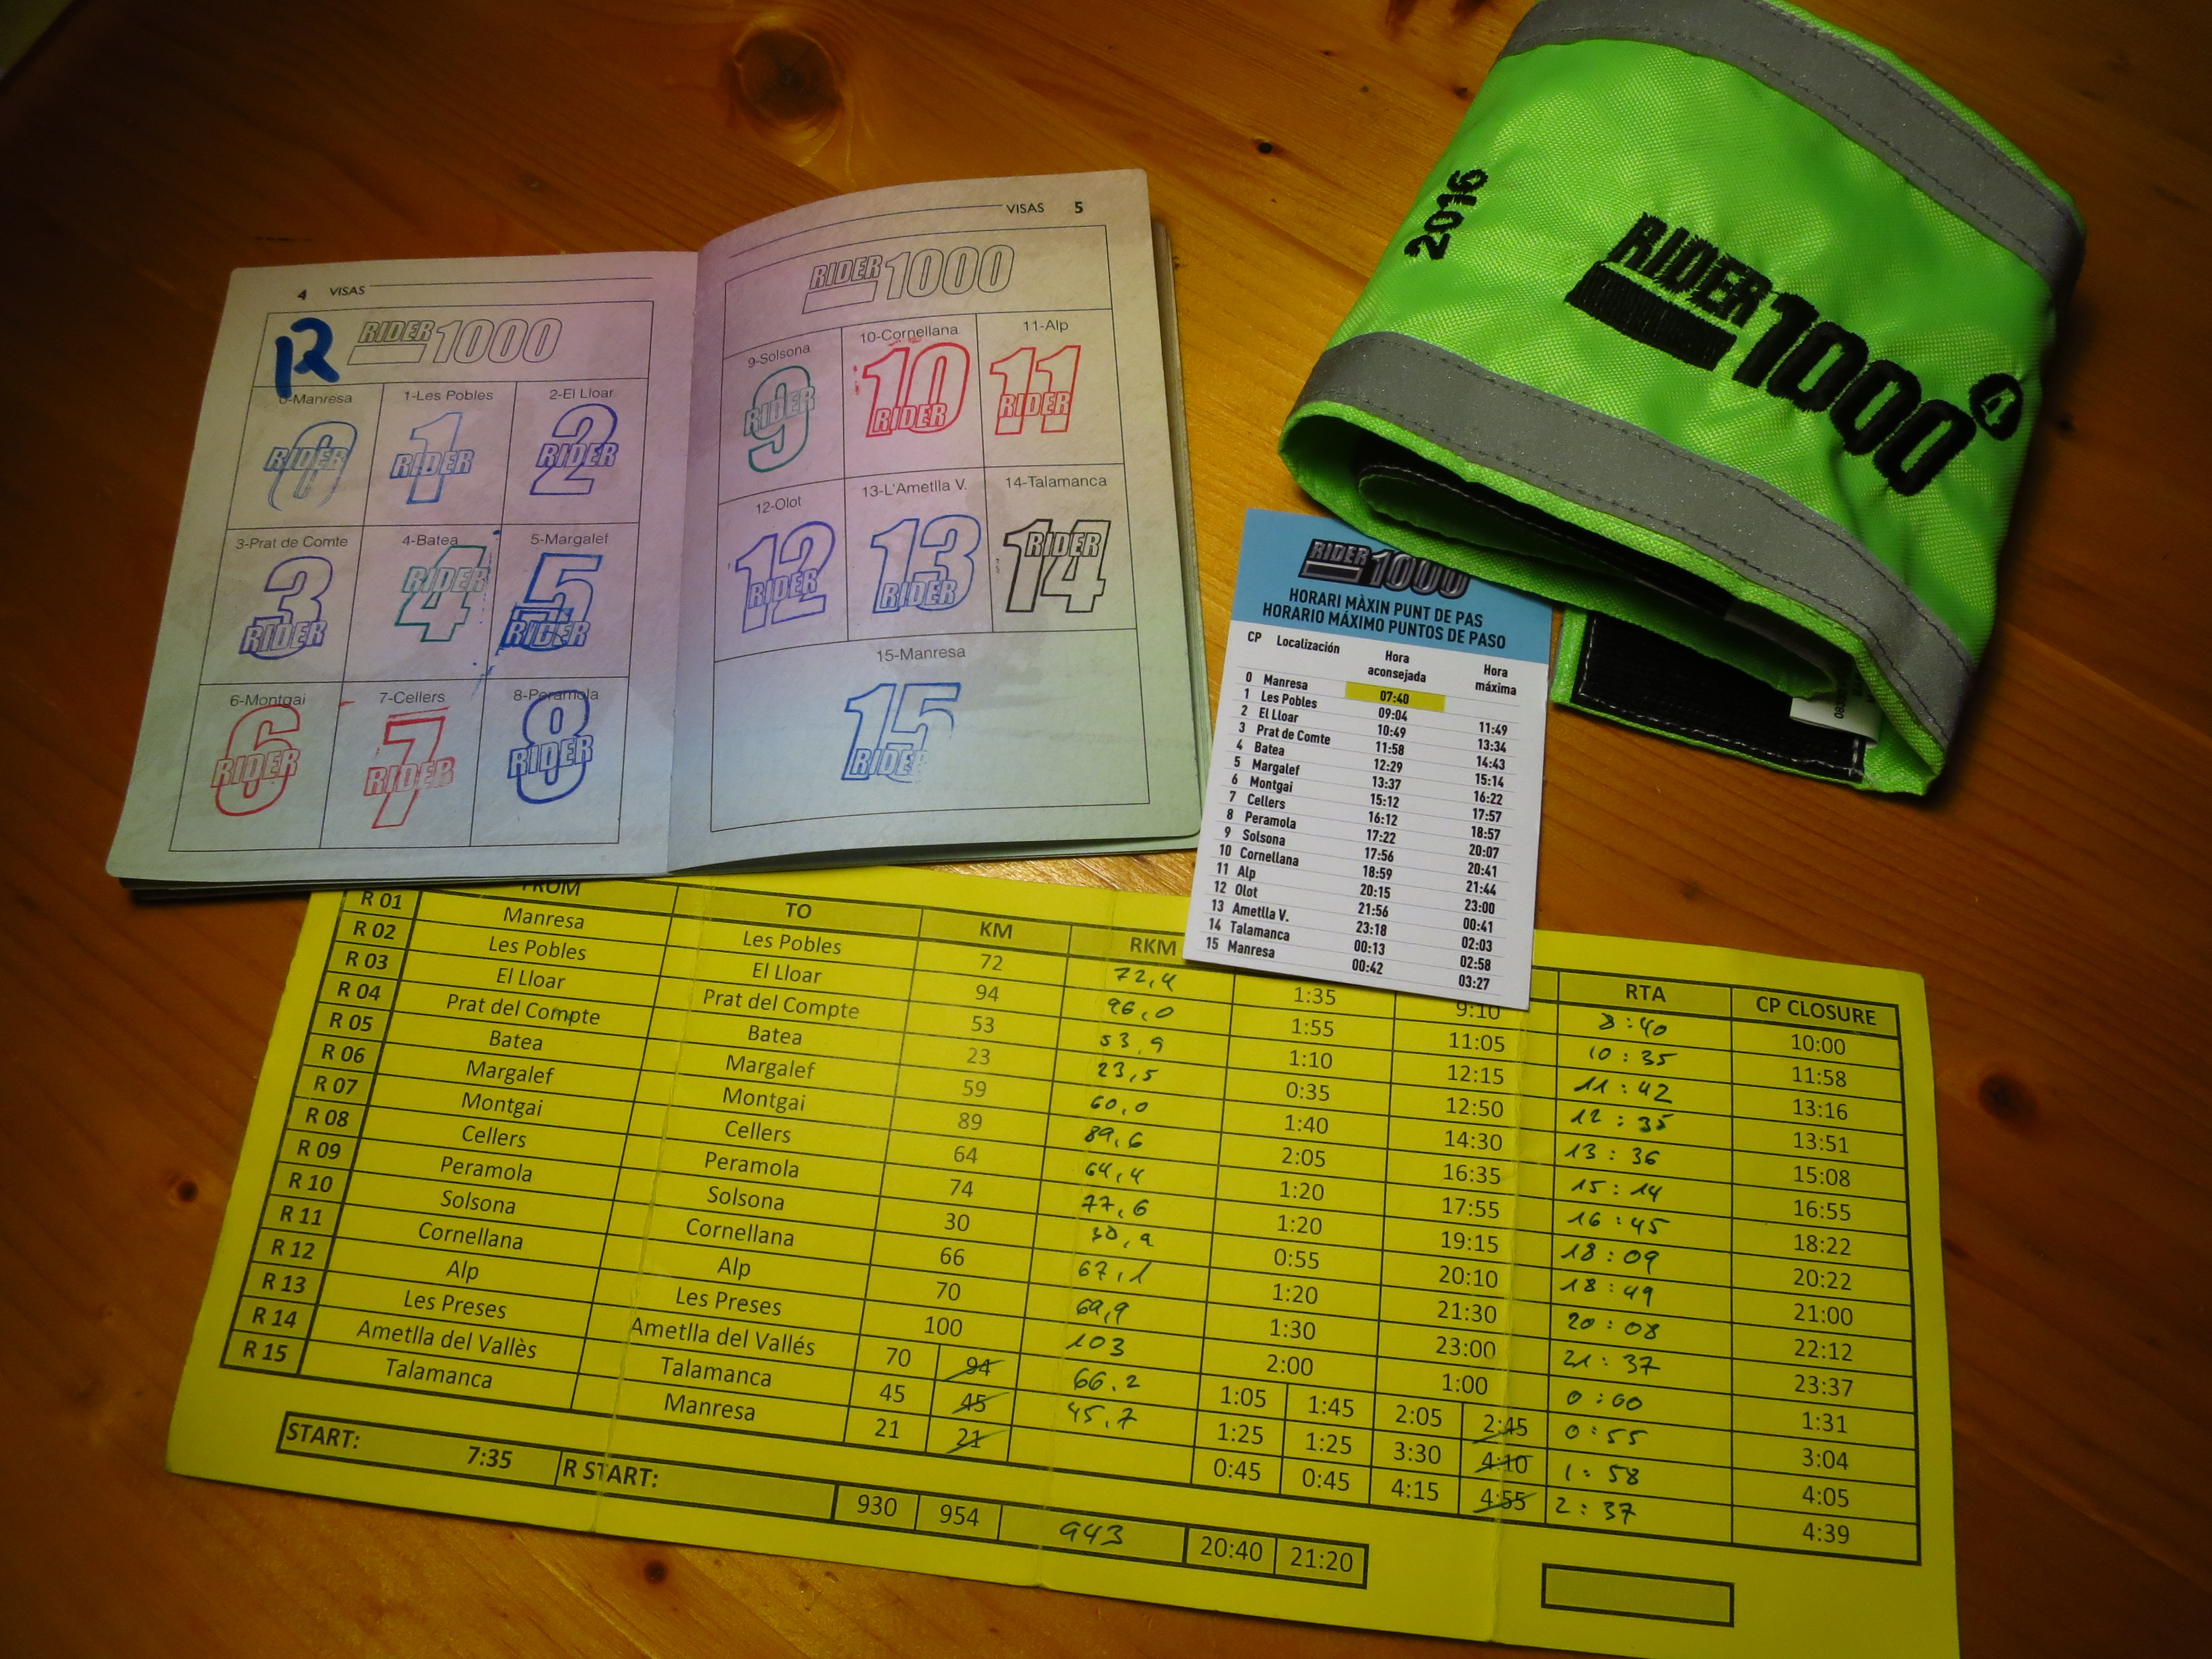
The Rider1000 is a non-competitive endurance riding event that consists in riding 1000 kilometers around Catalonia starting and finishing in the city of Manresa. The 4th edition was held over the past weekend, and I took part for the second time.
I heard about for the first time only a day before the inscriptions for the previous edition closed and I did not have time to convince anyone to take part with me. This year, however, I managed to convince two friends that it would be a great idea to get up before 6am and spend 20 hours riding almost non-stop in winding roads. Not only that, three more friends who are relatively new to riding decided to take part in the 500km version.
With more time to plan things we decided to try not to repeat some mistakes I made last year. First of all – enter the event early. Departures start at 6:00 in order of inscription, meaning that last year I was second to last to take mine, at 7:15. By the time the sun set I was just reaching the checkpoint in Horta de Sant Joan, the furthest point from the finishing line in Manresa and I had to ride for four and a half hours in the dark. I finished at 1:17. The second mistake was not booking accommodation for that night – I thought I would just go back home at the end, but riding an extra 50km on top of the 1000 already done was too much.
With that in mind, we tried to get an early start slot, but the Rider seems to be growing in popularity, and even though we entered it only two hours after inscriptions opened, we were given numbers 578 and 579 and scheduled to start at 7:35. Well, at least we addressed the second mistake and booked an apartment in Manresa for the night before and after.
There was rain forecast in the whole of Catalonia for Saturday. We woke up at 5:45 and when rode to the organization tent to get our breakfast the sky was overcast, but it was not raining. We had a sandwich and a coffee and then moved our bikes to the assigned departure lane.
A few minutes later, our turn came – the passports were stamped, our inscription numbers checked and noted, we had our picture taken in front of a sponsor board so fast that we did not even have time to strike a decent pose (I’m not going to post the result) and we lined up behind the starting line, ready for our turn. At precisely 7:35, we got on the starting ramp, waited a minute to allow a gap with the 6 previous riders, and were given the go!
It was 72km to the first checkpoint, the first bit on a fast national road, and like on the previous edition, the prospect of 850 eager riders let loose on the road was an opportunity that the police could not let escape – they set up a speed trap and at least one undercover patrol car on that bit of road. We got lucky and some riders coming in the opposite direction warned us to slow down, but we saw a few other riders who were not so fortunate and started the day 300€ lighter. The police must have made enough to buy a few new patrol cars.
Things got interesting quickly after that when we left the main road for a much narrower one in Queralt, with a 18% gradient that put our bikes to the test.
A lot of riders were in a hurry to get as many kilometers as possible done early in the day and some of them took too many risks overtaking. It was not long before we saw a bike in a ditch, its rider unharmed, fortunately.
We got the first stamp on our passports in Les Pobles and headed off to the second longest stint of the day, 96km to El Lloar.
After a cold and cloudy start of the day, the sun came out and we enjoyed one of those rides where everything is just perfect – road, weather, scenery… we were in the heart of the Montsant mountains. We only stopped for a moment in the second checkpoint before pressing on another 53km to Prat del Compte, which we reached at 11:42, almost half an hour earlier than my original calculations, so we took the chance to rest for a moment.
While we were having breakfast we heard some guys on GSs talk about an accident that had just happened outside the village – it seems that shortly after leaving Prat del Compte the police had set another speed trap behind some bushes on a long straight. The first bike of a group had seen in time and he braked to avoid a fine, and some guy in a crotch rocket had rammed into one of the GSs. Fortunately he had managed to avoid rearending it full on, and the result was only a bent gear lever and side stand on the GS and two unharmed riders. The guy on the R got the worst part, though, he ended up on the ground with a lot of broken plastic on his bike. You could say that by setting up that speed trap on a perfectly safe straight bit of road with no junctions and long distance visibility the police had managed to cause an accident instead of preventing one. As we were leaving Prat del Compte – riding slowly, for sure – we saw the police car with the speed gun and next to it an unhappy looking rider and his now naked bike waiting for the recovery truck.
We turned right shortly after for the road that connects with Bot across the Pàndols mountains. Next checkpoint was a mere 23km away, but this was the most winding, narrowest bit of road we’d encounter all day.
So narrow in fact, that there were mirrors in some of the corners to check for incoming traffic! Luckily, the road was empty bar from the participants in the Rider, and we were all going in the same direction.
It was still sunny when we reached Batea, the most southwestern part of our journey, but when we hit the road again heading back northeast black clouds were looming ahead of us.
Most people think that the hardest part of the Rider1000 are the last 3 or 4 hundred kilometers, when it gets dark and you are still a long way from the finishing line, but I have found on both my times in the event that once you have passed the 500km mark your body just finds a groove and settles into a calm routine of riding no matter the conditions. No, the hardest part for me on this occasion was the moment between the 250-300km. It was not a particularly long stint to the next checkpoint (59km), we were on time, it wasn’t raining, it was not too cold, and the road was quite good, but my back started to ache – I had made the mistake of wearing a backpack with some food and a CamelBak instead of strapping it to the seat – my contact lenses were starting to get dry and I realized that we had barely covered a quarter of the whole distance. For the last 20km or so I rode behind a guy on a Kawasaki with an IXIL exhaust that made a horrendous noise, and he was riding at annoying speed that is too fast to overtake on a road with not a single straight stretch but too slow to get some distance between me and him. By the time we reached Margalef I had a slight headache, and to make matters worse I saw that I had forgotten the Ibuprofen I had packed for cases like this in the apartment. Damn.
The organization were providing lunch at the next checkpoint, so after putting on some eyedrops to hydrate my contacts we decided to press on to be able to eat at a decent time and to hit the road ahead of the Kawa.
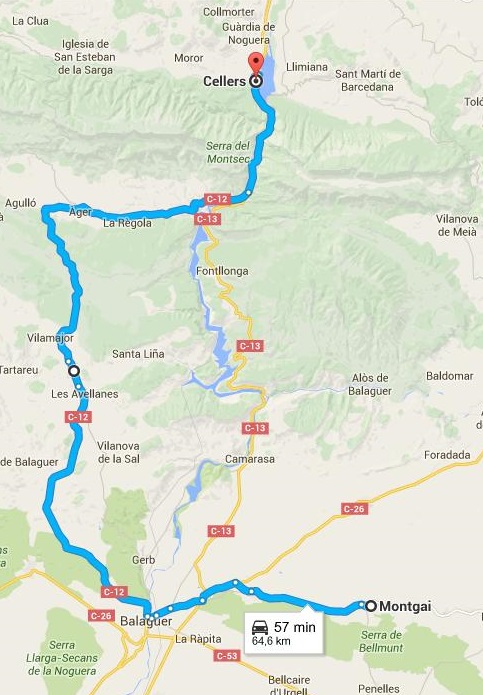
It is funny how fatigue works – for the next stint I was feeling just fine. Maybe it had been the noise from that guy’s exhaust, maybe I was looking forward to lunch, maybe an intermediate fuel stop helped, or maybe the roads were faster, with more flowing corners now, but even though it was 89km to Montgai, they felt very short and I was feeling fresh again.
The main street in Montgai was packed with all kinds of bikes, which was surprising because we had mostly been riding alone all morning, finding other participants only at the checkpoints. Either we had been getting very lucky with traffic or we were two of the few following the recommended route and not cutting between checkpoints using motorways and main roads. Anyway, we sat down for lunch with a rather big helping of fideuà – yes, a light meal before hitting the road – and enjoyed a rest in the sun, which had come out again.
There were menacing clouds in all directions, but we seemed to be following the very few sunny gaps in the clouds all across the country.
It was time to head north now, towards the Pyrenees. If there was going to be rain after all, this was where we were most likely to find it – a high mountain range in the afternoon-evening.
The next 64km to Cellers, on the banks of the Terradets reservoir, were a fast road, and everybody took the chance to make up some time in this stint. It felt so short that we had the after lunch coffee there, less than an hour from the previous checkpoint. And still no rain.
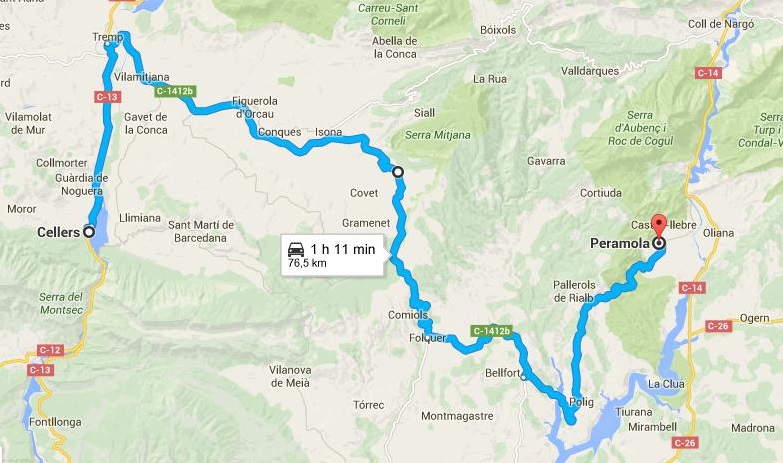
We were not going to reach the Pyrenees just yet, oh no, they were going to make us work for it. After Cellers the route headed straight east in Tremp, then south in Isona and east again until we reached the checkpoint in Peramola, opposite Oliana across the river Segre.
It was just past 6pm and we were still shy of the halfway mark. It was here that my phone ran out of battery – my mistake, I should have kept it in airplane mode and use it only to update the Facebook page at the checkpoints, but I did not think of it. As it turns out, most of the route took us across vast areas with no phone signal and it kept searching, thus drying the battery much sooner than expected. To make matters worse, I still had not had time to fit a 12V socket to the AT, so that was the end of my live report on Facebook. Sorry about that, I promise better logistics next year.
It was on the 30km between Peramola and Solsona when the rain finally caught up with us. Fortunately, it was just a light drizzle, and it had died down by the time we reached the 10th checkpoint and the equator of the ride. It was here that we learned that well over half the participants had already gone through the checkpoint, confirming our suspicions that some people were taking faster routes. Oh well, to hell with the clock, we were having a blast on the winding roads and were not going to stop now.
Next bit was going to be interesting – it was not raining, but the temperature was dropping and we were heading straight north to La Seu d’Urgell on tiny roads across Port del Compte. It was here that I made my only planning mistake – we should have cut across the skiing slopes instead of going around them, as we had to ride down the mountain around the southeast and then back up on the northwest side and we must have lost some valuable time there. Nevermind, the scenery was stunning, so it more than made up for the mistake.
It was 66km to the checkpoint in Cornellana, in the middle of nowhere in the mountains, and then another 30km down to the main road in La Seu.
Our bikes were quite low on fuel for this last bit, and there was not a single petrol station in any of the small villages and hamlets we rode across.
The sun set as we were making our way down to the main road, but the clouds robbed us of what could have been a spectacular sunset over the snow-capped mountains. Once on the main road, we hurried to a petrol station between La Seu and Alp, the 12th checkpoint of the day. On the way there emerged from a tunnel into a very thick cloud of smoke. At first I thought it was a burning car, maybe an accident, but then we saw it was a diesel Volvo whose engine had started burning oil and was self-destroying at full throttle. A family were standing as far from the car as possible, looking terrified and possibly without a clue as to what was happening to their car. My friend later told me that the only way to stop such thing is to block the admission of the engine to choke it, but unless you know exactly where it is and can do it quickly, I would not put my hand in that engine bay.
It was already dark when we stopped at Alp, and we had a sandwich for dinner near one of the paraffin stoves they had lit up to keep warm. We only saw about five or six other bikes at this checkpoint, and wondered how many were there left behind us.
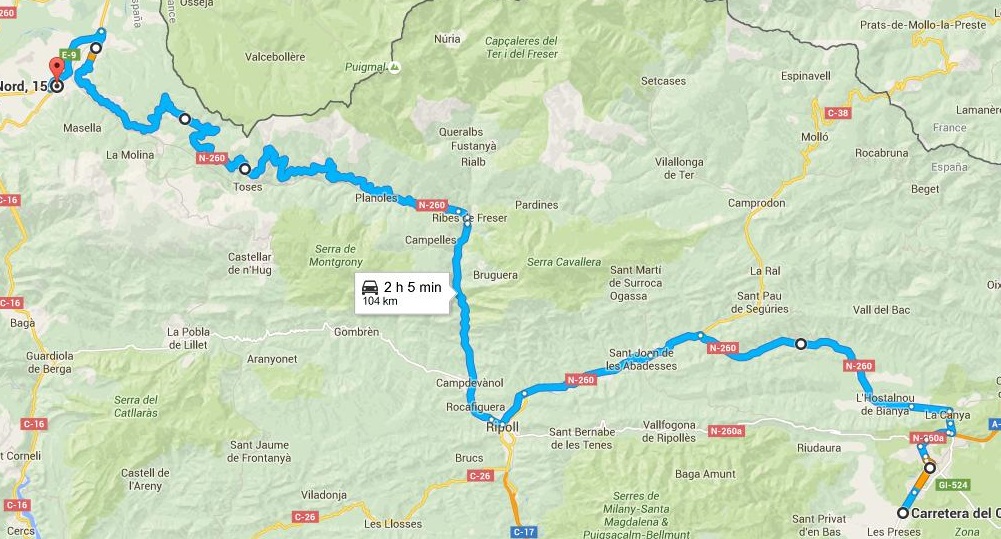
The night time ride was about to begin. We still had a very long ride with four more checkpoints to go and it started with crossing La Collada de Toses, one of the country’s most famous mountain passes. In complete darkness. At this point we could have taken a shortcut through La Molina skiing resort, but we were feeling brave. Time for the energy drink I had been carrying all day.
It went much better than expected, temperature only dropped to 5ºC at the top of the pass, and the LED headlights on the AT are rather excellent. On roads like this, however, I still missed having a pair of fog lamps to light up the sides of the roads, as in really tight corners I was basically turning into complete darkness. Not very confidence-inspiring… at least we could see the headlights of incoming traffic. Not that there was much, mind you, we only saw three cars, and that was on the way down, almost at the end.
This was the longest stint of the day, 100km between Alp and the next checkpoint in Les Preses, just past Olot. Fortunately, after coming down from La Collada the road became much faster and we were able to keep up a good pace for the last 50km. We found the RODI workshop where the checkpoint was almost deserted, it was midnight and they told us that there were about 300 riders left to go through. Well, we were not doing that bad, we were numbers 578 and 579 out of 850, remember. After filling up for the last time (just in case, the bikes only took five litres) we hit the road.
We had now 70km of main national road, and we made good time to the next checkpoint. I was surprised to see many bikes coming from the opposite direction and heading to the checkpoint we had just left. I guess thay had taken the tunnel to avoid La Collada pass, but that meant a huge detour, even if it was on main roads.
We turned off the C-17 road and into L’Ametlla at 0:55. Only one more checkpoint to get to Manresa and the finishing line. Here most people kept heading south on the main road and the motorway and took a route that was 80km long and took about less than an hour. We thought we would do it properly and cut straight across the Sant Llorenç mountains, only 45km, but ‘to cut straight’ might be an optimistic way of putting it, as that road was everything but straight.
We found no other riders coming the same way. We reached the last checkpoint at 1:58, the girls that stamped our passport so bored by now that they had been putting stamps on each other’s faces.
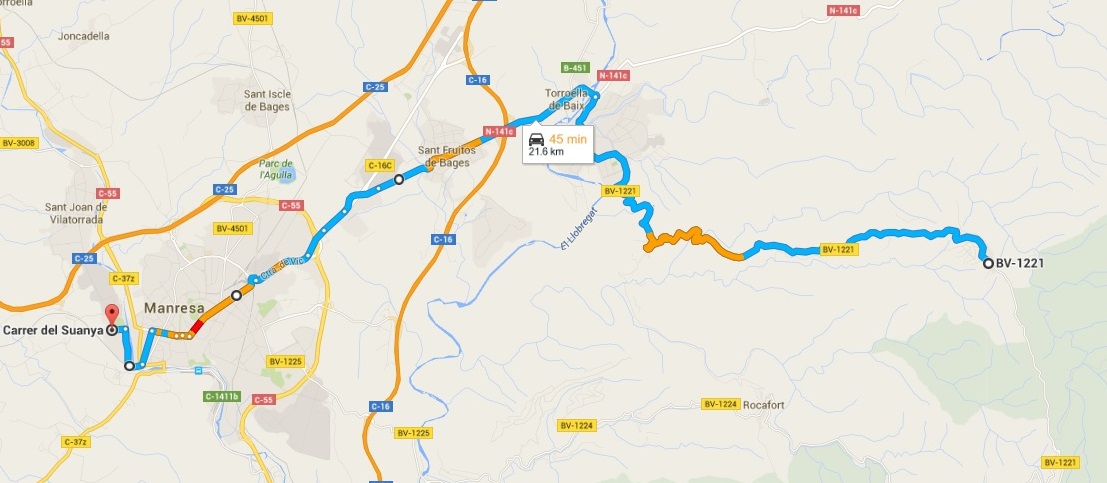
Only 21km to the finish line now. We made our way down the mountain with Manresa city lights already visible below, and many bikers coming in the opposite direction from the motorway to get their last stamp before heading back down the same way.
At 2:37 we turned into the car park we had left that morning, 19 hours earlier down to the minute, and crossed the finishing line.
The Rider1000 is a long, grueling challenge, most of those 1000km are done on mountain roads with 2nd and 3rd gear corners, they are not relaxed motorway kilometers. Our average speed on the move was only 63km/h, and we did not spend long on the stops. Despite all this, it is totally worth it, an amazing ride through some of the best roads and landscapes (at least until it gets dark!) in Catalonia. We will be back next year!
Making yourself heard in traffic is essential, but the horn that comes as standard in most motorbikes sounds little better than the puny one in a scooter, which means that at speed or in heavy inner city traffic cagers might not hear you when you most need to make them aware of your presence.
Replacing the horn in the V-Strom was something that was on my to-do list forever but I never got round to do it even though it was one of the easiest bikes in which to install one of everyone’s favourite horns – the Stebel Nautilus, as it has plenty of room.
Then I got the Super Ténéré and the horn was even more ridiculous, which turned out to be not because it was complete rubbish as I thought but because it was on its way out. It died about a month after I bought the bike. Time to finally fit a proper horn, then.
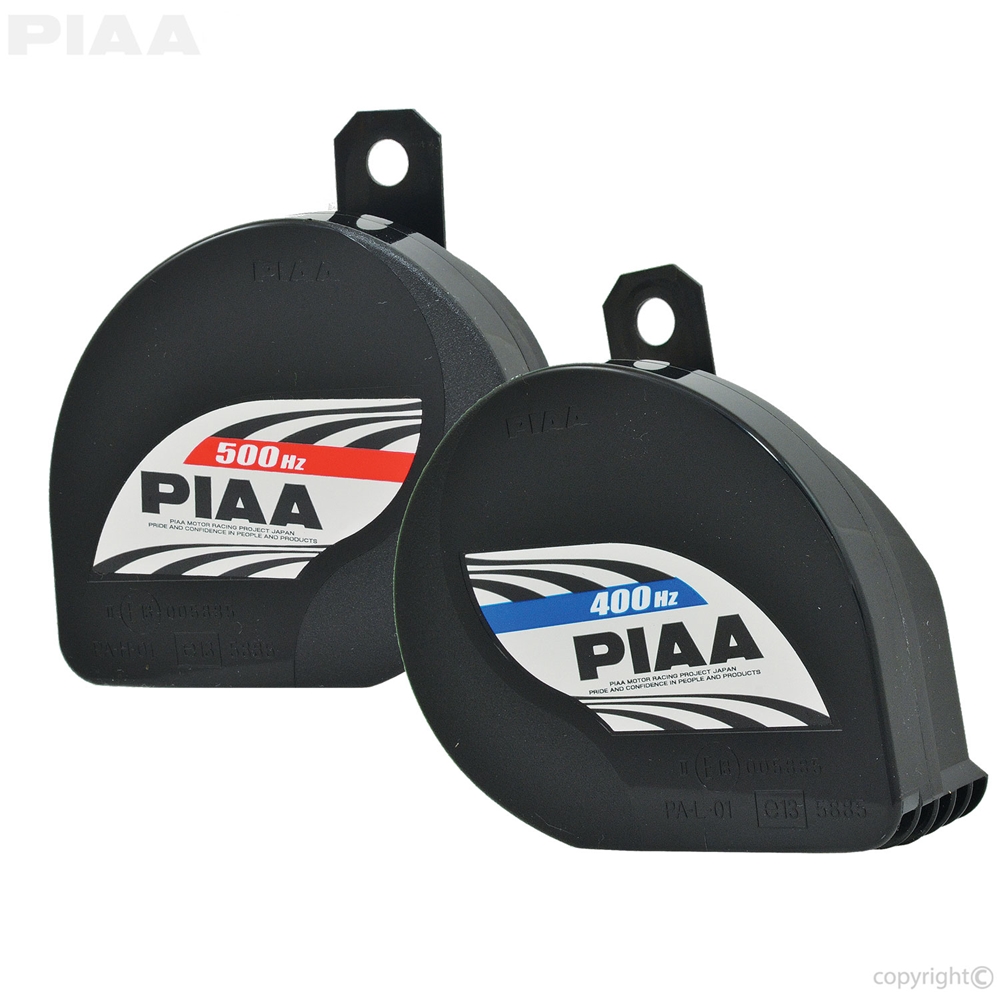
Space in the Super was a lot more restricted than in the V, and after some thorough research on several forums I choose the PIAA Powersports Slim Line horn. It was a straight replacement for the standard horn, a simple matter of unscrewing and unplugging the OEM one and bolting in the PIAA in the same place and connecting it to the same wires. Current draw is not high, so there was no need to wire in a relay. It made a world of difference, maybe not in volume, but tone was a lot more car-like, so cagers do pay more attention when you sound it.
Happy with the product, I decided to get another one for the AT, and this time I was lucky to find a pack including two horns – 400Hz and 500Hz. The idea is that the combination of both frequencies produces a louder, deeper sound. I found the 500Hz one on the Super to be more than enough, but since I found the pack on Ebay for the same price I had paid for a single 500Hz one, I ordered it.
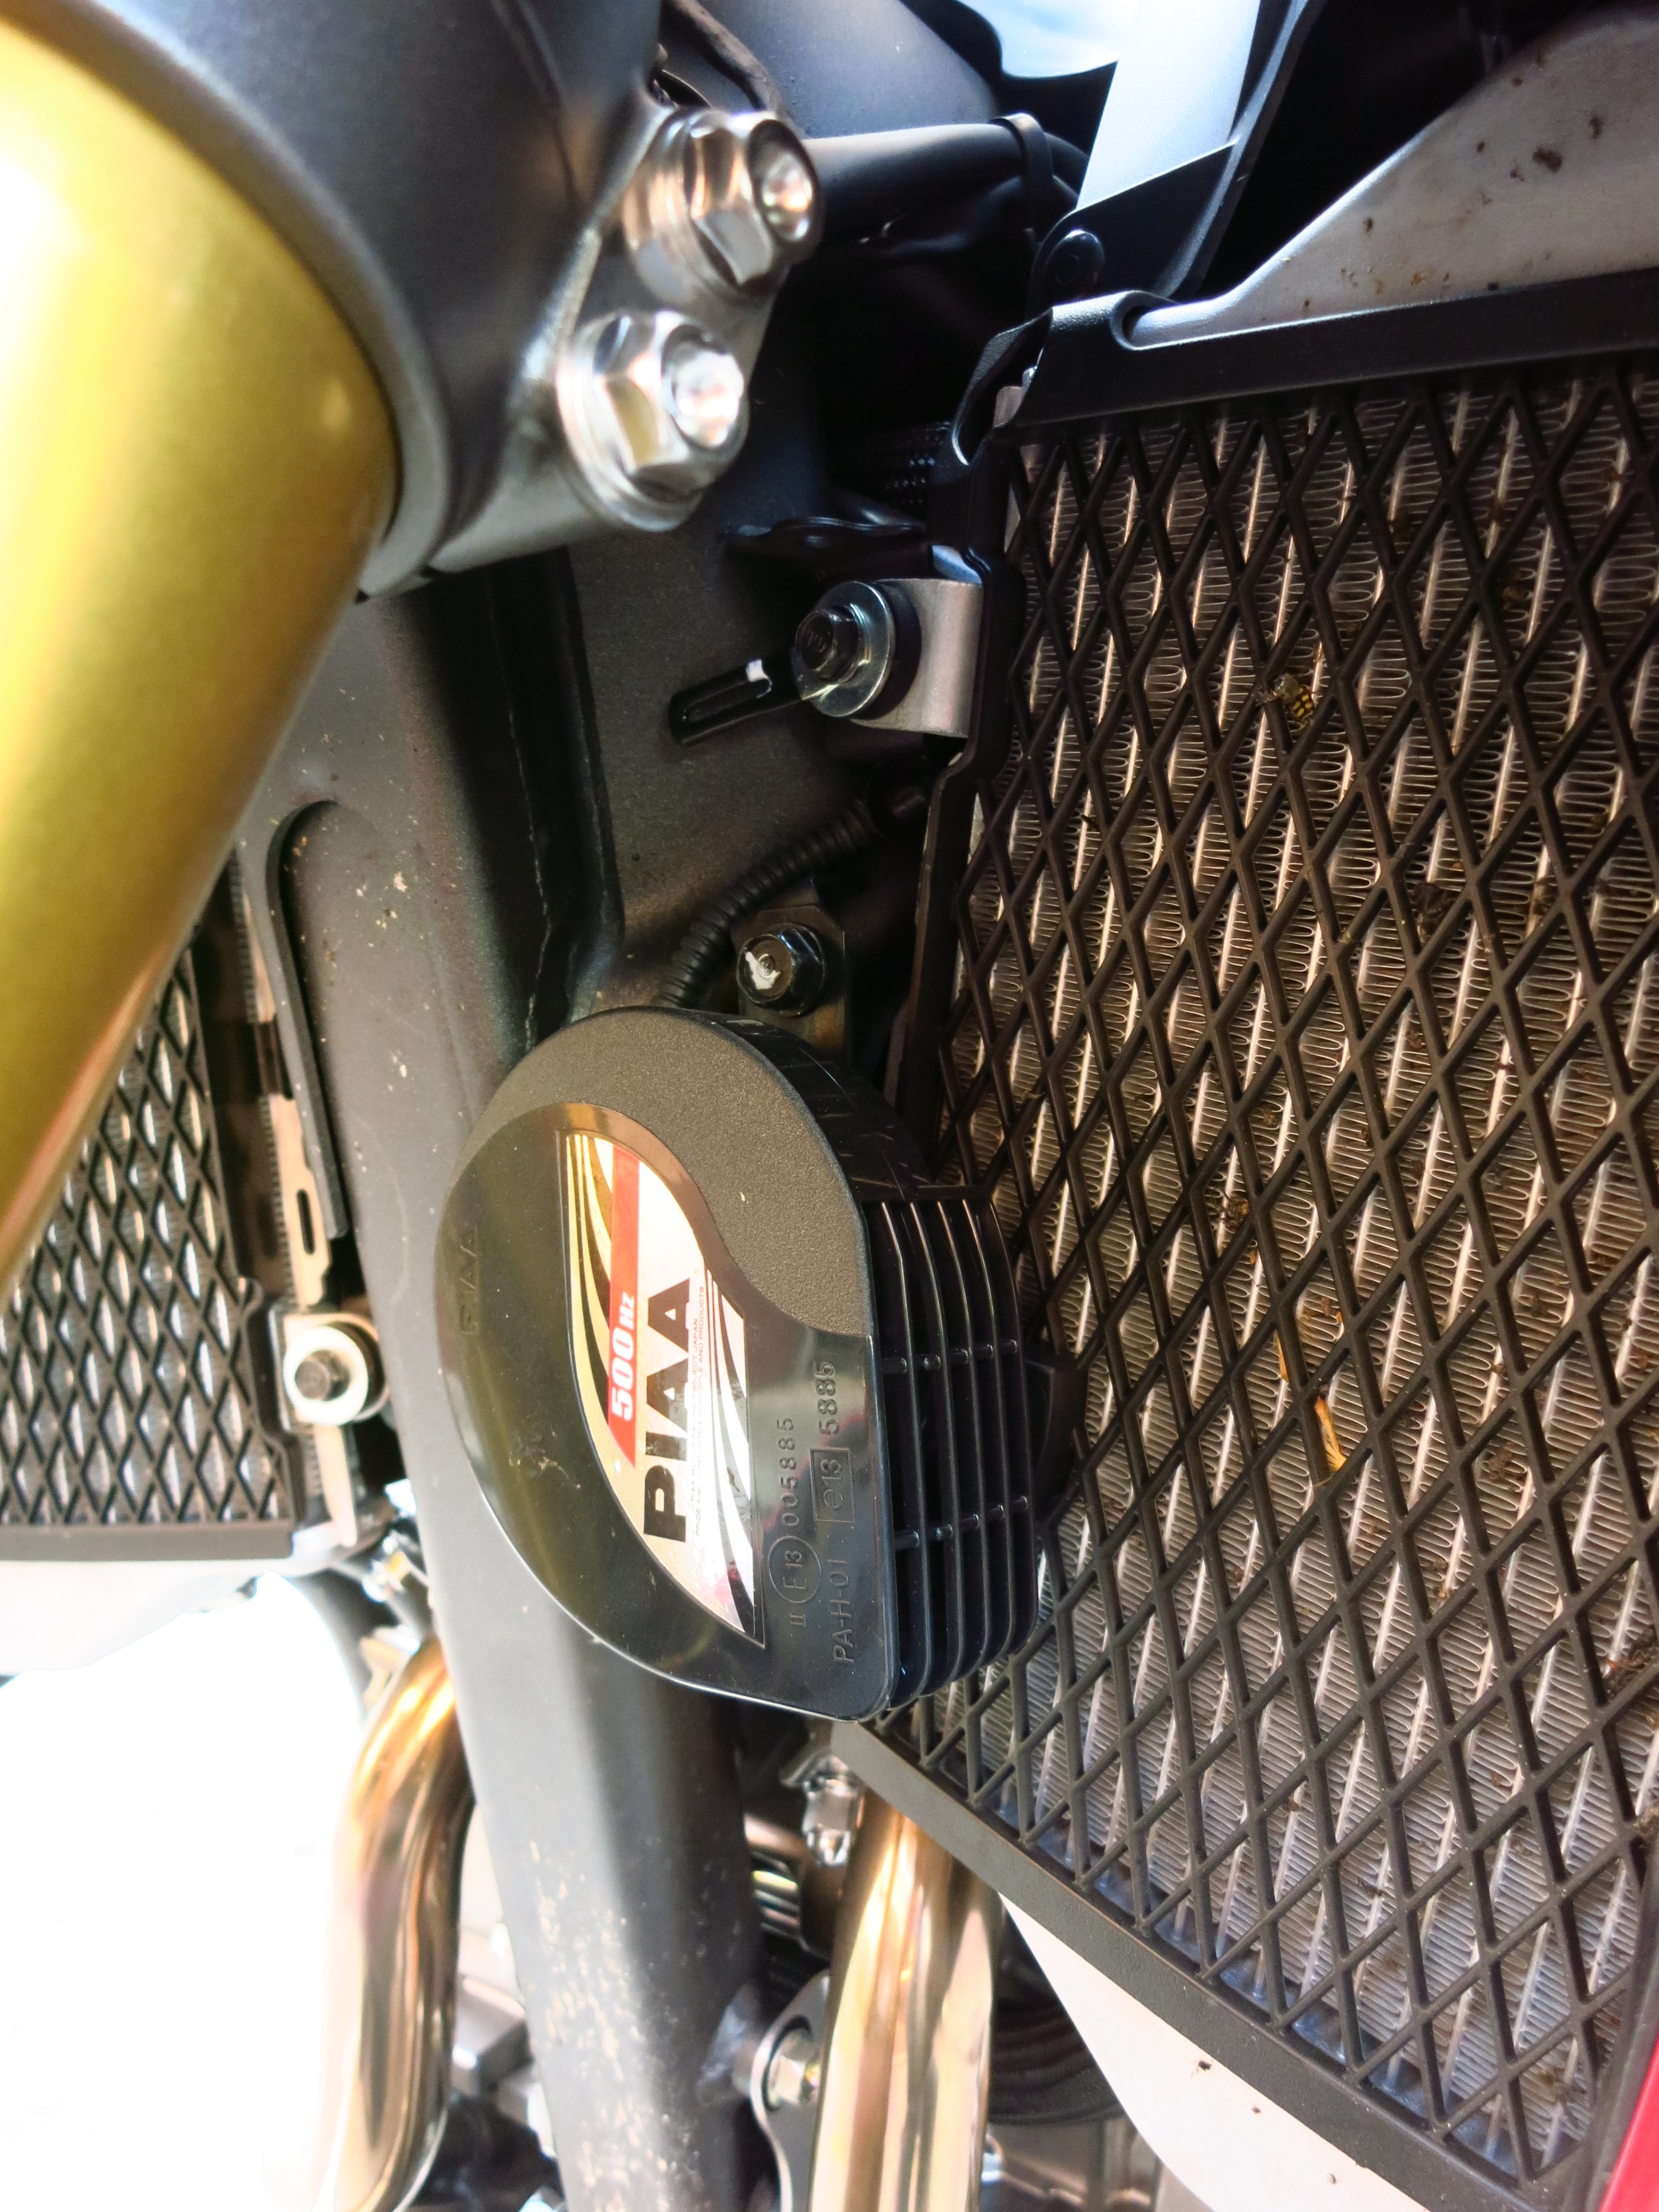
The problem came when I tried to find a place to install them in the AT. Space is even more restricted on the Honda, and after trying different combinations, it was clear that the only easy option was to fit only the 500Hz in the same place as the OEM horn. The PIAA is quite compact, but still larger both in diameter and depth than the standard horn, so a couple of little modifications were required to install it properly.
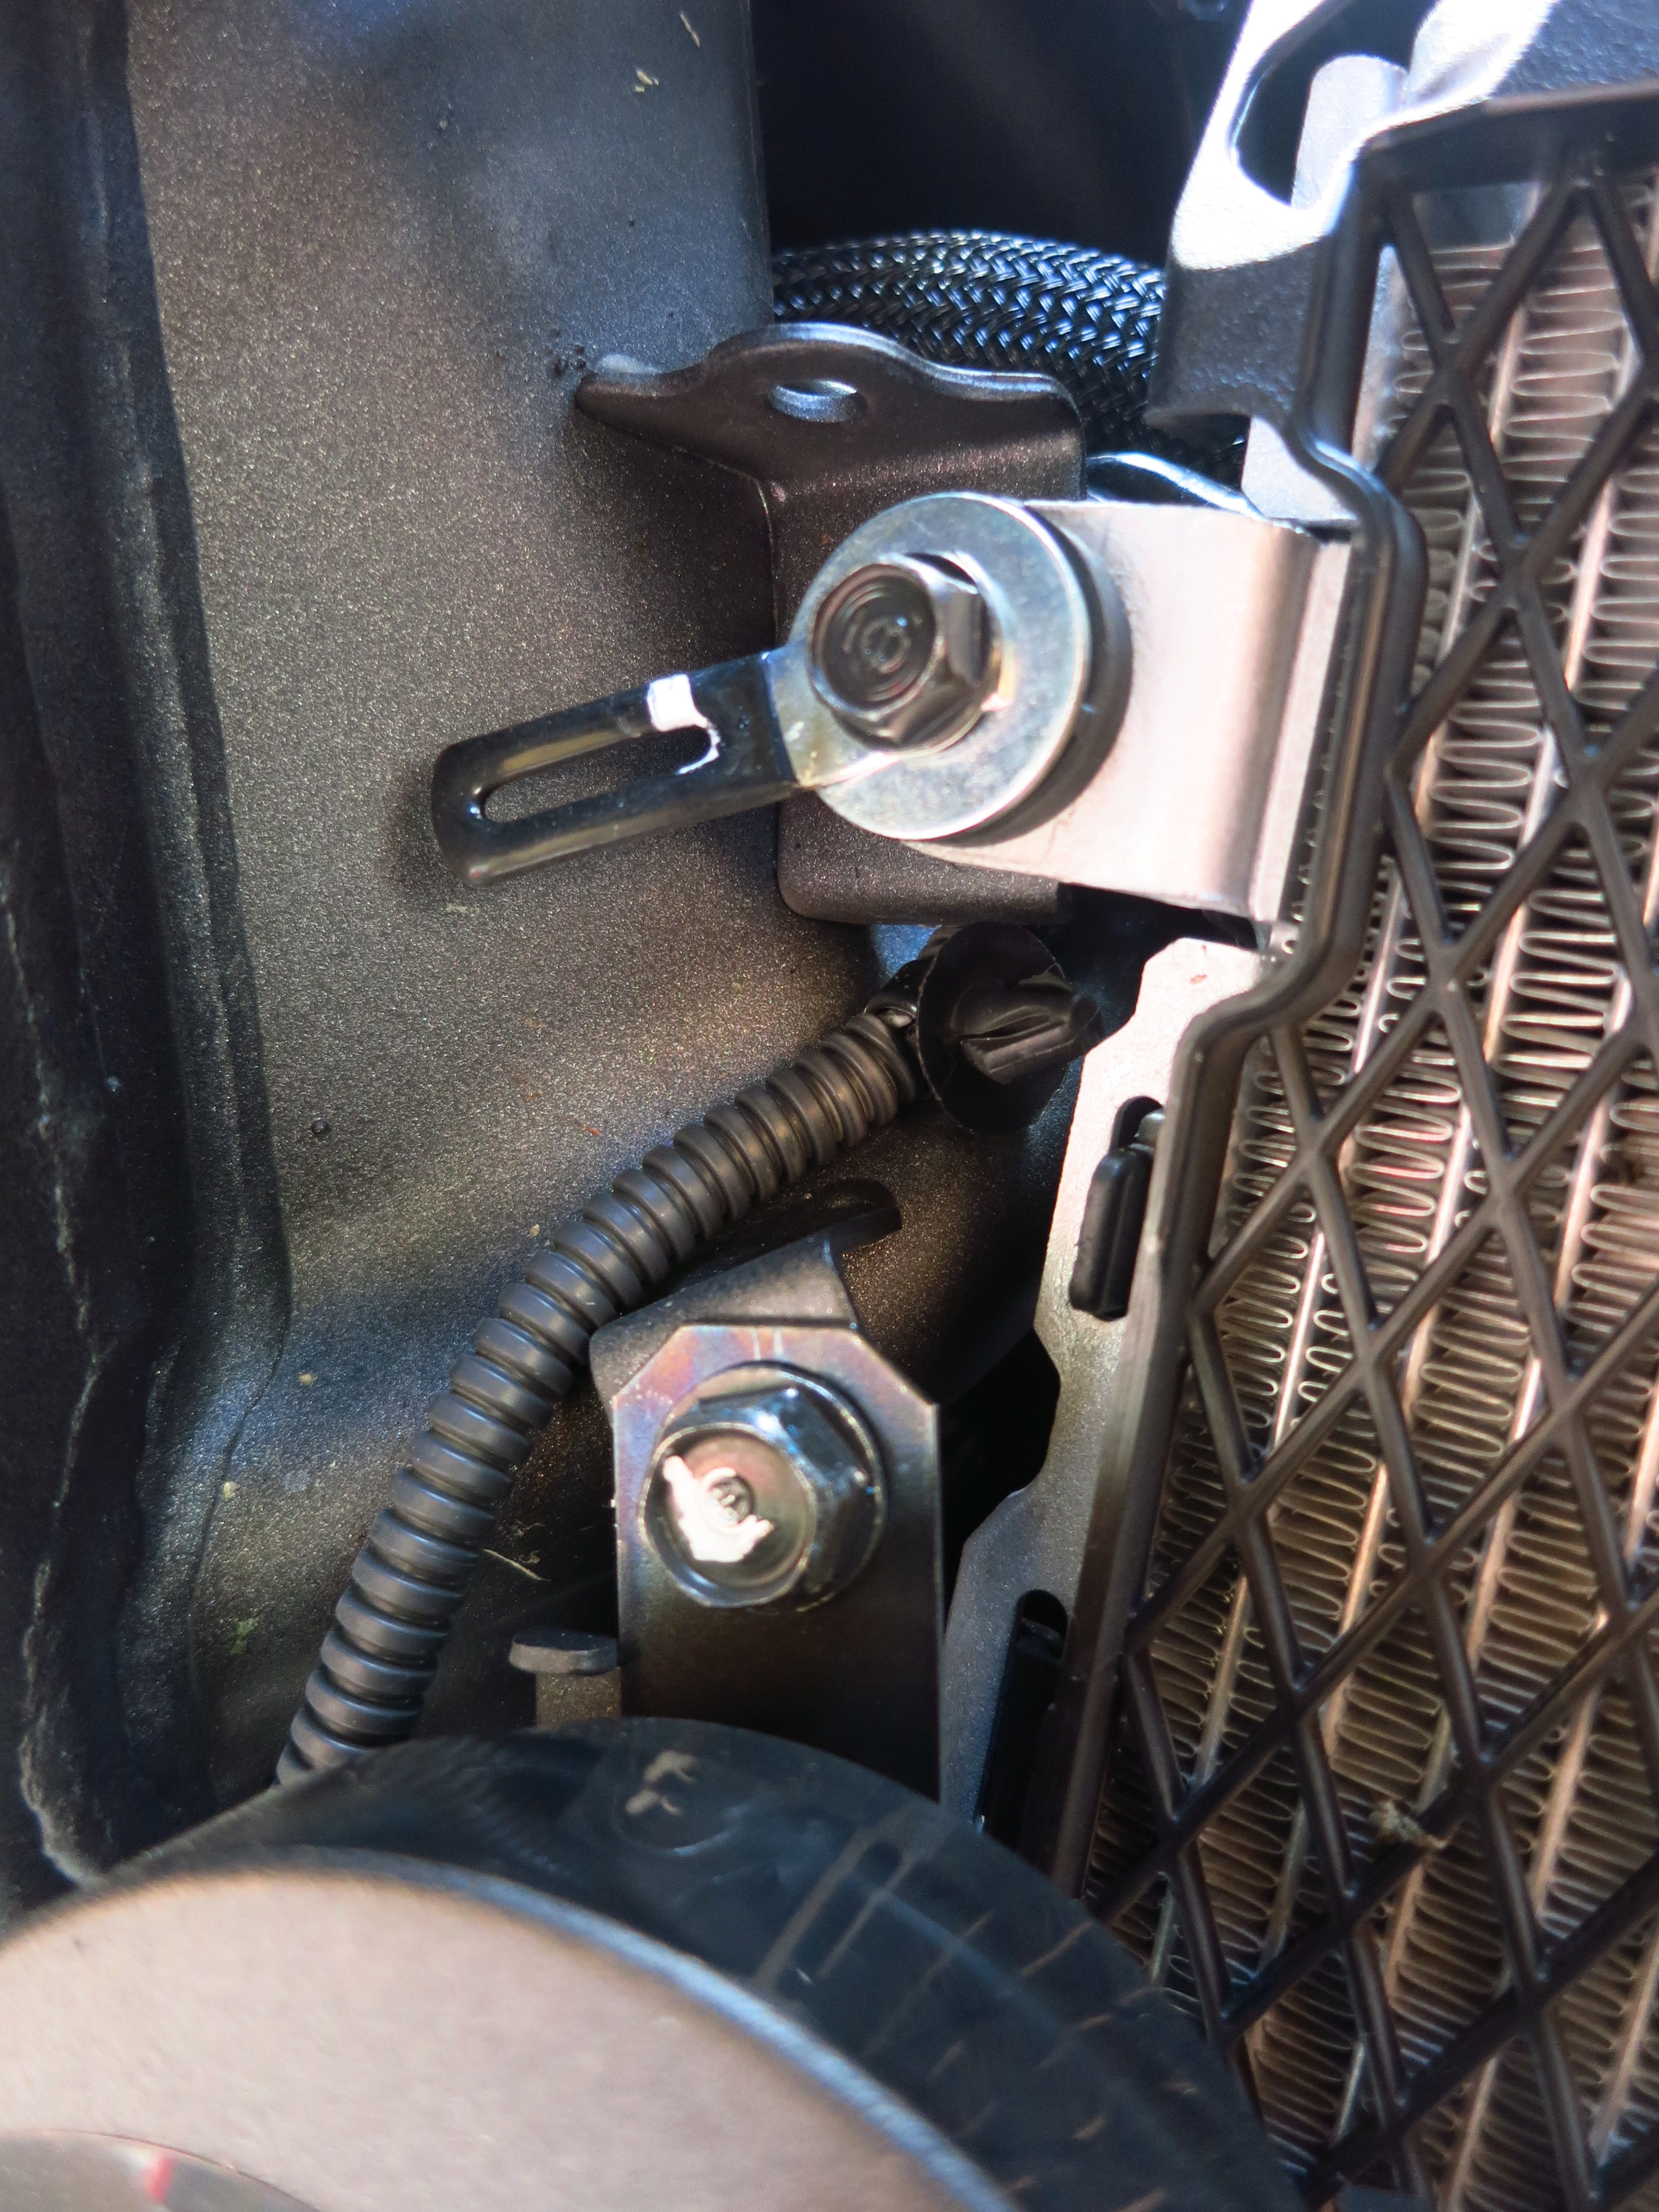
First, to make sure it fitted as close as possible to the radiator and the grill was not directly facing the frame, which might have stifled the sound a bit, I rotated the mounting plate of the horn 180 degrees. This can easily be done by loosening the bolt that attaches it to the horn and rotating it as desired. Careful though, the nut might be stuck due to the paint, so make sure you hold the horn formly. There is a little etch at the bottom of the plate and four little plastic protuberances to secure it in different positions in increments of 90 degrees.
That left the connectors further down that the ones in the original horn, too low for the standard wires to reach them. You can simply buy or make an extension, but it is only a matter of a couple of inches, and a job well done would include covering them in heat-shrink tubing to protect it properly. After a bit of fiddling, I discovered that it was possible to re-route the bike wiring by unclipping it from the mount next to the radiator and then passing it under the mount. It has a heat shield and even in the new position it did not get much closer to the radiator, so there was no risk of damage and now it was possible to connect the horn without further modifications.
It is a very tight fit, clear of the bottom of the triple clamps by only a couple of millimetres when in full left lock. I took measurements to ensure that the mudguard would not touch it under compression, and it seems that the only possible situation in which that might happen would be fully bottoming out with the wheel turned right full lock, which is highly unlikely to happen in normal use.
I might have been able to install the second horn on the other side if I made a bracket myself to attach it to one of the radiator mounts, but I still have not installed the crash bars and they use those mounting points, as do the radiator protectors I also want to fit. I will wait and see if it is possible once everything is in place.
With a draw of 2.7 amps I do not think that a relay is necessary, so all in all it a is a pretty straightforward installation and the gain in safety is considerable.
Even the most oblivious mum changing lanes in a monster SUV while sending text messages with one hand and fighting kids in the back seat with another is bound to hear me now.
Well, not exactly… after a weekend away running the bike in, it was more like 1,245km.
When I bought the bike I also got the Honda Plus card, which extends the warranty to four years and gives you the right to the use of a replacement bike while yours is being serviced, which is great for me as I need the bike daily to go to work. I booked the 1,000km service the same day I picked up the AT to make sure that the replacement bike would be available, and on Wednesday she went in for her first visit to the dealer’s workshop.
They took the AT in the moment I arrived and asked how everything was going. I told them about the problem with the 6th gear – occasionally it was difficult to change up into it and then it would jump into neutral – and they assured me they would look into it.
I filled in some paperwork and was given, as I feared, a replacement scooter… Well, at least it was not that bad, it was a brand new SH300 and even though I do not like scooters I have to admit that this one made a pretty convincing city runabout. I will go into my riding impressions more into detail in an upcoming post, for the moment suffice to say that it was more than adequate to take to work outside the city until I could pick up the AT the following day.
In fact, the bike was ready on the same day, but since I did not finish work until 22:00 I could not pick it up until Thursday. The first service came at 143.64€ and included an oil and filter change and greasing and checking the chain. I had been hoping they would also clean the bike, but they did not… I am going to have to remove the mosquitoes from the weekend myself.
The head mechanic told me that he tested the bike himself but having changed the oil he found nothing wrong with the 6th gear. He said that these issues tend to disappear with fresh oil and a bit on running in, and another owner on the local AT forum told me that that after 2,000km the gearbox on his bike had become noticeably smoother. I must say that the problem has not happened a single time since then.
All in all, I was quite satisfied with the quality of the service and the price, which was within the average of what I have read about in the forum. Since I was there, took the opportunity to order the tall screen as well. We will see how wind protection improves with it, and if it is not enough, I will fit a deflector on top of it, which was the definitive solution on the Super Ténéré.

 The following day was a lot quieter than first impressions had led me to expect, and time was mostly spent writing this blog, playing cards and reading between the top deck and a small deserted shaded side deck two levels down with a nice sea breeze. The journey felt a lot shorter than it really was, and despite the initial two-hour delay, we were in Civitavecchia at about 19:30.
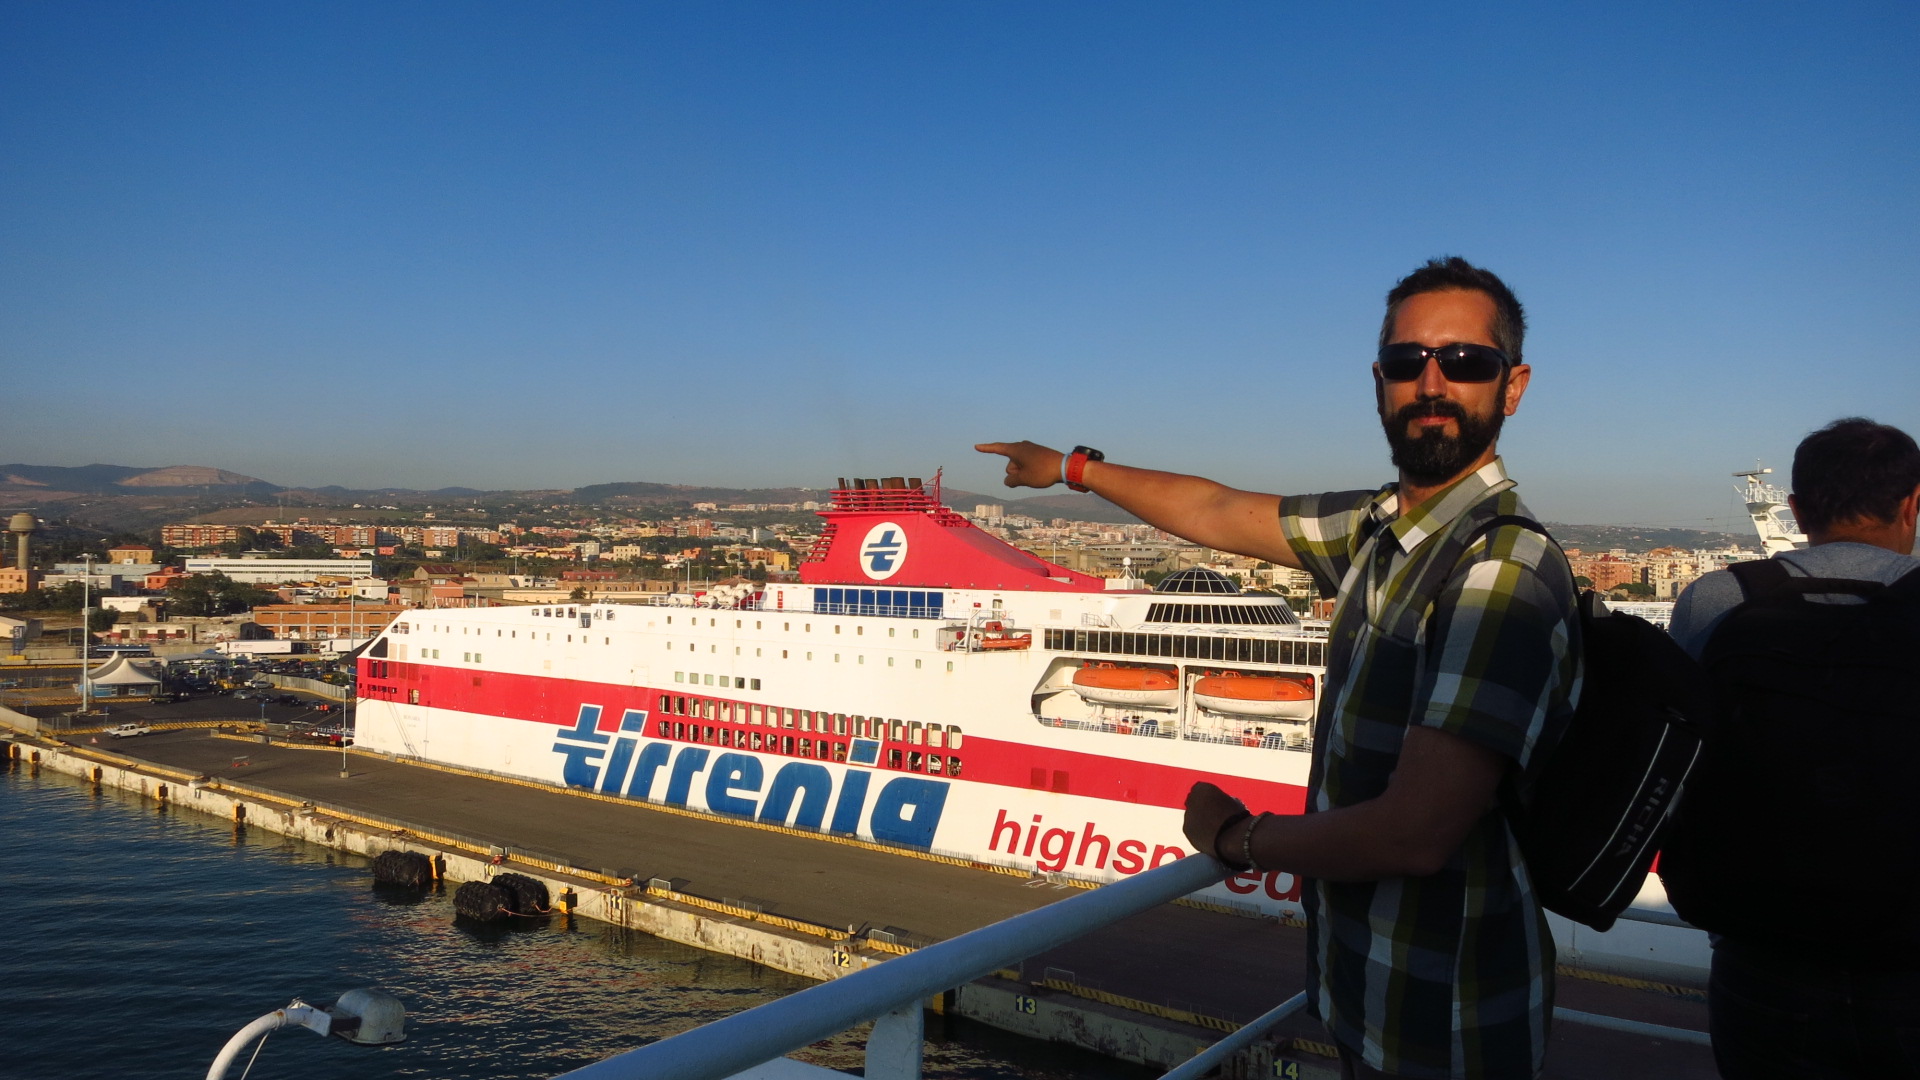 We had a bit over 100km to get to Terni, a town more or less halfway across Italy where we were going to spend the night, and Italy welcomed us with a great country road gently sweeping across fields and low hills with the sun glowing red as it set in the background.