
After a long wait (almost two months), I finally got the Holan crash bars for the AT. I have already fitted handguards, so all that remains now before I can offroad with peace of mind is a pair of knobbly tires.
I picked up the bars from the shipping company and as I was taking the tools out to the front yard I was readying my mind for whatever challenges Holan was going to throw at me this time – missing bolts, nuts or washers? misaligned mountings? – both from personal experience with the panniers and from what I usually read on forums, I was sure something was not going to go as planned. And I wasn’t wrong.
The surprise came as soon as I unpacked the upper crash bars. Holan makes two models, the ‘standard’ one and the ‘Pro’ one. The main difference, other than a slight difference in shape and the position of the bar that crosses under the headlight, is that the ‘Pro’ one has two additional mounting points that fit in the radiator mounts of the motorbike.  Whether you want them or not, if you are buying them through the Spanish distributor, these are the only available option, but surprise motherf***er! Mine did not have the extra mounting points. They sure were shaped like the ‘Pro’ ones, but that bit was missing.
I had chosen Holan because I liked the fact that they covered as much of the fairing as the products from Honda, Touratech and Hepco & Becker for considerably less money, but also because they already included mounting points for the fog lamps. As for how sturdy they are, only time and crashes will tell. None of the alternatives (except for the Motortek ones) have the mounting points to the radiators, and having waited two months, I was not very keen on sending them back and face another two months wait, particularly when my holidays are coming up and I need the bike equipped for the trip, so I decided to keep them and ask for the difference to be reimbursed (the ‘Pro’ ones are 25€ more expensive). Time to fit them and see if there were other ‘surprises’ in store (other than the known fact that Holan does not include instructions).


Instructions
The good news about both the upper and lower Holan crash bars is that they do not require the exhaust manifold to be removed, as they do not attach to the upper bolt in the engine mount, making things a lot easier.

I decided to start with the engine crash bars, as they only have two mounting points each and the process is very straightforward. At the back both use the mounting point for the piece of plastic that keeps your boots from scratching against the frame. Remove the Allen bolt and pull the plastic out on both sides of the bike.
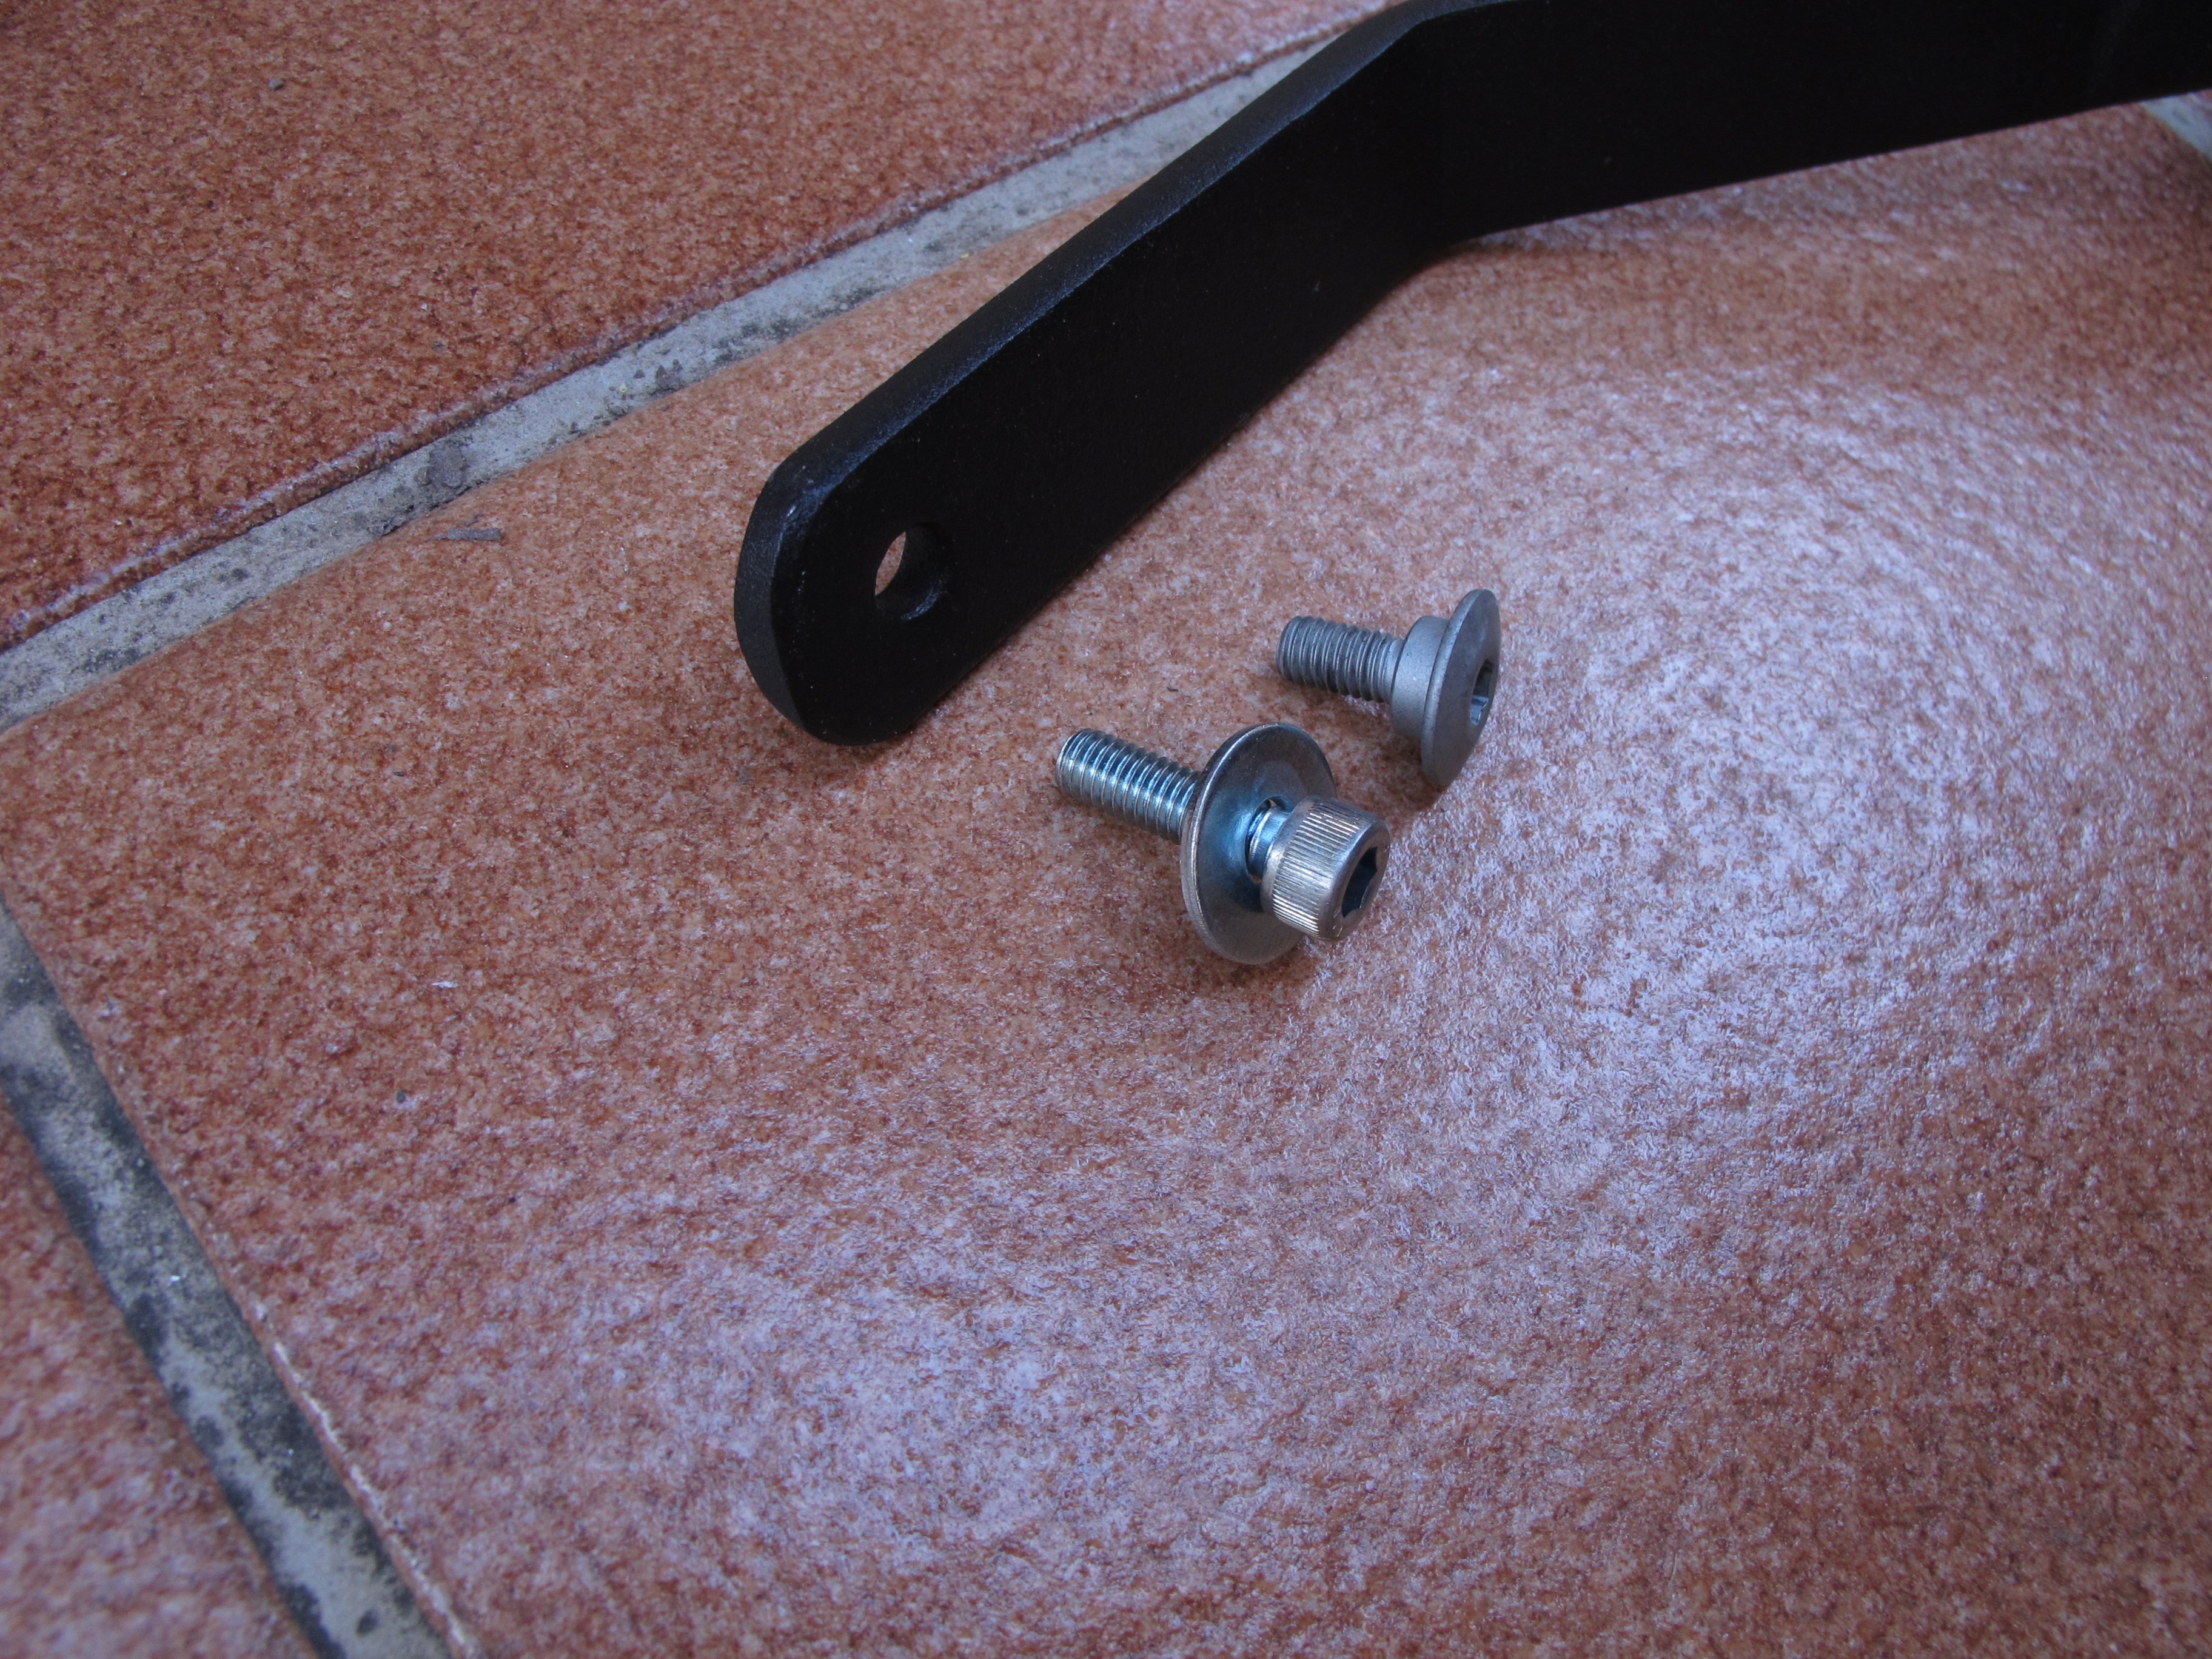
 Holan provides two longer Allen bolts with a washer to replace the OEM ones. (I like the fact that they seem to be of considerably better quality). Nothing missing so far.
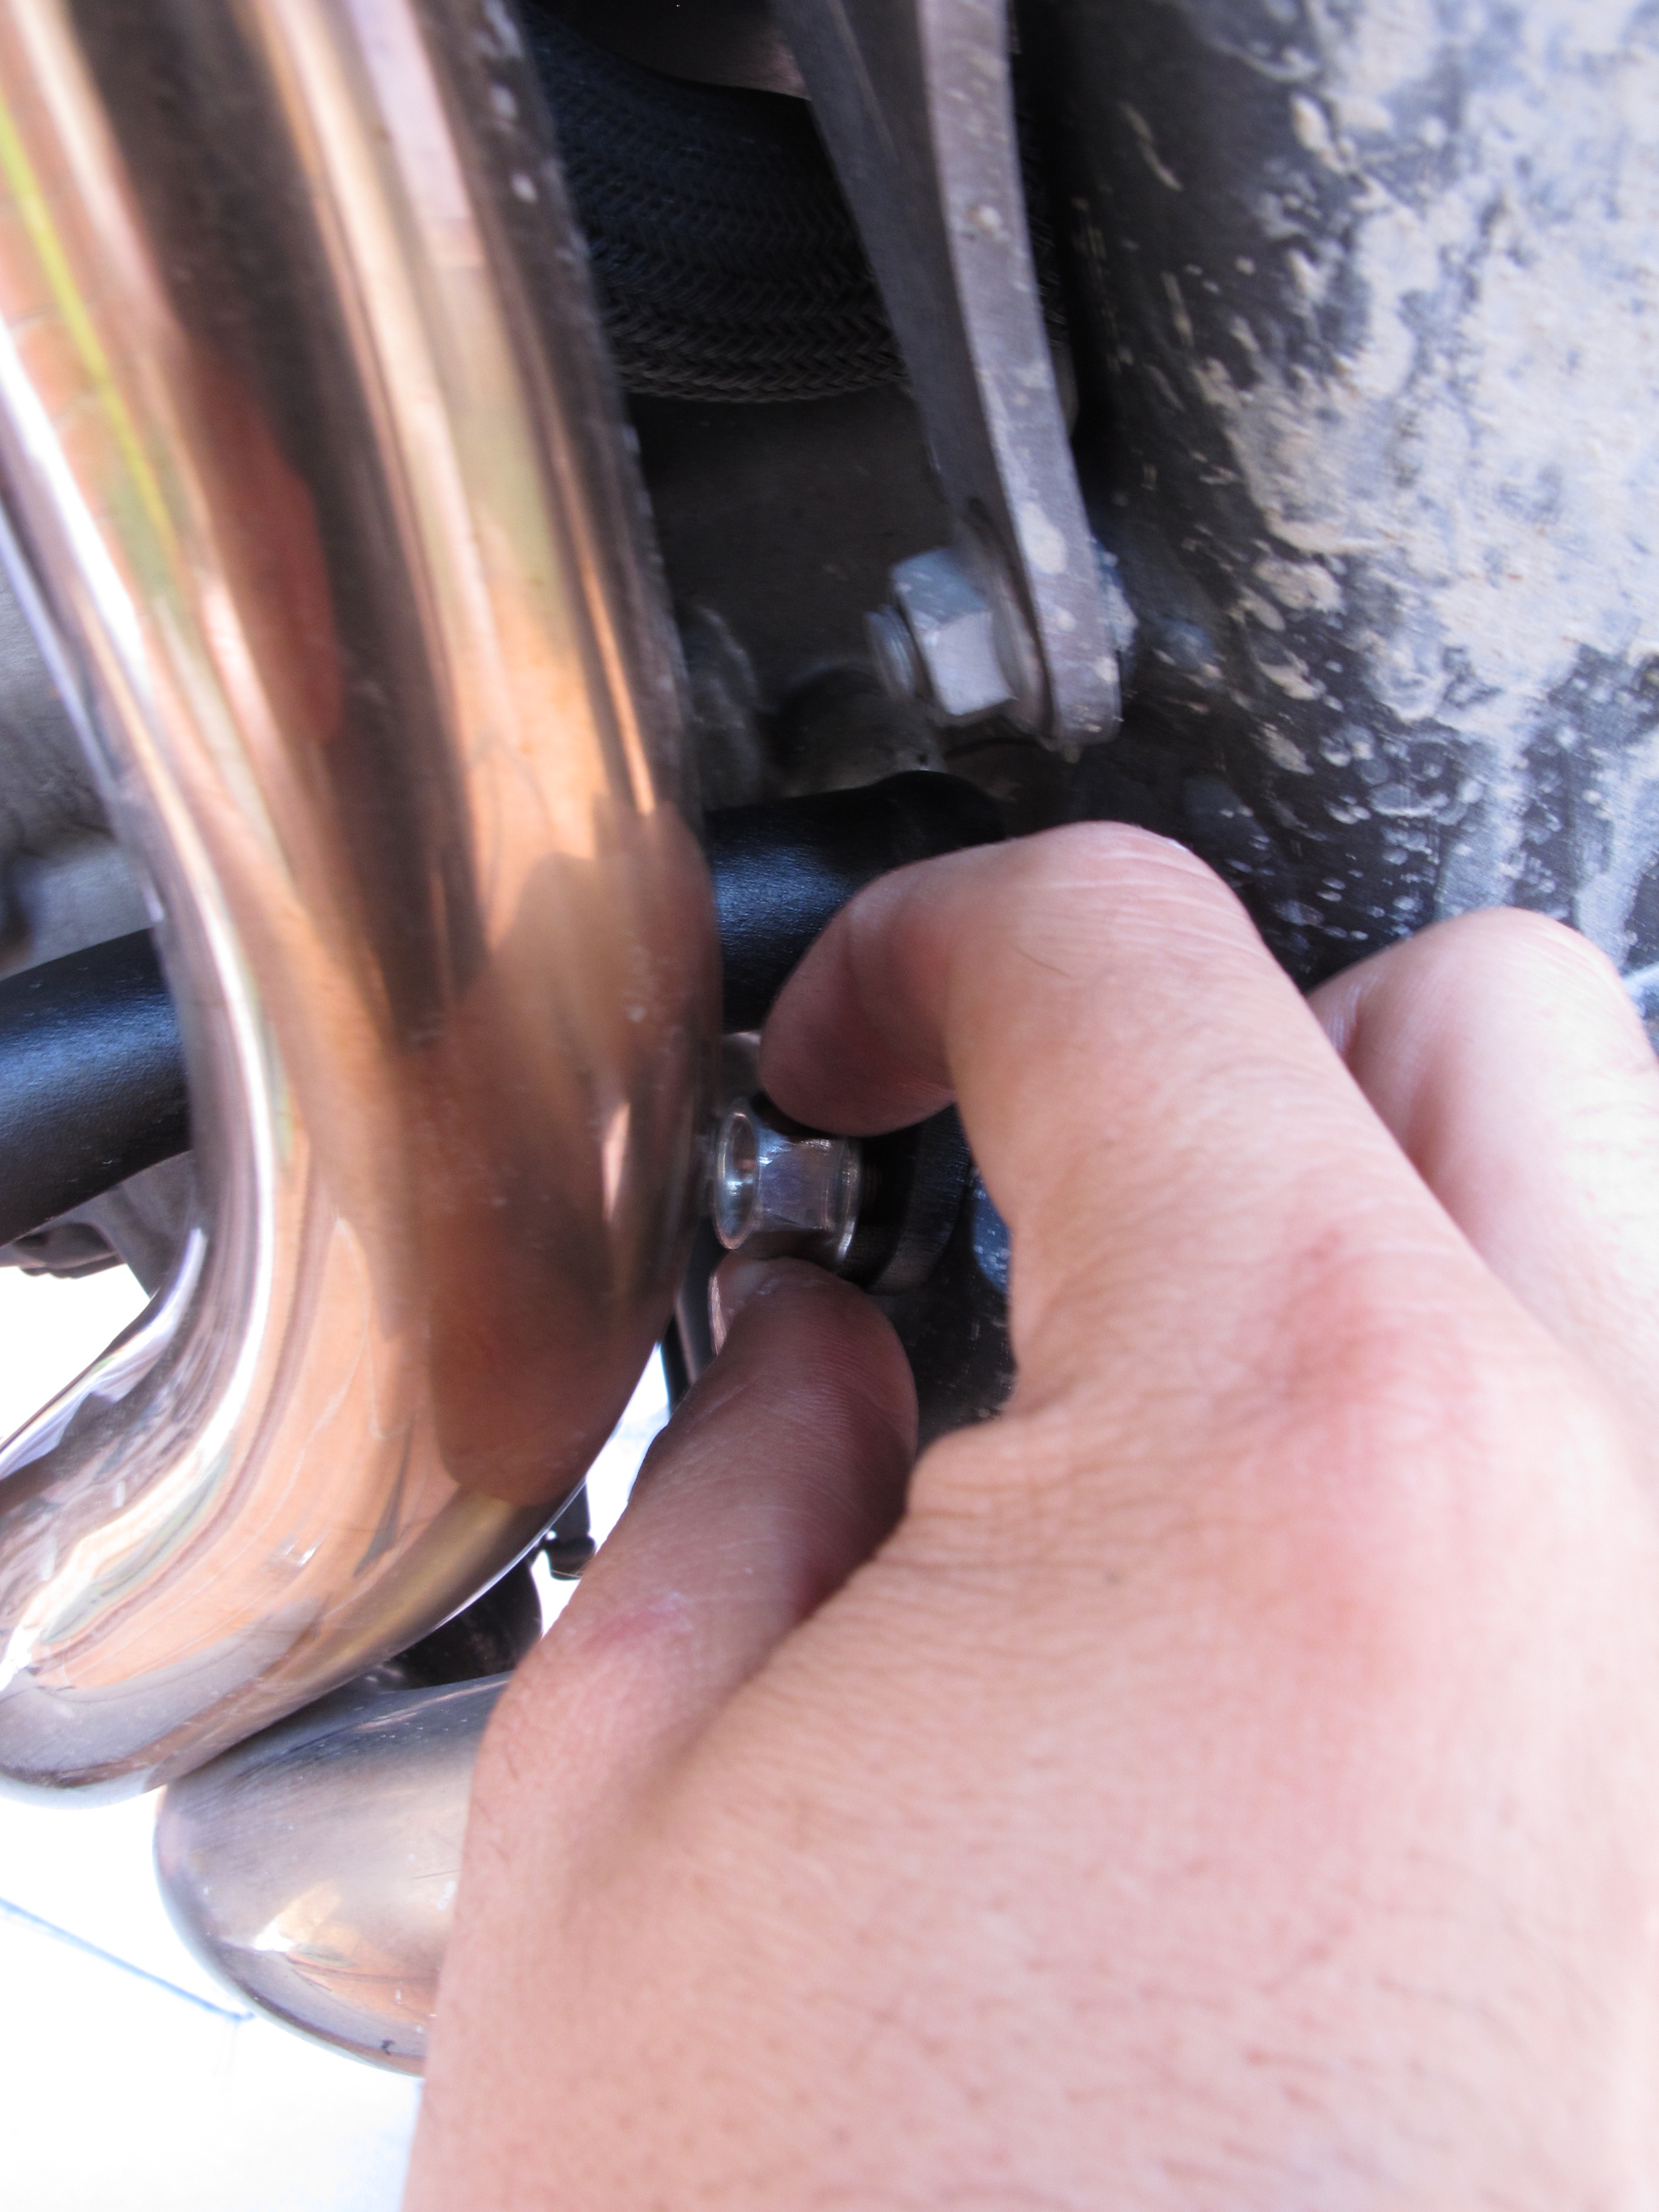
At the front, the right one uses one of the bolts that connect the cradle frame coming from the bottom of the engine to the vertical beam between the radiators.
 The OEM bolt is long enough, so no replacement bolt is provided. It is a bit tricky to remove with your fingers and to put back in place with the crash bar, but both to loosen it first and then to tighten it again there is enough space to work with a spanner without any problems.
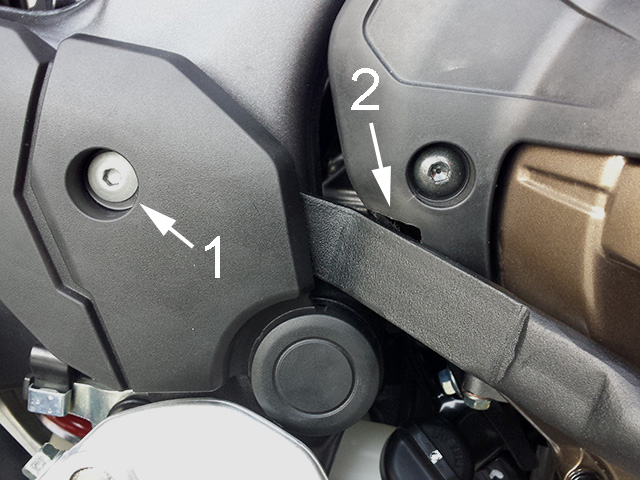
There have been reports of problems with the plate at the back end of the right engine crash bar touching and bending a bit the plastic that protects the clutch housing. Some people have just left it that way, others have filed off a bit of plastic (number 2 on this picture, which is from a DCT model). I had no such problems.


The left crash bar mounts on the lower bolt of the front engine mount, and this is shared with the upper left crash bar, so you need to fit both at the same time.

At this point, the easiest way to proceed is to line up both upper crash bars, insert all bolts, nuts, spacers, and washers without tightening them and then tighten them one by one. It is much, much easier if you have a friend to help you hold the bars while putting everything in place.
Here was where I had the second and only other problem. The upper and lower crash bars are sold as separate products; you can buy and fit one or the other independently or both at the same time. The thing is, Holan does not make any special provisions for those who are going to fit both, which means that when it comes to the lower bolt on the front engine mount, they provide a longer bolt with the lower crash bars to accommodate the flange at the front of the bar, and another bolt of the exact same length with the upper crash bars to accommodate the flange at the bottom of those bars. See where this is going? When you put both flanges together in the same point, neither of the bolts provided separately is long enough.

I had to leave things half mounted and go try to find the right bolt. More than an hour and three specialised shops later, I got one.
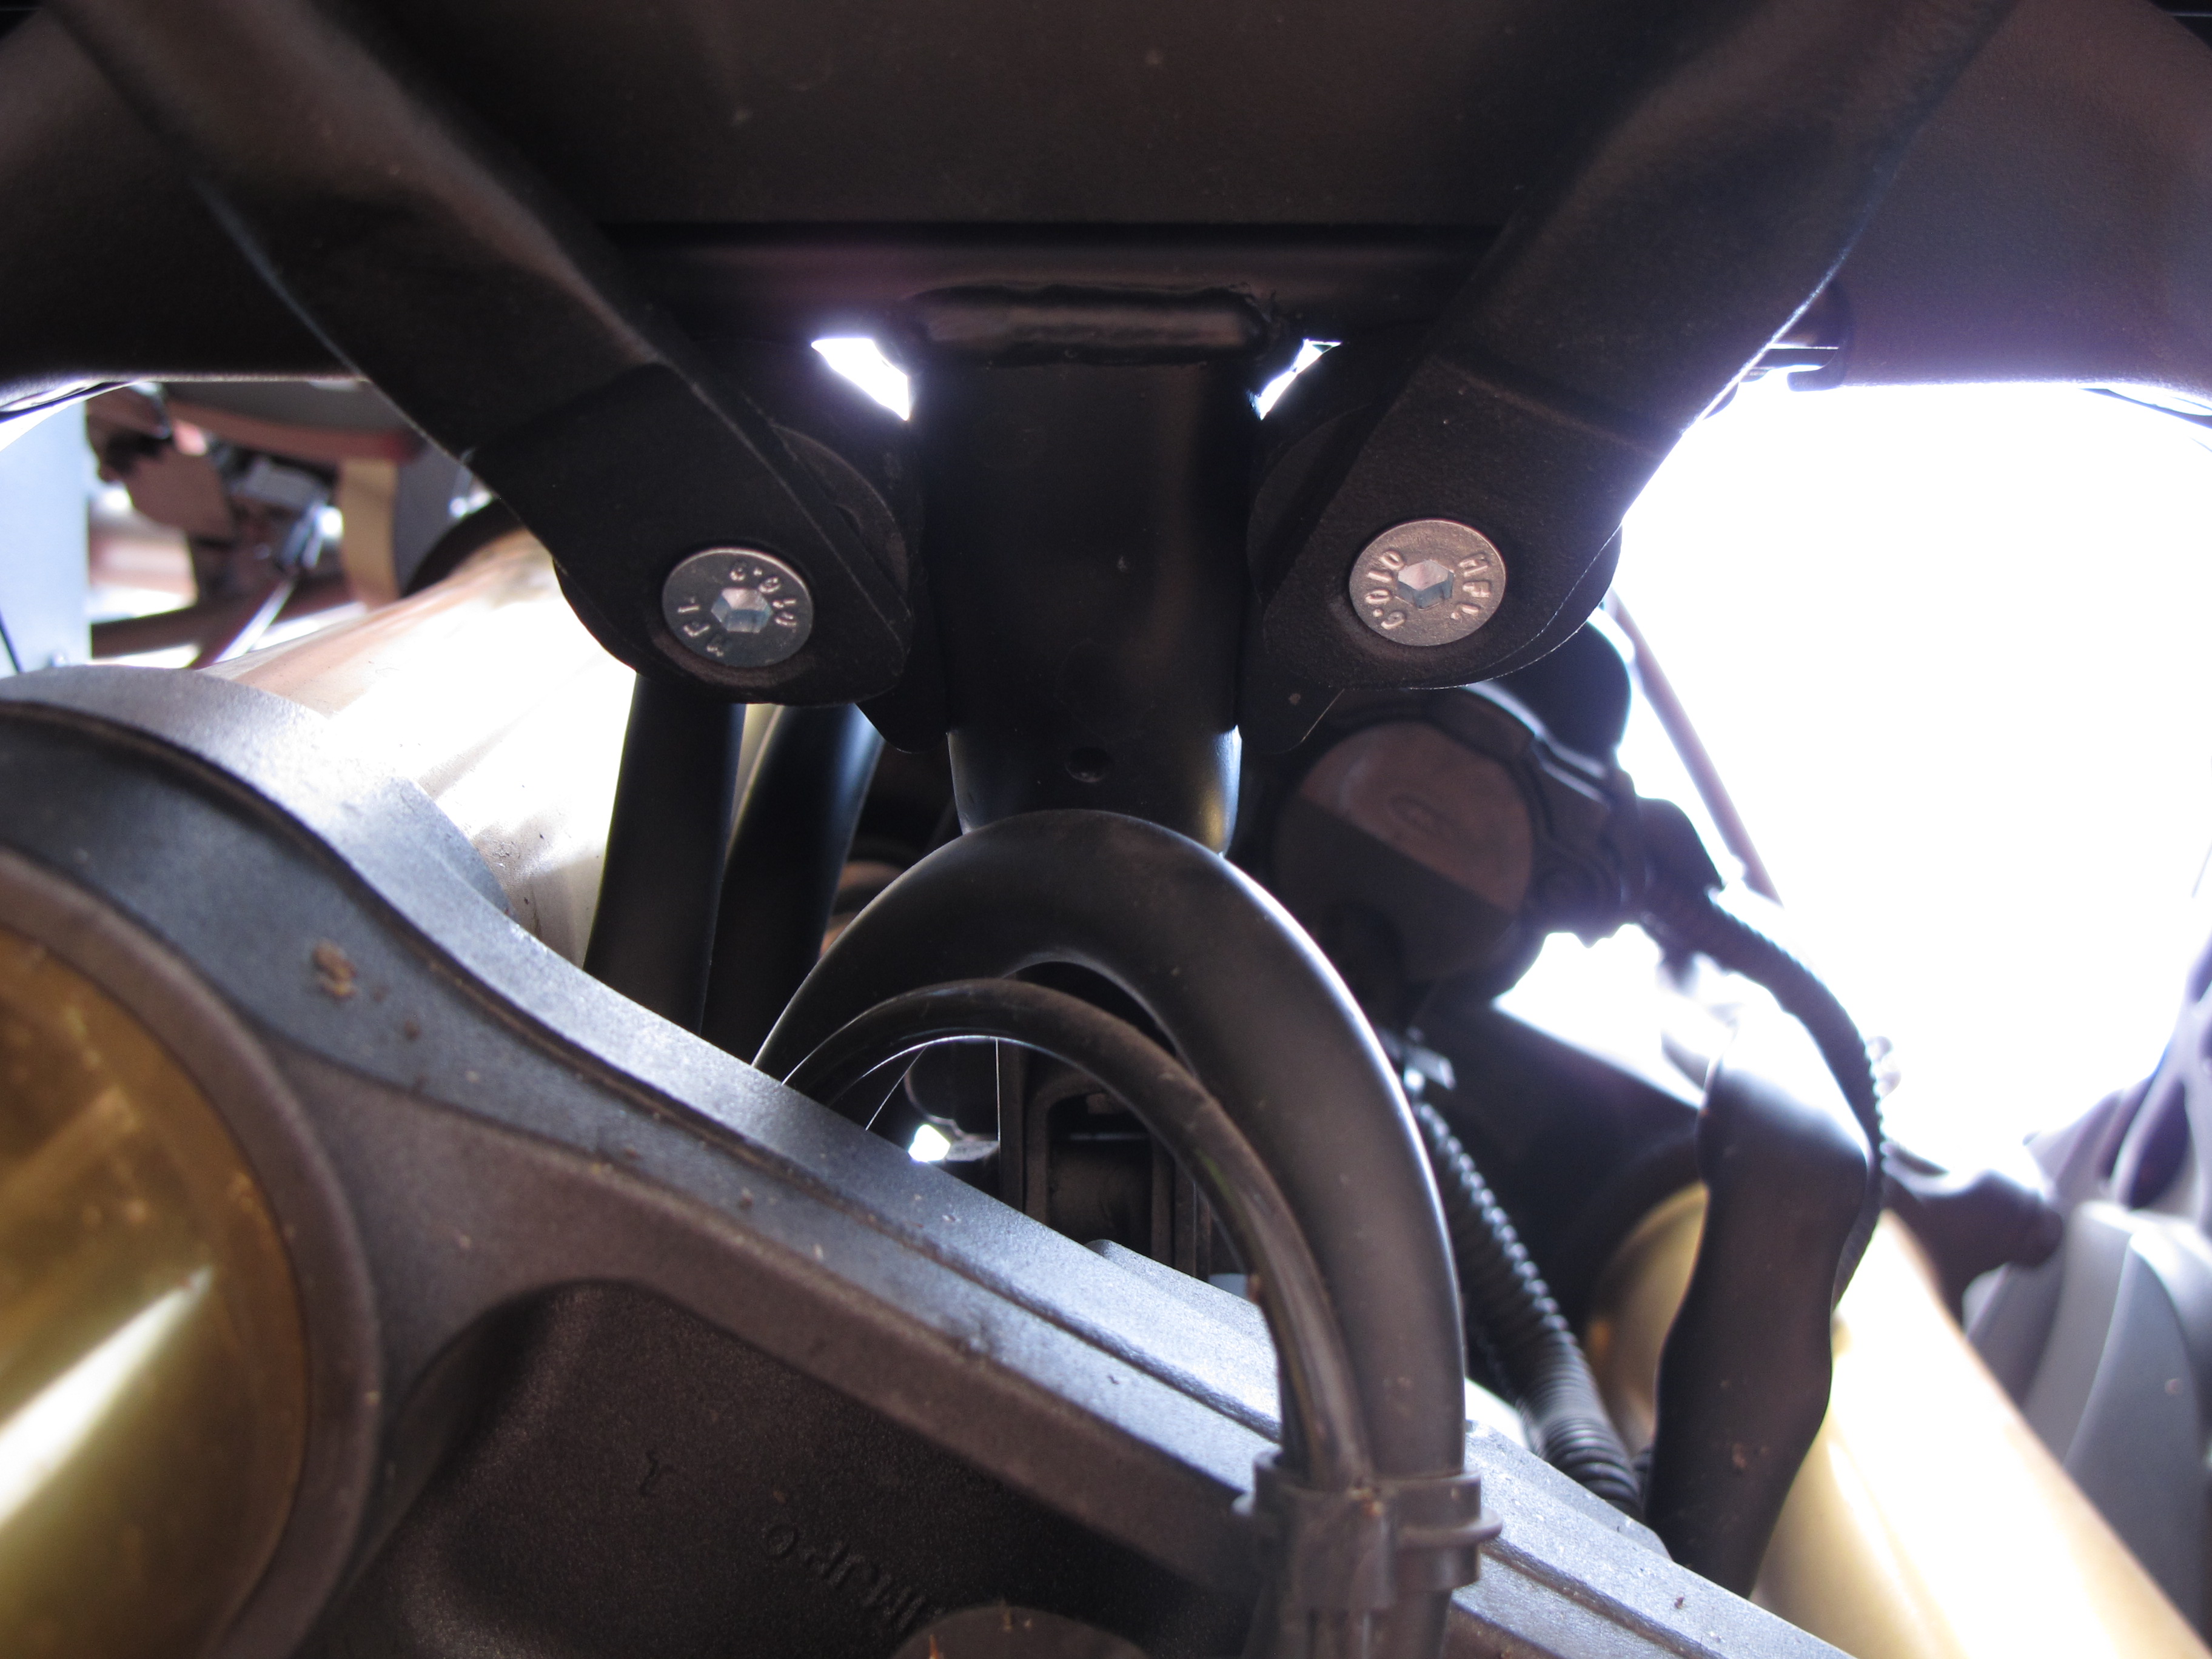
At the top, the two halves of the upper crash bars are held together with two Allen bolts which are colour silver and stand out quite a lot against the black bar. It might be a good idea to either paint them or replace them with black ones.

The other mounting point for the upper crash bars (unless they are the ‘Pro’ ones) is under the headlight. Two plastic spacers and two bolts and nuts are provided. In my case, everything lined up without any problems and did not have to modify or bend anything.
Now we only have to wait and see how they fare when I start dropping the bike.


Should the engine mount bolt have a particular torque setting?
And the right-lower-front bolt which you said is “long enough” only seems *just about* long enough. Wouldn’t you recommend getting a 5mm longer bolt?
Should the engine mount bolt have a particular torque setting?
And the right-lower-front bolt which you said is “long enough” only seems *just about* long enough. Wouldn’t you recommend getting a 5mm longer bolt?
Hi, the Holan crashbars include no instructions, so there is no torque setting specified. I imagine you can refer to the workshop manual if have access to one (Rugged Roads in the UK sell them) or ask your dealer. As for the right-lower-front bolt, it was long enough, but since there is enough space, a longer one would do no harm, for sure.
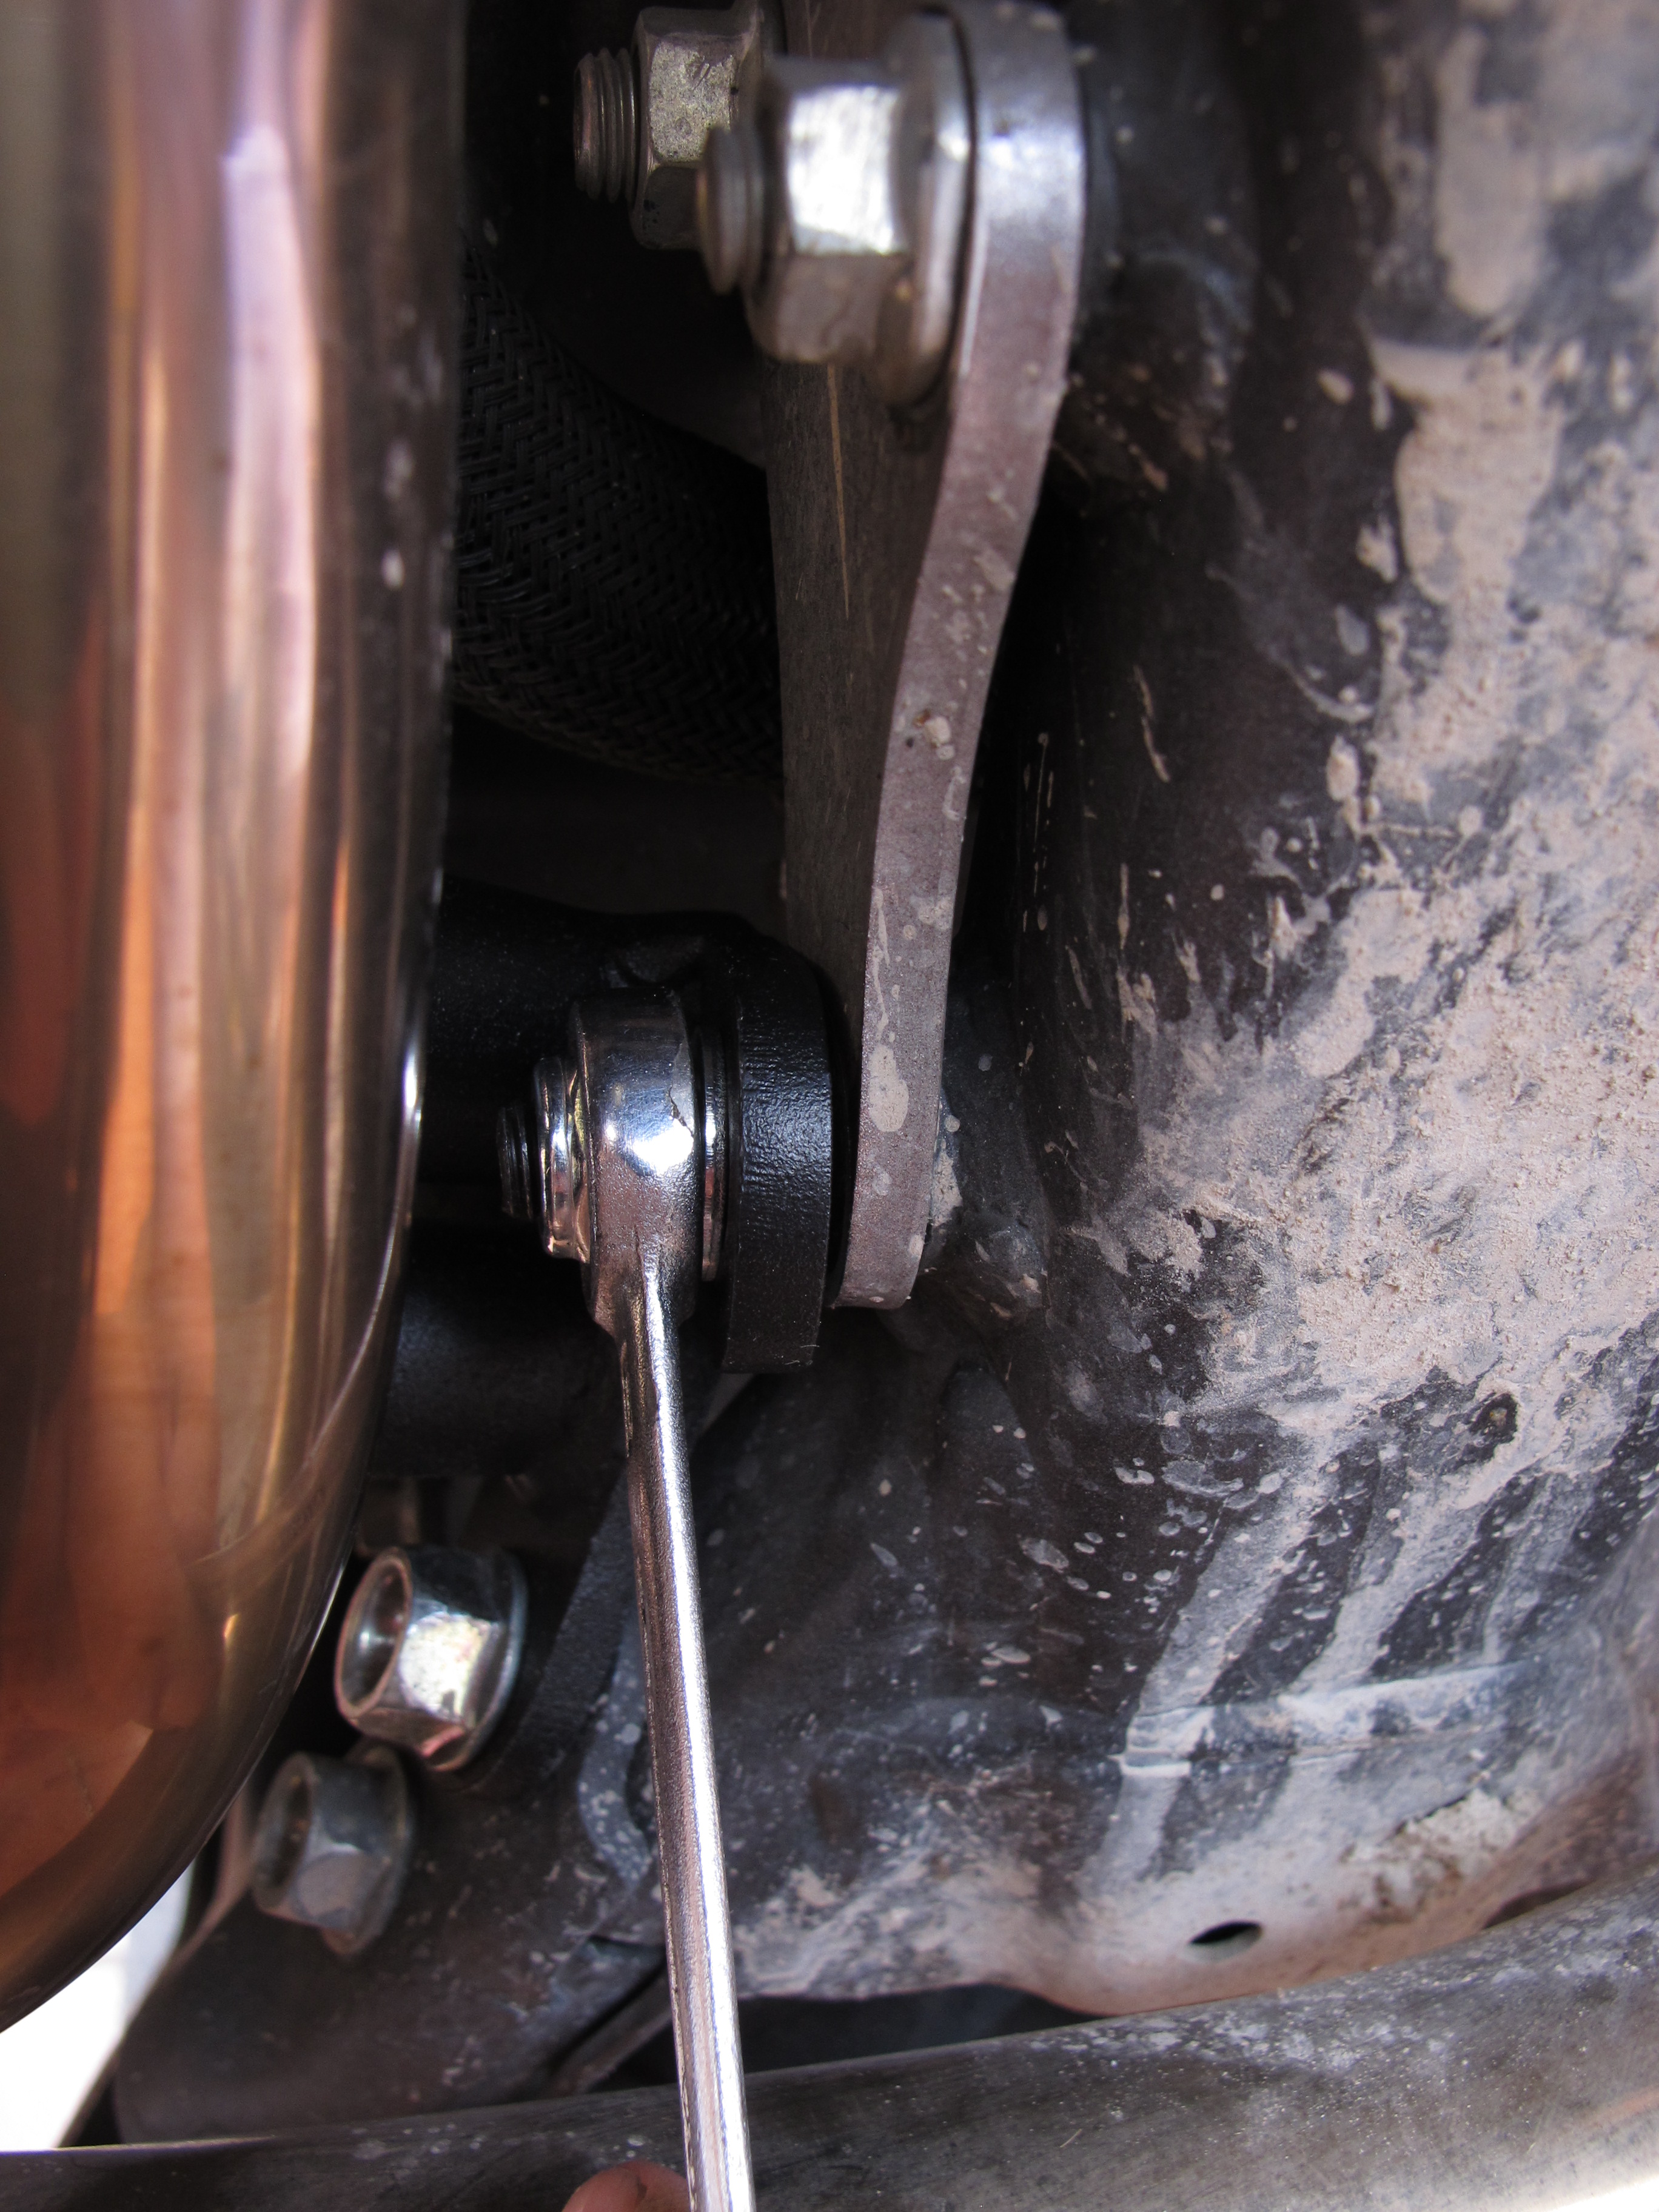
Could you please post a picture of the right lower crashbar as you said that it doesn’t touch the black plastic ? 🙂
Sure! I added a couple of pictures from the bar on my bike.